OsstellConnect

Verbessern Sie Ihre Implantatbehandlungen

OsstellConnect ist eine kostenlose Cloud-basierte Lösung, die Klinikern eine neue Möglichkeit bietet, Daten zur Verbesserung ihrer Zahnimplantatbehandlungen zu nutzen. Es ist das weltweit größte Online-Portal für Implantologie mit mehr als einer Viertelmillion Datenpunkten. OsstellConnect ist kostenlos und für alle Benutzer von Osstell ISQ-Geräten zugänglich.

Beacon & OsstellConnect

Klinische Ergebnisse

Ein Werkzeug, das Sie bei der Planung und Entscheidungsfindung in Bezug auf Patientencharakteristika und Implantatbehandlungen unterstützt und die Einheilzeiten für verschiedene klinische Situationen und Implantate optimiert. Verfolgen Sie die Entwicklung des Osstell ISQ im Laufe der Zeit. Einfacher Zugang zu Ihren Patientenakten und Behandlungen.

Patientvertrauen

Ein guter Weg, Sicherheit zu geben und Vertrauen weiter zu stärken: der OstellConnect Behandlungsbericht, der Patienten über den Verlauf und Erfolg der Implantation informiert.

Kommunikation durch Referenzen

Eine Möglichkeit, überweisende Kliniker über die Implantate und die Osseointegration eines Patienten zu informieren und einen Prüfpfad für die weitere Behandlung zu schaffen.

Community

Schließen Sie sich der OsstellConnect-Community an, in der Tausende von Klinikern aus der ganzen Welt vertreten sind. Eine Gemeinschaft, die auf neutrale, aussagekräftige Daten und klinische Evidenz vertraut, um Best Practice-Ansätze zu gewährleisten.

Valide Einblicke

Verfolgen Sie Ihre Behandlungs-Statistiken, um Behandlungsmethoden und -erfolge zu analysieren und zu verbessern. Erhalten Sie Zugang zu neuen klinischen Erkenntnissen, um für Ihre Patienten die bestmögliche Behandlung planen zu können.

Kostenlos registrieren

Entscheidungshilfe zur Behandlungsplanung

Erfahren Sie, wie sich Belastungsprotokolle, die von Ihnen verwendeten Implantatmarken und die Risikomerkmale Ihrer Patienten auf die individuelle Einheilzeit Ihrer Patienten auswirken.

Kostenlos registrieren

Einfach kommunizieren mit dem ConsultationTool

Mit dem ConsultationTool in OsstellConnect können Sie die verschiedenen Schritte eines Verfahrens von der Operation bis zur endgültigen Implantatversorgung mit Schätzungen der Zeit zwischen den einzelnen Schritten auf wissenschaftlich fundierte, leicht verständliche Weise beschreiben. Damit tragen Sie dazu bei, die Angst zu lindern, die Patienten häufig haben, wenn sie meinen, einer Lage nicht gewachsen zu sein.

Kostenlos registrieren

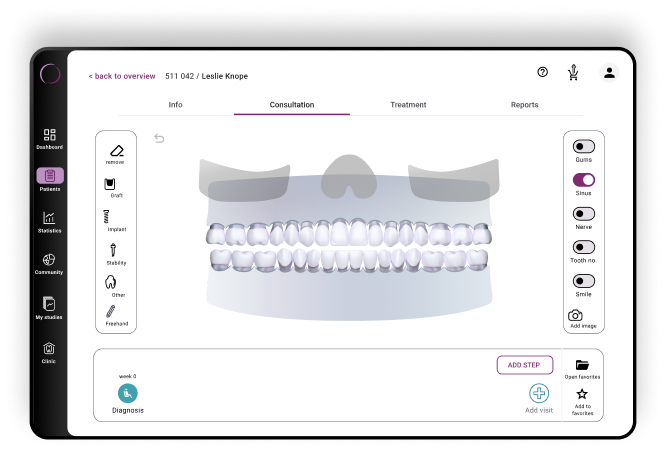
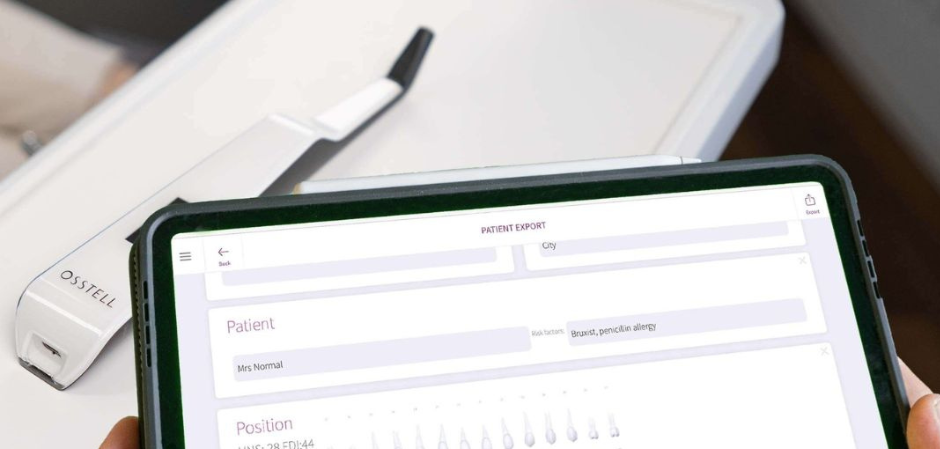
Unkompliziert, schnell, präzise – die Allround-App

Entdecken Sie die aktualisierte OsstellConnect-App: jetzt optimiert für Mobilgeräte und Tablets. Scannen Sie das Implantatfach mit verbesserter Scan-Technologie und gewinnen Sie sofortige, detaillierte Erkenntnisse. Profitieren Sie vom optimierten Konsultationsprozess, dem Zugriff auf klinische Daten und der mühelosen Erfassung von ISQ-Messwerten mit dem Beacon – kein Osstell-Dongle erforderlich. Unsere App unterstützt jetzt noch mehr Implantatmarken, spart Zeit und ermöglicht eine höhere Präzision ohne manuelle Eingaben.

Hier herunterladen
OsstellConnect App
OsstellConnect Statistics

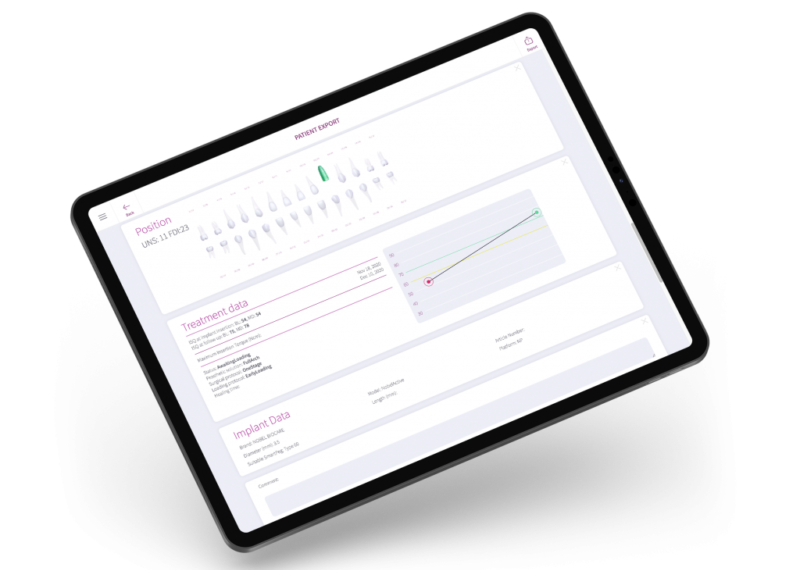
Frequently asked questions

Got a question regarding OsstellConnect? Our FAQ is the fastest way to get help. Below you will find the most frequently asked questions regarding OsstellConnect. If you can’t find the answer you are looking for, don’t hesitate to contact us.

How can I find my registration code?

Osstell Beacon
• To find your registration code, please make sure that you have already installed the Beacon Gateway. If you have not installed it yet, please navigate to your clinic in your account, click the instruments tab and download the gateway. Install it.
• Make sure that you have inserted the Osstell Key to your computer.
• Take your instrument in hand. It is now connecting to OsstellConnect and you should see a symbol animating. Please note that it can take a few seconds.
• When connected, the symbol stops animating.
• The registration code is now displayed on the lower screen of your instrument.

Osstell IDx
• When turning on your Osstell IDx for the first time, you will be prompted to select language, time zone, date and time.
• After that, you will need to set up a 4-digit pin code and a backup password. The backup password is needed when restoring to a backup, so please note it down and save it in a safe place.
• Your registration code is now displayed on your Osstell IDx.

How can I find my SN?

You can find the serial number on the back of your instrument.

How can I update the software of my Osstell IDx?

Navigate to your clinic in your account. Select the instrument tab. Click on Download firmware.
Download instructions:

• Wait for the download to complete (could take a while depending on your connection)

• Copy the .m2f binary file to a USB memory stick

• Insert the memory stick in your IDx while it is running

• Follow instructions on the IDx display

Note: you cannot open or view the .m2f file
You can also check this guide

How can I upload data from my Osstell IDx to OsstellConnect?

The data in your Osstell IDx is automatically uploaded to your OsstellConnect account, if it is connected to the internet. To connect your device to the internet, please follow the instructions here.

Please note that you can also create backups, for example on a USB stick. Please follow the instructions here.

How do I document an implant failure?

• To document an implant failure, go to your patients records. Select the patient, then select the tooth. Click ‘Mark as failed’. Choose the type of failure (early or late failure), fill in the failure date. Choose the reason for failure. Click ‘Mark as failed’.

• You can access the history of the implant failure by navigating to the history tab. Click the tab ‘Failed’ to see all information related to the treatment and the failure.

• A history symbol is displayed on the tooth with a failed implant.

How do I measure and record ISQ on an abutment?

You can measure and record ISQ on an abutment.

• First, navigate to your patients records, select the patient and the implant on the tooth chart. Click ‘Add abutment’, choose the abutment and save.

• Second, click ‘Measure stability’. Select ‘Abutment’ under ‘Measurement level’. Measure on the abutment, as you would on implant level. Save.

• To visualize stability, go to the stability tab and toggle on ‘Show abutment’ to see the details. You can also toggle on ‘Show details’ to see ISQ for both buccal lingual and mesial distal.

Can I delete a measurement?

Yes, simply navigate to your patient records. Select the patient. Select the implant. Go to the stability tab. Click on the edit icon by the measurement you would like to delete. Click delete. Please note that the measurement will be permanently removed from the patient chart.

Can I delete a patient?

Yes, simply navigate to your patient records. Select the patient you would like to delete. Click delete in the upper right corner. Confirm that you want to delete the patient and all data. Please note that it will be permanently removed from your account.

Can I export all my data?

Yes, you can export all your data to an Excel file for further analysis. Simply go to your patients records and click CSV export. The file will appear in your downloads.

Can I manually edit implant data?

Yes, simply navigate to your patient records. Select the patient. Select the implant you want to edit on the tooth chart. Select the tab ‘Implant & abutment’. Click on the pen icon to edit. Edit implant data. Save.

How can I connect my Osstell Beacon to OsstellConnect and directly record data?

Before starting, make sure that you have already installed the Beacon Gateway. If you have not installed it yet, please navigate to your clinic in your account, click the instruments tab and download the gateway. Install it.

• Plug in the Osstell Key to a USB port on your computer.

• Take your instrument in hand. It is now connecting to OsstellConnect and you should see the following symbol animating. Please note that it can take a few seconds.

• When connected, the symbol stops animating.

• Go to your patient records.

—— If it is the first measurement, create a patient. Fill in patient data and save. Click New Treatment and fill in treatment information. Click Add implant, fill in implant data and save. Click measure stability.
—— If it is a follow up measurement, select the patient and then the tooth on the teeth chart. Click measure stability.

• Measure in buccal lingual direction. The ISQ value is now showing in OsstellConnect.

• Measure in mesial distal direction. The ISQ value is now showing in OsstellConnect.

• Fill in the information about the treatment and save.

How can I edit patient data?

Simply navigate to your patient records. Select the patient. Click ‘edit’ on the top right corner. Edit the data and save.

Das könnte Sie auch interessieren
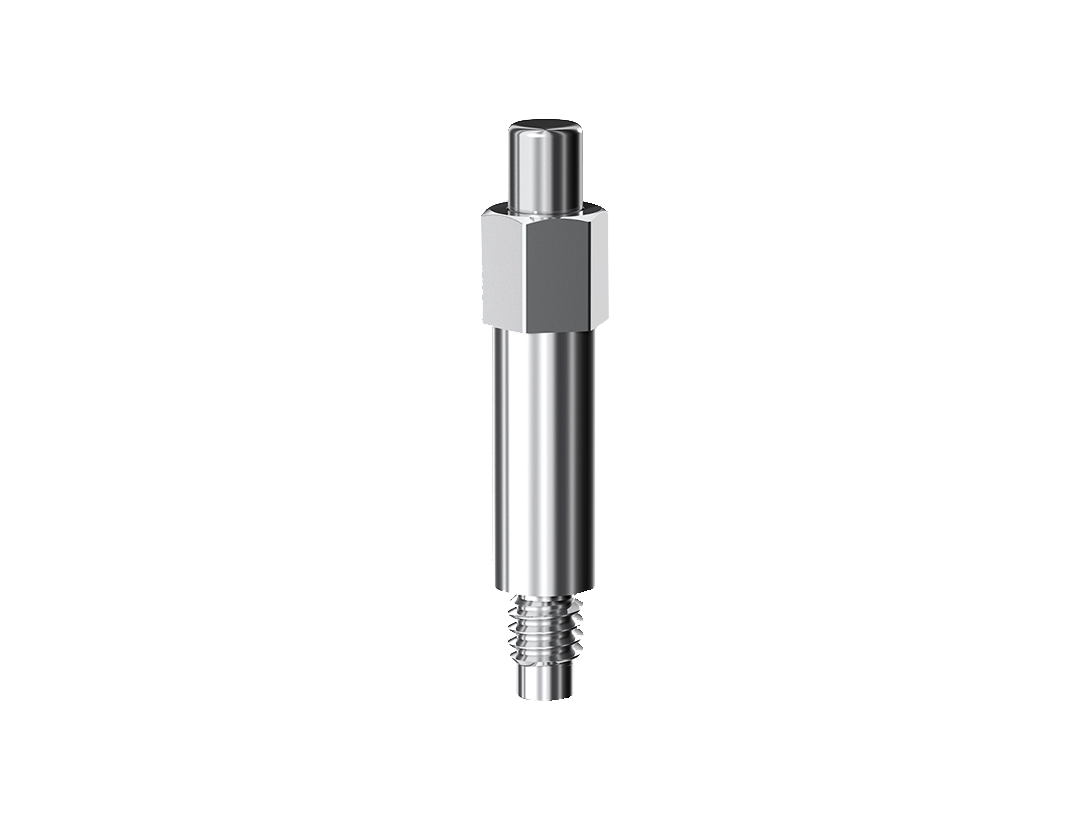
SmartPeg

Der SmartPeg™ wird am Implantat befestigt und zusammen mit den Messgeräten Osstell IDx, Osstell Beacon oder Osstell ISQ verwendet.