기기 등록 방법
환자 생성 방법
측정치 추가 방법
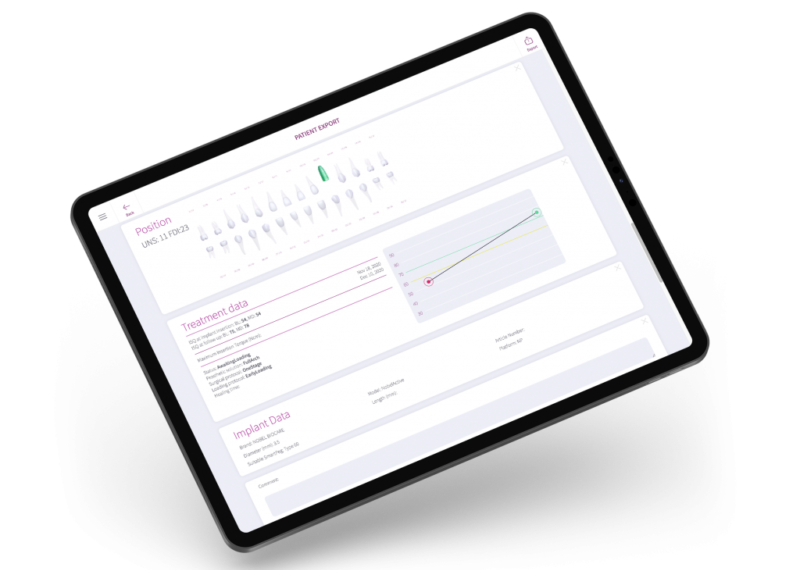
PDF로 내보내는 방법
안정성 발달 시각화 방법
통계 검토 방법
Frequently asked questions
Osstell Beacon
• To find your registration code, please make sure that you have already installed the Beacon Gateway. If you have not installed it yet, please navigate to your clinic in your account, click the instruments tab and download the gateway. Install it.
• Take your instrument in hand. It is now connecting to OsstellConnect and you should see a symbol animating. Please note that it can take a few seconds.
• When connected, the symbol stops animating.
• The registration code is now displayed on the lower screen of your instrument.
Osstell IDx
• When turning on your Osstell IDx for the first time, you will be prompted to select language, time zone, date and time.
• After that, you will need to set up a 4-digit pin code and a backup password. The backup password is needed when restoring to a backup, so please note it down and save it in a safe place.
• Your registration code is now displayed on your Osstell IDx.
You can find the serial number on the back of your instrument.
Navigate to your clinic in your account. Select the instrument tab. Click on Download firmware.
Download instructions:
• Wait for the download to complete (could take a while depending on your connection)
• Copy the .m2f binary file to a USB memory stick
• Insert the memory stick in your IDx while it is running
• Follow instructions on the IDx display
Note: you cannot open or view the .m2f file
You can also check this guide
인터넷에 연결된 경우 Osstell IDx의 데이터는 OsstellConnect 계정에 자동으로 업로드됩니다. 기기를 인터넷에 연결하려면 다음 지침을 따르십시오.
예를 들어 USB 스틱에 백업을 만들 수도 있습니다. 다음 지침을 따르십시오.
https://osstell.com/app/uploads/How-to-connect-to-the-Internet-6.0.pdf
• To document an implant failure, go to your patients records. Select the patient, then select the tooth. Click ‘Mark as failed’. Choose the type of failure (early or late failure), fill in the failure date. Choose the reason for failure. Click ‘Mark as failed’.
• You can access the history of the implant failure by navigating to the history tab. Click the tab ‘Failed’ to see all information related to the treatment and the failure.
• A history symbol is displayed on the tooth with a failed implant.
OsstellConnect에서 지대치 수준의 ISQ를 기록할 수 있지만, 정확한 값을 얻으려면 올바른 임상 측정 절차를 따르는 것이 중요합니다.
지대치 수준에서 ISQ를 측정하는 방법
- 지대치 장착 전 먼저 임플란트 수준에서 측정합니다.
- 동일한 세션에서 지대치 수준 측정용 SmartPeg를 사용하여 지대치 수준에서 다시 측정합니다.
- 임플란트 수준과 지대치 수준의 ISQ 값 차이를 확인하여 오프셋을 산정합니다. 이 오프셋은 치유 기간 내내 일정하게 유지되며 추후 측정값을 해석할 때 사용해야 합니다.
- 모든 후속 방문 시, 지대치에서 측정한 후 동일한 오프셋을 적용하여 실제 임플란트 ISQ 값을 파악합니다.
OsstellConnect에서 측정값을 기록하는 방법:
- 환자 등록으로 이동하고, 치아 차트에서 환자와 임플란트를 선택합니다. ‘지대치 추가’를 클릭하고 지대치를 선택하고 저장합니다.
- ‘안정성 측정’을 선택한 후 측정 수준에서 ‘지대치’를 선택합니다. 임플란트 수준에서와 같은 방법으로 지대치에서 측정하고 저장합니다.
- 안정성 추세를 검토하려면 안정성 탭을 열고 ‘지대치 표시’로 전환합니다. 또한 ‘세부 정보 표시’를 활성화해 협측-설측 및 근심-원심 ISQ 값을 볼 수도 있습니다.
보다 자세한 설명과 임상 지침은 여기에서 블로그 게시물을 참고하시기 바랍니다.
Simply navigate to your patient records. Select the patient. Click ‘edit’ on the top right corner. Edit the data and save.
시작하기 전에 Beacon Gateway를 이미 설치했는지 확인하십시오. 아직 설치하지 않았다면 계정에서 클리닉을 탐색하고 기기 탭을 클릭하고 게이트웨이를 다운로드합니다. 게이트웨이를 설치합니다.
- Osstell Key를 컴퓨터의 USB 포트에 꽂습니다.
- 기구를 손에 듭니다. 이제 기기가 OsstellConnect에 연결 중이며 다음 기호가 애니메이션으로 나타날 것입니다. 몇 초 정도 걸릴 수 있습니다.
- 연결되면 기호의 애니메이션 동작이 멈춥니다.
- 환자 기록으로 이동합니다.
- 처음 측정하는 경우에는 환자를 생성합니다. 환자 데이터를 입력하고 저장합니다. 새 치료를 클릭하고 치료 정보를 입력합니다. 임플란트 추가를 클릭하고 임플란트 데이터를 입력하고 저장합니다. 안정성 측정을 클릭합니다.
- 후속 측정인 경우에는 환자를 선택한 다음 치아 차트에서 치아를 선택합니다. 안정성 측정을 클릭합니다.
- 협측-설측 방향으로 측정합니다. ISQ 값이 이제 OsstellConnect에 표시됩니다.
- 근심-원심 방향으로 측정합니다. ISQ 값이 이제 OsstellConnect에 표시됩니다.
- 치료에 대한 정보를 입력하고 저장합니다.
Yes, simply navigate to your patient records. Select the patient. Select the implant you want to edit on the tooth chart. Select the tab ‘Implant & abutment’. Click on the pen icon to edit. Edit implant data. Save.
예, 추가 분석을 위해 모든 데이터를 Excel 파일로 내보낼 수 있습니다. 환자 기록으로 이동하여 CSV 내보내기를 클릭하기만 하면 됩니다. 다운로드에 파일이 나타납니다.
내보낸 모든 데이터는 GDPR 또는 HIPAA 등 관련 데이터 보호 규정을 준수하여 처리하십시오.
Yes, simply navigate to your patient records. Select the patient you would like to delete. Click delete in the upper right corner. Confirm that you want to delete the patient and all data. Please note that it will be permanently removed from your account.
Yes, simply navigate to your patient records. Select the patient. Select the implant. Go to the stability tab. Click on the edit icon by the measurement you would like to delete. Click delete. Please note that the measurement will be permanently removed from the patient chart.
도움이 필요하신가요?
양식을 작성해 주시면 곧 연락드리겠습니다. 곧 연락드리겠습니다!