Osstell Beacon
¿Osteointegración? Simple.
El Osstell Beacon le ayuda a determinar de manera objetiva la estabilidad del implante y a evaluar el progreso de la osteointegración, sin poner en peligro el proceso de curación. Osstell Beacon utiliza una tecnología RFA (análisis de frecuencia de resonancia) propia y respaldada por miles de estudios científicos. También incluye OsstellConnect, una plataforma basada en la nube que proporciona acceso a amplios datos de implantes y ayuda a mejorar la comunicación con los pacientes.
Resultados predecibles
Con nuestro método ya no tendrá que hacer suposiciones. Al medir la estabilidad del implante con un valor objetivo, Osstell hace que los tratamientos con implantes sean más predecibles y fiables para todos los pacientes.
Tiempo de tratamiento óptimo
La carga inmediata se está realizando cada vez con más frecuencia. Los pacientes desean resultados rápidos. Y, con Osstell, solo tiene que esperar lo estrictamente necesario.
Método comprobado
Respaldado por más de 1500 estudios científicos, nuestro método está basado en la tecnología RFA (del inglés “resonance frequency analysis”, análisis de la frecuencia de resonancia) para determinar si un implante presenta o no la estabilidad suficiente. El resultado se presenta con un valor ISQ de 1 a 99. Cuanto más alto sea el valor ISQ, más estable es el implante.
OSSTELLCONNECT & OSSTELL BEACON
Mejore sus tratamientos con implantes
OsstellConnect es una solución gratuita basada en la nube que ofrece a los médicos una nueva manera de utilizar los datos para mejorar sus tratamientos con implantes dentales. Se trata del portal en línea de implantes más grande del mundo, con más de un cuarto de millón de puntos de datos. Actualmente, OsstellConnect es gratuito y los usuarios de Osstell Beacon y Osstell IDx pueden acceder a él.
OsstellConnectImplantmed Plus II & Osstell Beacon
Precisión y fiabilidad con las unidades Implantmed Plus II y Osstell Beacon de W&H
Implantmed Plus II de W&H, combinado con Osstell Beacon, ofrece una solución ideal para que los procedimientos de implante sean seguros y precisos. Con funciones como control de torque automático, para que la inserción del implante sea segura, y una función de mecanizado de roscas para mejorar la precisión, Implantmed Plus II garantiza la facilidad y la exactitud. Osstell Beacon mejora aún más la experiencia al mostrar las mediciones de estabilidad ISQ en tiempo real directamente en la pantalla, con lo que se simplifica la documentación y se fomentan unos resultados óptimos para los pacientes.
Explore el paquete Implantmed Plus II + Osstell Beacon para llevar la máxima precisión a su consulta.
Vídeos
Configure su instrumento: paso a paso
En este breve vídeo, le guiaremos, paso a paso, en la configuración y el registro de su Osstell Beacon. Comience en 5 minutos y reciba 2 cajas de SmartPegs sin cargo.
Regístrese aquí
Mida la estabilidad del implante con Osstell Beacon
El Osstell Beacon determina la estabilidad del implante en cuestión de segundos. En este vídeo, le mostramos como realizar las mediciones. Para obtener guías paso a paso, visite la sección Ayuda de su cuenta de OsstellConnect.
OsstellConnect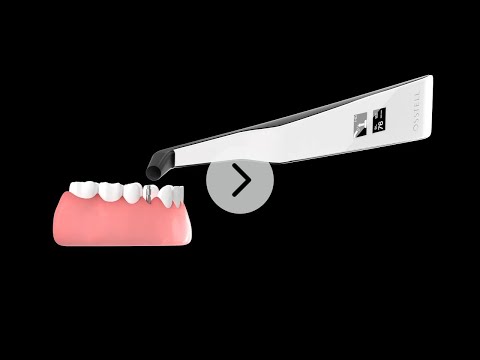
Search for distributor
Frequently asked questions
Got a question regarding Osstell Beacon? Our FAQ is the fastest way to get help. Below you will find the most frequently asked questions regarding Osstell Beacon. If you can’t find the answer you are looking for, don’t hesitate to contact us.
Charge the Beacon for at least 30 min in room temperature, then try again. If the error remains, try resetting the device by:
1. Identify the Beacon reset pin on the picture below.
![]()
2. With a paper clip, do a gentle press for 1 second on the reset button (Note! You may have to tilt the pin a little downwards).
If you see a “PadLock” symbol in the upper display, press one more time on the reset button.
If the Beacon still doesn’t start or the display is showing a wrench and a manual, then please contact your local sales representative or distributor or support@osstell.com.
Explore nuestros productos
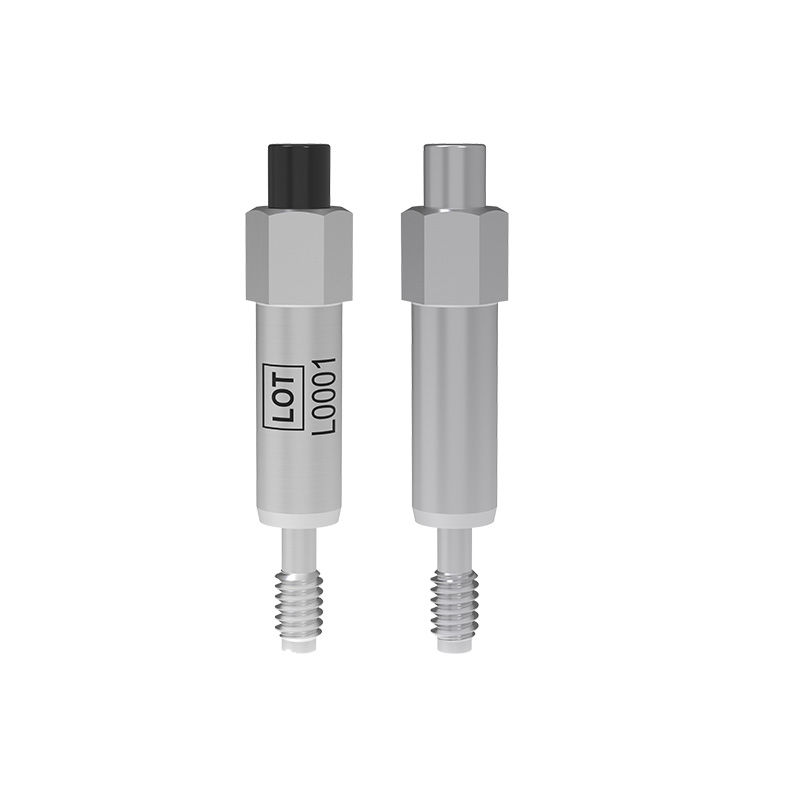
SmartPeg
El SmartPeg™ se conecta al implante y se utiliza junto con los instrumentos de medición Osstell IDx, Osstell Beacon u Osstell ISQ.

OsstellConnect
OsstellConnect es una solución gratuita basada en la nube que ofrece a los médicos una nueva manera de utilizar los datos para mejorar sus tratamientos con implantes dentales.
