Support
FAQ
Maggiori informazioni sui nostri prodotti, sulla scala ISQ e su come utilizzarla, su OsstellConnect, sulla tecnologia Osstell e molto altro ancora.
Domande sugli SmartPeg
I seguenti prodotti possono essere sterilizzati in autoclave (fino a 135 °C):
- SmartPeg Mount
- SmartPeg riutilizzabile
- Sonda (IDx)
Si ricorda che gli SmartPeg monouso sono dispositivi monouso e non possono essere sterilizzati in autoclave.
Impianti diversi richiedono SmartPeg specifici per garantire una misurazione accurata. Ogni SmartPeg corrisponde a un particolare sistema implantare e tipo di connessione.
È possibile trovare lo SmartPeg corretto per il proprio impianto nella SmartPeg Reference Guide: fare clic qui per accedervi.
No. Non deve essere utilizzato un dispositivo dinamometrico per serrare lo SmartPeg.
Gli SmartPeg devono sempre essere montati con lo SmartPeg Mount e serrati a circa 4–6 Ncm, generalmente definiti serraggio manuale.
Questo assicura che lo SmartPeg sia correttamente posizionato senza rischiare di danneggiare la connessione implantare.
L’ISQ deve essere sempre misurato in due direzioni, poiché la stabilità implantare può variare in base alla quantità di osso circostante nelle diverse direzioni. Misurare da due angolazioni consente di rilevare sia la direzione più stabile sia quella meno stabile.
A tal fine, eseguire una misurazione in direzione bucco-linguale e una in direzione mesio-distale. Questi due valori ISQ rappresentano le diverse direzioni di stabilità. Talvolta i valori sono identici, talvolta differiscono.
Se le due misurazioni differiscono, fare sempre riferimento al valore ISQ più basso, poiché riflette la direzione più debole e fornisce quindi l’informazione clinicamente più rilevante sulla stabilità implantare.
Osstell misura la stabilità implantare mediante Analisi della Frequenza di Risonanza (RFA). Il piccolo SmartPeg fissato all’impianto ha un minuscolo magnete sulla parte superiore. Quando la sonda invia impulsi magnetici, lo SmartPeg inizia a vibrare, come un diapason molto piccolo.
Come funziona:
1. Lo strumento invia impulsi magnetici
Questi impulsi fanno vibrare lo SmartPeg senza toccarlo.
2. La vibrazione cambia in base alla stabilità implantare
– Un impianto stabile (con buon supporto osseo) fa vibrare lo SmartPeg più velocemente.
– Un impianto meno stabile lo fa vibrare più lentamente.
3. Il dispositivo converte la vibrazione in un valore ISQ
– Maggiore stabilità → frequenza più alta → ISQ più alto
– Minore stabilità → frequenza più bassa → ISQ più basso
Il processo richiede meno di un secondo e il valore ISQ viene visualizzato immediatamente.
Diversi fattori possono causare valori ISQ inattesi o l’assenza di una lettura:
1. Uso o condizioni non corretti dello SmartPeg
• SmartPeg monouso: destinato a una sola seduta di trattamento e a un solo paziente. Riutilizzarlo può causare usura delle filettature e misurazioni non affidabili.
• SmartPeg riutilizzabile: assicurarsi che sia stato pulito e ispezionato correttamente e che non sia danneggiato. Usura, deformazione o contaminazione possono comprometterne le prestazioni.
2. Selezione del tipo di SmartPeg errato
Assicurarsi di avere selezionato il tipo di SmartPeg corretto per lo specifico sistema implantare e la relativa connessione. Consultare la SmartPeg Reference Guide.
3. Tessuti o detriti nella connessione implantare
Frammenti ossei, tessuti molli o liquidi tra l’interfaccia implantare e lo SmartPeg possono impedirne il corretto posizionamento. Pulire accuratamente la connessione protesica dell’impianto prima di applicare lo SmartPeg.
4. Interferenze elettromagnetiche
Fonti vicine di disturbo elettromagnetico possono interrompere la misurazione. Se possibile, rimuovere o spegnere la fonte.
5. Posizionamento errato dello strumento di misura
Tenere la punta dello strumento a 2–4 mm dallo SmartPeg e orientarla correttamente verso la parte superiore del peg con un angolo di circa 45°. Non toccare il magnete.
È possibile registrare l’ISQ a livello dell’abutment (moncone) in OsstellConnect, ma per ottenere valori accurati è importante seguire la corretta procedura clinica di misurazione.
Come misurare l’ISQ a livello dell’abutment
1. Eseguire prima una misurazione a livello implantare, prima di posizionare l’abutment.
2. Nella stessa seduta, misurare nuovamente a livello dell’abutment utilizzando uno SmartPeg destinato alla misurazione a livello dell’abutment.
3. Determinare l’offset annotando la differenza tra l’ISQ a livello implantare e quello a livello dell’abutment. Questo offset rimane stabile durante la guarigione e deve essere utilizzato per interpretare le misurazioni di controllo.
4. In tutte le visite successive, misurare sull’abutment e applicare lo stesso offset per comprendere il reale ISQ implantare.
Come registrare la misurazione in OsstellConnect:
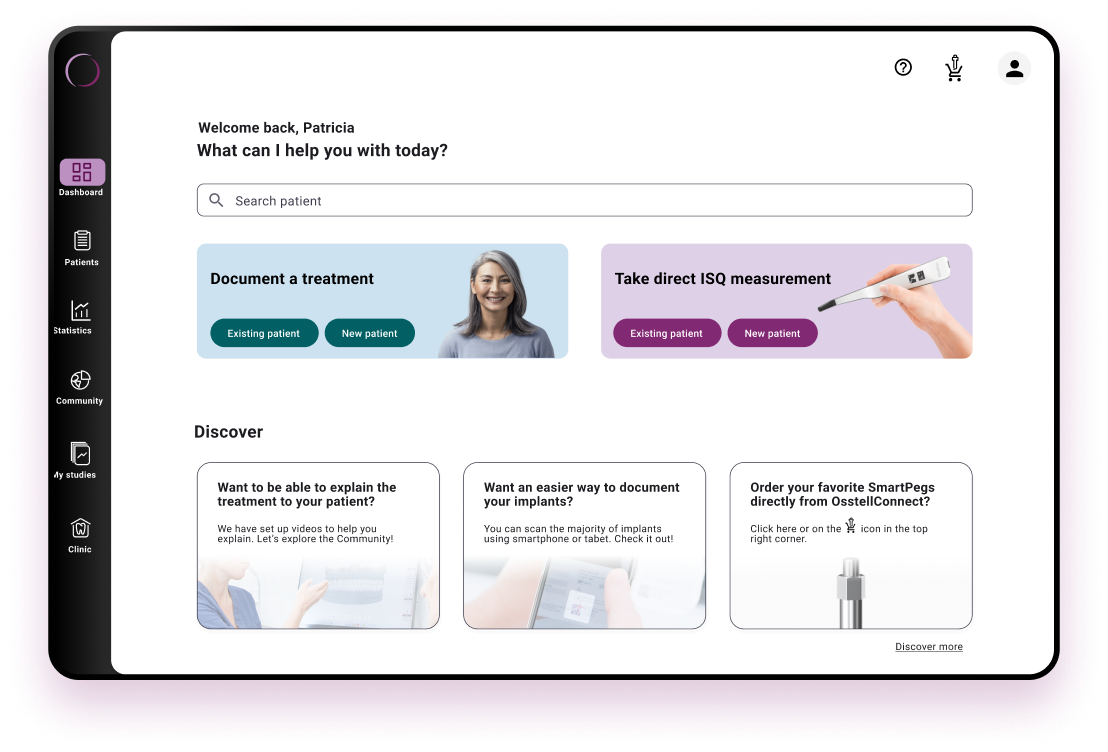
1. Accedere all’archivio pazienti, selezionare il paziente e l’impianto nell’odontogramma. Fare clic su “Add abutment”, scegliere l’abutment e salvare.
2. Selezionare “Measure stability” e scegliere “Abutment” in Measurement level. Misurare sull’abutment come a livello implantare e salvare.
3. Per rivedere l’andamento della stabilità, aprire la scheda Stability e attivare “Show abutment”. È anche possibile attivare “Show details” per visualizzare i valori ISQ bucco-linguali e mesio-distali.
Per una spiegazione più dettagliata e indicazioni cliniche, consultare qui il nostro post del blog.
Sì, può essere sterilizzato con un ciclo Prion a 134 °C per 18 minuti.
Sia con uno SmartPeg monouso sia con uno riutilizzabile, il montaggio deve essere sempre eseguito con lo SmartPeg Mount e serrato a circa 4–6 Ncm, generalmente definito serraggio manuale.
Ciò garantisce un corretto posizionamento e misurazioni ISQ accurate senza rischiare di danneggiare l’impianto o lo SmartPeg.
Sì. È possibile utilizzare SmartPeg monouso e riutilizzabili durante la stessa seduta di trattamento. L’unico requisito è utilizzare lo SmartPeg Type corretto per lo specifico impianto o abutment (moncone) da misurare.
Il fatto che lo SmartPeg sia monouso o riutilizzabile non influenza la misurazione.
Sì, purché ne siano mantenute integrità e prestazioni.
Osstell è inoltre l’unica azienda a offrire sia SmartPeg monouso sterili sia SmartPeg riutilizzabili in alluminio, supportati da oltre 1.500 studi pubblicati sul metodo ISQ.
Con la scala ISQ originale Osstell e gli SmartPeg non sono necessarie tabelle di conversione o fattori di correzione. Il valore ISQ misurato è il valore effettivo, indipendentemente dall’uso di uno SmartPeg monouso o riutilizzabile.
Gli SmartPeg sono forniti in formati di confezionamento diversi a seconda che siano monouso o riutilizzabili:
SmartPeg monouso
– Forniti sterili.
– Confezionati in scatole da 5 pezzi, in un sistema di barriera sterile singolo con imballaggio esterno protettivo.
– Destinati a una sola seduta di trattamento e non riutilizzabili.
SmartPeg riutilizzabili
– Forniti non sterili in confezione individuale.
– Devono essere puliti, disinfettati e sterilizzati prima del primo utilizzo clinico e dopo ogni utilizzo successivo. (Vedere la guida rapida su osstell/ifu).
SmartPeg Mount
– Fornito non sterile con lo strumento.
– Può essere acquistato separatamente, in confezioni da 5.
– Deve anch’esso essere pulito, disinfettato e sterilizzato prima dell’uso e tra un paziente e l’altro. (Vedere la guida rapida su osstell/ifu).
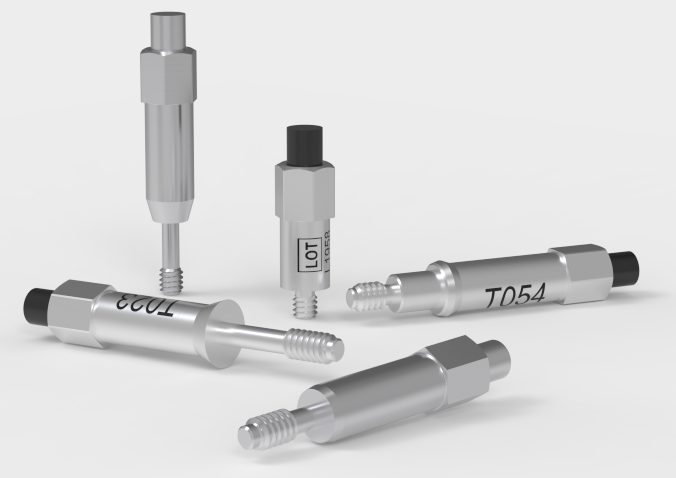
Sì. Gli SmartPeg riutilizzabili e monouso sono progettati per essere facilmente distinguibili visivamente:
– Lo SmartPeg monouso è fornito sterile, ha un magnete color alluminio (non colorato) e non presenta identificatori marcati al laser sul corpo.
– Lo SmartPeg riutilizzabile ha un magnete nero sulla parte superiore e riporta sul corpo i numeri Type e LOT marcati al laser, per identificazione e tracciabilità.
Lo SmartPeg riutilizzabile può essere utilizzato fino a 20 cicli di ricondizionamento convalidati, purché ne siano mantenute integrità e prestazioni.
Se l’ispezione rileva usura, deformazione, corrosione, filettature danneggiate o perdita di compatibilità funzionale, lo SmartPeg deve essere scartato, anche se è stato trattato meno di 20 volte.
Lo SmartPeg monouso è destinato a una sola seduta di trattamento e non deve essere ricondizionato.
Lo SmartPeg riutilizzabile è progettato con speciali rivestimenti protettivi: uno sul corpo dello SmartPeg e un altro, nero, sul magnete. Questi rivestimenti resistono a umidità, sostanze chimiche di pulizia, usura e corrosione, preservando le prestazioni dello SmartPeg per il numero convalidato di cicli di ricondizionamento.
Lo SmartPeg riutilizzabile si distingue facilmente dalla versione monouso: ha un magnete nero e i numeri LOT e Type sono marcati al laser sul corpo per una chiara identificazione.
Yes, it can be sterilised with a Prion cycle at 134 °C for 18 minutes.
Whether you are using a single-use or a reusable SmartPeg, it should always be installed using the SmartPeg Mount and tightened to approximately 4–6 Ncm – typically described as finger tight. This ensures proper seating and accurate ISQ measurements without risking damage to the implant or the SmartPeg.
Yes. You can mix single-use and reusable SmartPegs during the same treatment session. The only requirement is that you use the correct SmartPeg Type number for the specific implant or abutment you are measuring.
Whether the SmartPeg is single-use or reusable does not affect the measurement.
Yes, as long as its integrity and performance are maintained.
Osstell is also the only company offering both a sterile single-use and a reusable SmartPeg made of aluminium, supported by more than 1,500 published studies on the ISQ method.
With the Osstell original ISQ scale and SmartPegs, no conversion tables or correction factors are needed. The measured ISQ value is the true value, regardless of whether you use a single use or a reusable SmartPeg.
SmartPegs are supplied in different packaging formats depending on whether they are single-use or reusable:
Single-use SmartPegs
- Delivered sterile.
- Supplied in boxes of 5 pieces, in a single sterile barrier system with protective outer packaging.
- Intended for one treatment session only and must not be reused.
Reusable SmartPegs
- Delivered nonsterile in individual packaging.
- Must be cleaned, disinfected and sterilized before the first clinical use and after every subsequent use. (See quickguide at osstell/ifu).
SmartPeg Mount
- Delivered nonsterile with the instrument.
- Can be purchased separately, in package of 5.
- Must also be cleaned, disinfected and sterilized before use and between patients. (See quickguide at osstell/ifu).
Yes. The reusable and single use SmartPegs are designed so they can be easily distinguished visually:
- The single-use SmartPeg is supplied sterile, has an aluminium coloured (non coloured) magnet, and does not include any laser marked identifiers on the body.
- The reusable SmartPeg has a black magnet on top and carries laser marked Type and LOT numbers on the body for identification and traceability.

The reusable SmartPeg can be used for up to 20 reprocessing cycles, as long as its integrity and performance are maintained.
If inspection reveals wear, deformation, corrosion, damaged threads, or any loss of functional compatibility, the SmartPeg must be discarded, even if it has been processed fewer than 20 times.
The single-use SmartPeg is intended for one treatment session only and must not be reprocessed.
The reusable SmartPeg is engineered with special protective surface coating – one on the SmartPeg body and another black protective coating on the magnet. These coatings provide resistance to moisture, cleaning chemicals, wear, and corrosion, ensuring that the SmartPeg maintains its performance throughout the validated number of reprocessing cycles.
The reusable SmartPeg can easily be distinguished from the single use version: it has a black magnet, and its LOT and Type number are laser marked on the body for clear identification.
Prima del primo utilizzo clinico e dopo ogni utilizzo, i prodotti riutilizzabili devono essere puliti, disinfettati e sterilizzati secondo le istruzioni della guida rapida disponibile qui: Osstell.com/ifu.
You can record ISQ at abutment level in OsstellConnect, but it is important to follow the correct clinical measurement procedure to obtain accurate values.
How to measure ISQ at abutment level
- Perform an implant level measurement first, before placing the abutment.
- Measure again at abutment level during the same session, using a SmartPeg made for abutment level measuring.
- Determine the offset by noting the difference between implant level and abutment level ISQ. This offset remains stable throughout healing and should be used when interpreting follow-up measurements.
- For all subsequent visits, measure on the abutment and apply the same offset to understand the true implant ISQ.
How to record the measurement in OsstellConnect:
- Go to the patient’s register, select the patient and the implant in the tooth chart. Click ‘Add abutment’, choose the abutment, and save.
- Select ‘Measure stability’ and choose ‘Abutment’ under Measurement level. Measure on the abutment as you would at implant level and save.
- To review the stability trend, open the Stability tab and toggle ‘Show abutment’. You can also enable ‘Show details’ to view buccal–lingual and mesial–distal ISQ values.
For a more detailed explanation and clinical guidance, see our blog post here.
ISQ should always be measured in two directions, because implant stability can vary depending on the amount of surrounding bone in different directions. Measuring from two angles ensures that both the most and the least stable directions are captured.
To do this, take one measurement in the buccal-lingual direction and one in the mesial-distal direction. These two ISQ values represent the different stability directions. Sometimes the values are identical; sometimes they differ.
If the two measurements differ, always rely on the lowest ISQ value, as it reflects the weakest direction and therefore provides the most clinically relevant information about implant stability.
There are currently thousands of articles where Osstell devices were used in the study, published in scientific papers. These abstracts could be found in our searchable database under “Resources/Scientific database“.
The Osstell ISQ scale is based on outcomes from these studies, all performed using Osstell instruments and aluminium SmartPegs.
No. A torque device should not be used to tighten the SmartPeg.
SmartPegs should always be mounted using the SmartPeg Mount and tightened to approximately 4–6 Ncm, which is typically described as finger tight.
This ensures the SmartPeg is seated correctly without risking damage to the implant connection.
Osstell measures implant stability using Resonance Frequency Analysis (RFA). The small SmartPeg that you attach to the implant has a tiny magnet on top. When the probe sends magnetic pulses, the SmartPeg starts to vibrate – similar to a very small tuning fork.
How it works:
- The instrument tip sends magnetic pulses
These pulses make the SmartPeg vibrate without touching it. - The vibration changes depending on how stable the implant is
– A stable implant (good bone support) makes the SmartPeg vibrate faster.
– A less stable implant makes it vibrate slower. - The device converts this vibration into an ISQ value
– Higher stability → higher frequency → higher ISQ
– Lower stability → lower frequency → lower ISQ
It takes less than a second, and the ISQ value is shown immediately.
Yes. The ISQ value can be affected if the SmartPeg is not mounted correctly.
For accurate measurements, the SmartPeg should be attached finger tight using the SmartPeg Mount, which corresponds to about 4–6 Ncm.
At this level, the SmartPeg has firm, stable contact with the implant, and the resulting ISQ value is consistent – typically within ±2 ISQ units.
- If the SmartPeg is not fully seated:
The contact becomes unstable, and the ISQ value can appear artificially low, or you don’t receive any value. - If too much force is applied:
Overtightening does not improve accuracy. It may damage the SmartPeg threads.
– A reusable SmartPeg may be damaged so it cannot be used again.
– A single use or reusable SmartPeg may have its threads deformed, which can lead to inaccurate measurements during that session or, in worst case a broken SmartPeg.
In short: finger tight (4–5 Ncm) is enough to ensure stable contact and reliable ISQ readings.
If no ISQ value appears, it usually means the SmartPeg’s vibration is not being detected clearly by the instrument. Several factors can cause this, and most are easy to resolve:
- Distance to instrument is too great
The instrument should normally be held 2–4 mm from the magnet on top of the SmartPeg. Do not touch the magnet. If no value appears, move the instrument closer until the signal is detected. - Angle needs adjustment
The magnetic field is directional, so the orientation of the instrument matters. Measurements should be taken at approximately a 45° angle relative to the top of the SmartPeg. - Ensure you have the correct SmartPeg Type for the specific implant
Use this link to find the correct SmartPeg Type: Find my SmartPeg - Soft tissue damping
Surrounding tissue can sometimes dampen the vibration more than expected. Holding the instrument a bit closer usually compensates for this. - The implant platform is not clean
Ensure the implant platform is clean and free of debris, so the SmartPeg seats properly and transmits its vibration. - The SmartPeg is worn or damaged
• If you are using a reusable SmartPeg, make sure it has been inspected before use and that it is within 20 reprocessing cycles. A reusable SmartPeg that is worn out, bent, or has damaged threads will not vibrate correctly — and the instrument may not be able to pick up a reading.
• A single‑use SmartPeg is intended for one treatment session only.
• Ensure the SmartPeg is properly seated on the implant and that it is not in contact with surrounding tissue, as this can prevent accurate signal detection and may result in no ISQ value or an incorrect one. - Electromagnetic interference
Strong electromagnetic noise sources nearby may disturb the measurement. (See the FAQ on “Electromagnetic noise” for details.)

The following products may be autoclaved (over-pressurized steam up to 135 deg Celsius):
- SmartPeg Mount
- Reusable SmartPeg
- Probe (IDx)
Please note that single-use SmartPegs are disposable and cannot be autoclaved!
Different implants require specific SmartPegs to ensure accurate measurement. Each SmartPeg is matched to a particular implant system and connection type.
You can find the correct SmartPeg for your implant in the SmartPeg Reference Guide – click here to access it.
Domande su Osstell Beacon
Osstell Beacon
- Per trovare il codice di registrazione, assicurarsi di avere già installato Beacon Gateway. In caso contrario, accedere alla propria clinica nell’account, fare clic sulla scheda Instruments e scaricare il gateway. Installarlo.
- Prendere in mano lo strumento. Si sta connettendo a OsstellConnect e dovrebbe comparire un simbolo animato. Tenere presente che potrebbero essere necessari alcuni secondi.
- Una volta connesso, il simbolo smette di animarsi.
- Il codice di registrazione viene ora visualizzato sul display inferiore dello strumento.
Osstell IDx
- Alla prima accensione di Osstell IDx verrà chiesto di selezionare lingua, fuso orario, data e ora.
- Successivamente sarà necessario impostare un codice PIN di 4 cifre e una password di backup. La password di backup è necessaria per il ripristino da un backup: annotarla e conservarla in un luogo sicuro.
- Il codice di registrazione viene ora visualizzato su Osstell IDx.
Prima di ogni utilizzo, inumidire una garza o un panno morbido con un detergente per superfici raccomandato (vedere l’elenco sottostante) e strofinare l’intero strumento.
Detergenti accettabili:
- Alcol isopropilico al 70%
- Detergenti enzimatici a bassa formazione di schiuma, a pH neutro quali:
- BePro Disinfectant Wipes, REF 19500102, www.wh.com (possono essere ordinate da W&H Sterilization)
- Medizime LF
- Enzol
Non utilizzare:
- Detergenti/disinfettanti a base di acidi o fenoli
- Qualsiasi detergente alcalino forte, inclusi saponi per le mani e per i piatti
- Detergenti a base di candeggina
- Detergenti a base di perossido di idrogeno
- Detergenti abrasivi
- Detergenti a base di acetone o idrocarburi
- MEK (metiletilchetone)
- Birex
- Gluteraldeide
- Detergenti a base di cloruro d’ammonio quaternario
Lo strumento non necessita di manutenzione regolare. In caso di malfunzionamento dello strumento, contattare il proprio rappresentante commerciale o distributore locale per ricevere assistenza.
You can record ISQ at abutment level in OsstellConnect, but it is important to follow the correct clinical measurement procedure to obtain accurate values.
How to measure ISQ at abutment level
- Perform an implant level measurement first, before placing the abutment.
- Measure again at abutment level during the same session, using a SmartPeg made for abutment level measuring.
- Determine the offset by noting the difference between implant level and abutment level ISQ. This offset remains stable throughout healing and should be used when interpreting follow-up measurements.
- For all subsequent visits, measure on the abutment and apply the same offset to understand the true implant ISQ.
How to record the measurement in OsstellConnect:
- Go to the patient’s register, select the patient and the implant in the tooth chart. Click ‘Add abutment’, choose the abutment, and save.
- Select ‘Measure stability’ and choose ‘Abutment’ under Measurement level. Measure on the abutment as you would at implant level and save.
- To review the stability trend, open the Stability tab and toggle ‘Show abutment’. You can also enable ‘Show details’ to view buccal–lingual and mesial–distal ISQ values.
For a more detailed explanation and clinical guidance, see our blog post here.
You can find the serial number on the back of your instrument.
Osstell Beacon
• To find your registration code, please make sure that you have already installed the Beacon Gateway. If you have not installed it yet, please navigate to your clinic in your account, click the instruments tab and download the gateway. Install it.
• Take your instrument in hand. It is now connecting to OsstellConnect and you should see a symbol animating. Please note that it can take a few seconds.
• When connected, the symbol stops animating.
• The registration code is now displayed on the lower screen of your instrument.
Osstell IDx
• When turning on your Osstell IDx for the first time, you will be prompted to select language, time zone, date and time.
• After that, you will need to set up a 4-digit pin code and a backup password. The backup password is needed when restoring to a backup, so please note it down and save it in a safe place.
• Your registration code is now displayed on your Osstell IDx.
Start by charging the instrument for about 3 hours to ensure optimal performance.
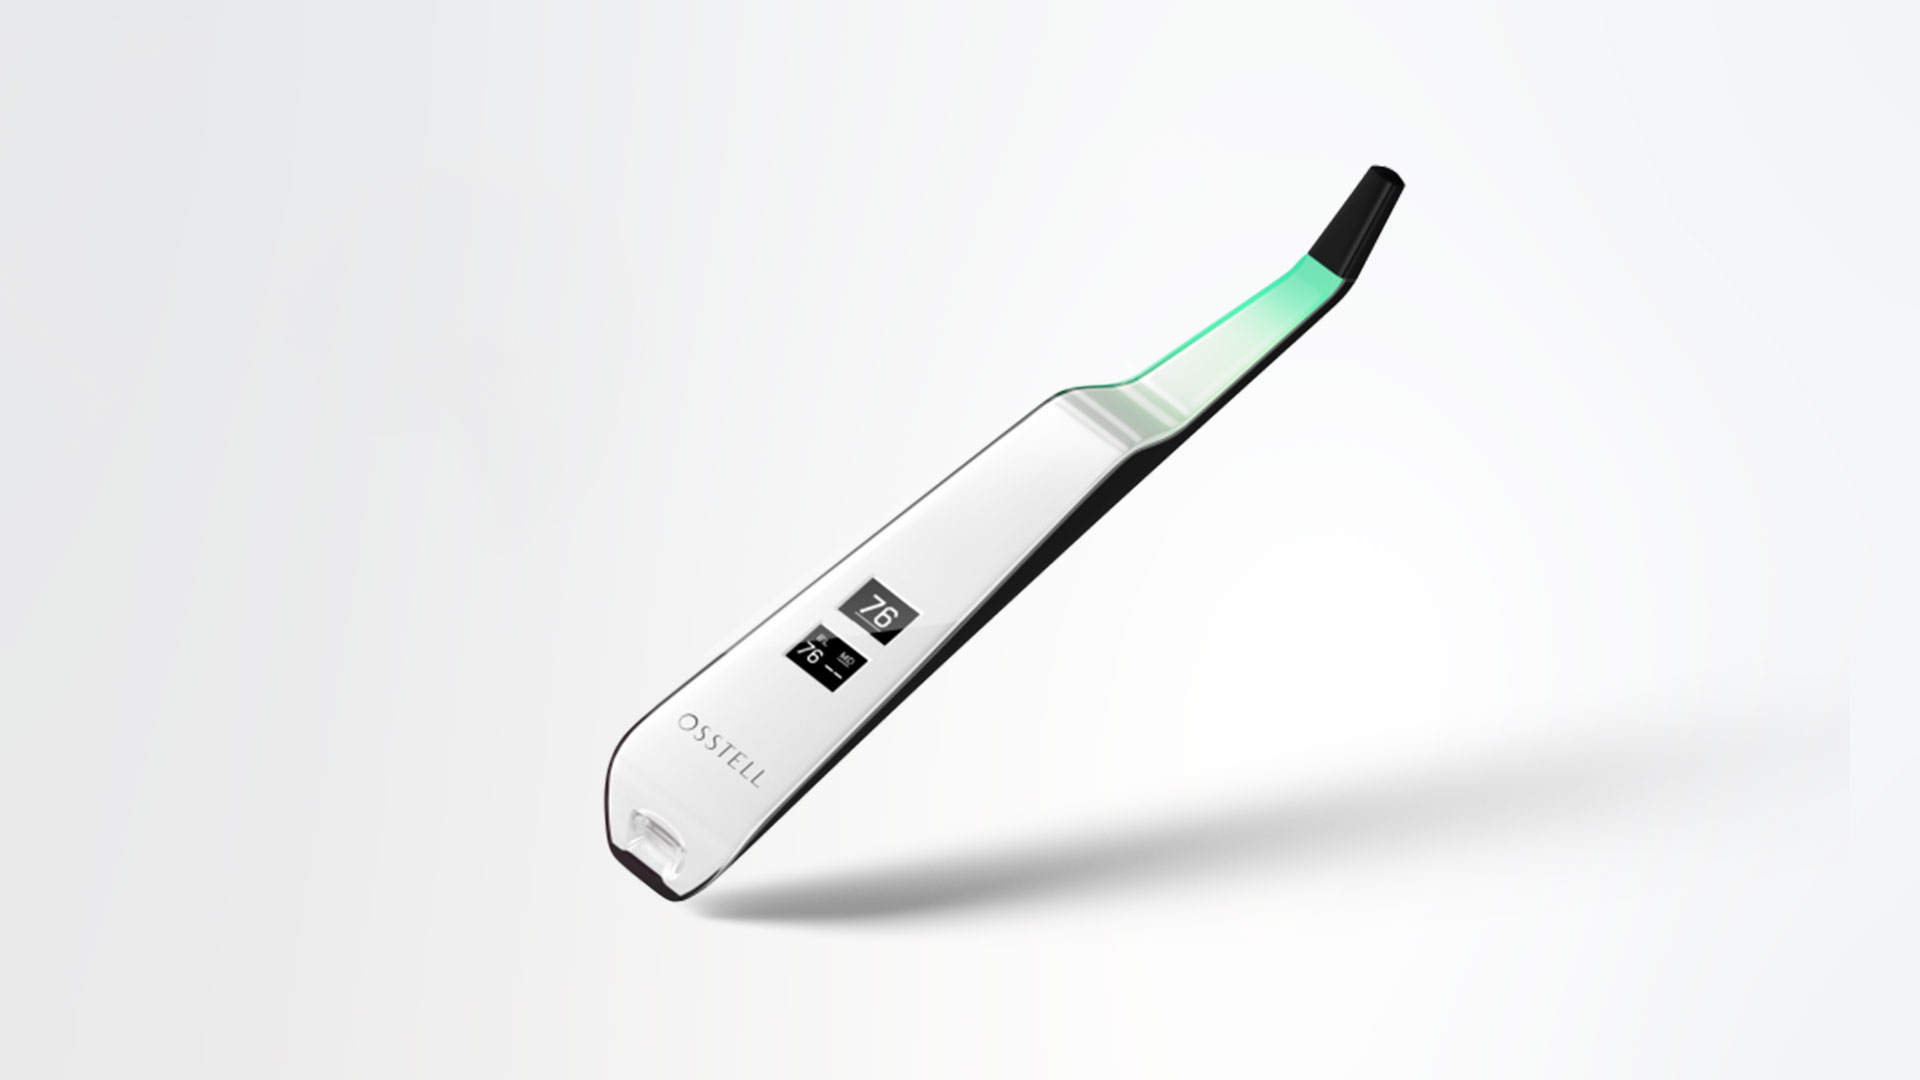
The Osstell Beacon starts automatically when moved, shows the battery status, and is then ready for measurement in the BL (buccal-lingual) direction.
Bring the instrument close to a SmartPeg or TestPeg to start measuring. An audible signal confirms the measurement, and the ISQ value is shown together with a coloured stability indication (red, yellow, green).
At start-up, an OsstellConnect code is displayed until the instrument is registered. You can register your instrument here: Register to OsstellConnect.
The instrument turns off automatically after 60 seconds without movement.
Video on how to measure: Measure with Osstell Beacon
1. Activate the Osstell Beacon by picking it up. The instrument will start-up and after showing the battery status, the instrument will be ready for measurement in the BL (Buccal – Lingual) direction, which is prompted in the upper display as well as optimal angle towards the Smartpeg.
2. Place a barrier sleeve over the Osstell beacon instrument.
3. Place the SmartPeg into the SmartPeg Mount. The SmartPeg is magnetic, and the SmartPeg Mount will hold the SmartPeg. See fig 2. Attach the SmartPeg to the implant or abutment by screwing the SmartPeg Mount using finger force of approximately 4-6 Ncm. Do not over-tighten, to avoid damaging the SmartPeg threads.
4. Hold the instrument tip close (2-4mm) to the top of the SmartPeg without touching it. Sometimes, you will need to go as close as 1 mm. An audible sound indicates when measurement has started, and measured data will be shown in the upper display combined with a colored light indication below the tip.
5. Bring the instrument out of the mouth to clearly read the ISQ value and the colored indication. The measured ISQ values will be displayed in the upper display for a couple of seconds and then switch to be ready for measurement in mesial-distal direction.
6. Repeat step 4 and the sequence starts over and the Osstell Beacon is ready for measurement in the BL (Buccal- Lingual) direction again.
7. When all measurements are performed, remove the SmartPeg by using the SmartPeg Mount. The instrument is automatically turned off after 60 seconds of inactivity.
Alcune spiegazioni possibili includono:
Riutilizzo degli SmartPeg: Gli SmartPeg sono monouso e devono essere utilizzati per eseguire una o più misurazioni in una sessione di trattamento e su un solo paziente. Riutilizzarli in modo ripetuto può provocare letture errate a causa dell’usura delle filettature degli SmartPeg in alluminio morbido.
Tipo errato di SmartPeg selezionato per l’impianto: Consultare l’elenco di riferimento degli SmartPeg alla pagina osstell.com/smartpegguide
Presenza di tessuto osseo o tessuto molle tra SmartPeg e impianto: Assicurarsi di pulire l’innesto protesico dell’impianto prima di collegare lo SmartPeg.
Interferenze elettromagnetiche: Rimuovere la fonte di interferenze elettromagnetiche.
La sonda è tenuta troppo lontana dallo SmartPeg: Tenere la sonda a una distanza di 2-4 mm dallo SmartPeg.
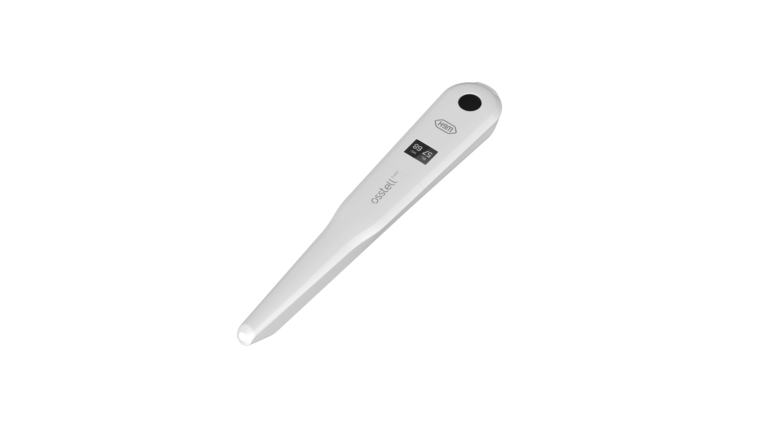
Although it is possible to use the Osstell Beacon directly, depending on the status of the built-in rechargeable battery, it is recommended to charge the battery for at least 3 hours before using the Osstell Beacon instrument.
The Osstell Beacon is activated by a built-in motion sensor. As soon as the motion sensor detects movement, the Osstell Beacon will start-up and shortly show battery status and then be ready for measurement in the BL (Buccal – Lingual) direction, which is indicated in the upper display.
The Osstell Beacon will start to measure, indicated by an audible sound, when near an Osstell SmartPeg or Test peg due to a built-in magnetic detector that senses the magnet on the top of the Osstell SmartPeg/TestPeg. Measured data will be shown in the upper display combined with a colored light indication below the tip.
The red, yellow and green color indicates if the measured ISQ value corresponds to a low, medium or high implant stability according to the ISQ scale guidance, click here for more information.
After 60 seconds of no motion, the Osstell Beacon will turn off automatically.
1. Activate the Osstell Beacon by picking it up. The instrument will start-up and after showing the battery status, the instrument will be ready for measurement in the BL (Buccal – Lingual) direction, which is prompted in the upper display as well as optimal angle towards the Smartpeg.
2. Place a barrier sleeve over the Osstell beacon instrument.
3. Place the SmartPeg into the SmartPeg Mount. The SmartPeg is magnetic, and the SmartPeg Mount will hold the SmartPeg. See fig 2. Attach the SmartPeg to the implant or abutment by screwing the SmartPeg Mount using finger force of approximately 4-6 Ncm. Do not over-tighten, to avoid damaging the SmartPeg threads.
4. Hold the instrument tip close (2-4mm) to the top of the SmartPeg without touching it. Sometimes, you will need to go as close as 1 mm. An audible sound indicates when measurement has started, and measured data will be shown in the upper display combined with a colored light indication below the tip.
5. Bring the instrument out of the mouth to clearly read the ISQ value and the colored indication. The measured ISQ values will be displayed in the upper display for a couple of seconds and then switch to be ready for measurement in mesial-distal direction.
6. Repeat step 4 and the sequence starts over and the Osstell Beacon is ready for measurement in the BL (Buccal- Lingual) direction again.
7. When all measurements are performed, remove the SmartPeg by using the SmartPeg Mount. The instrument is automatically turned off after 60 seconds of inactivity.
Possible explanations include:
Re-Used SmartPeg: The SmartPegs are disposable and should only be used for one or multiple measurement at one treatment session, for a single patient only. Repeated re-use may result in false readings due to wear and tear of the soft aluminum SmartPeg threads.
Wrong SmartPeg type selected for the implant: See SmartPeg reference list, osstell.com/smartpegguide
Bone or soft tissue in between SmartPeg and Implant: Make sure to clean the Implant prosthetic connection before attaching the SmartPeg.
Electromagnetic interference: Remove the source of electromagnetic interference.
Probe is held too far away from the SmartPeg: Hold the probe 2-4 mm away from the SmartPeg.
You can have your Osstell Beacon online connected to OsstellConnect for data collection, but it is not a requirement. OsstellConnect is an online tool for statistical analysis and valuable insights based on your data. Before you can start using data connection to OsstellConnect you have to register your Osstell Beacon. The serial number can be found on the back of the instrument. For registration assistance and features of data connection to OsstellConnect, please visit osstellconnect.com/beacon
2 years
Before each use, moisten a gauze or soft cloth with an acceptable (see list below) surface disinfectant and wipe the whole Osstell Beacon instrument. Note! Do not autoclave the Osstell Beacon instrument. Routinely check the surface of the instrument tip and overall surface for possible cracks and resins.
Acceptable Cleaners:
o Isopropyl alcohol
o Ethyl alcohol-based cleaners
Do not use:
o Strong alkali detergent of any type, including hand soaps and dish soaps Bleach based cleaners
o Hydrogen Peroxide based cleaners Abrasive Cleansers
o Acetone or hydrocarbon based cleaners MEK (Methyl Ethyl Ketone)
o Birex Gluteraldehyde
o Quaternary Ammonium Chloride salt-based cleaners
The Osstell Beacon is delivered from factory in a “transport” mode, where the built-in motion sensor is deactivated. To deactivate the transport mode and start charging, connect the small USB connector of the Osstell USB cable to wide end of the instrument. Connect the large USB connector to a standard USB outlet of a PC, laptop or charger.
No, a Wi‑Fi connection is not required to use your Osstell Beacon. You can measure implant stability and document ISQ values manually in your patient journal or in OsstellConnect at a later stage.
If connected, the Osstell Beacon can communicate wirelessly with OsstellConnect, allowing measurements to be transferred and recorded automatically.
OsstellConnect is an online tool used for data collection, statistical analysis and clinical insights based on your measurements.
To use the data connection, your Osstell Beacon must first be registered. The serial number can be found on the back of the instrument. For registration guidance and more information, please visit https://osstellconnect.com/register
The Osstell Beacon is delivered in transportation mode with the motion sensor deactivated. To switch modes, briefly connect the USB cable to the instrument and a USB port on a computer for a few seconds, then disconnect.
Charge the Beacon for at least 30 min in room temperature, then try again. If the error remains, try resetting the device by:
1. Identify the Beacon reset pin on the picture below.
![]()
2. With a paper clip, do a gentle press for 1 second on the reset button (Note! You may have to tilt the pin a little downwards).
If you see a “PadLock” symbol in the upper display, press one more time on the reset button.
If the Beacon still doesn’t start or the display is showing a wrench and a manual, then please contact your local sales representative or distributor or support@osstell.com.
ISQ should always be measured in two directions, because implant stability can vary depending on the amount of surrounding bone in different directions. Measuring from two angles ensures that both the most and the least stable directions are captured.
To do this, take one measurement in the buccal-lingual direction and one in the mesial-distal direction. These two ISQ values represent the different stability directions. Sometimes the values are identical; sometimes they differ.
If the two measurements differ, always rely on the lowest ISQ value, as it reflects the weakest direction and therefore provides the most clinically relevant information about implant stability.
There are currently thousands of articles where Osstell devices were used in the study, published in scientific papers. These abstracts could be found in our searchable database under “Resources/Scientific database“.
The Osstell ISQ scale is based on outcomes from these studies, all performed using Osstell instruments and aluminium SmartPegs.
Osstell measures implant stability using Resonance Frequency Analysis (RFA). The small SmartPeg that you attach to the implant has a tiny magnet on top. When the probe sends magnetic pulses, the SmartPeg starts to vibrate – similar to a very small tuning fork.
How it works:
- The instrument tip sends magnetic pulses
These pulses make the SmartPeg vibrate without touching it. - The vibration changes depending on how stable the implant is
– A stable implant (good bone support) makes the SmartPeg vibrate faster.
– A less stable implant makes it vibrate slower. - The device converts this vibration into an ISQ value
– Higher stability → higher frequency → higher ISQ
– Lower stability → lower frequency → lower ISQ
It takes less than a second, and the ISQ value is shown immediately.
If no ISQ value appears, it usually means the SmartPeg’s vibration is not being detected clearly by the instrument. Several factors can cause this, and most are easy to resolve:
- Distance to instrument is too great
The instrument should normally be held 2–4 mm from the magnet on top of the SmartPeg. Do not touch the magnet. If no value appears, move the instrument closer until the signal is detected. - Angle needs adjustment
The magnetic field is directional, so the orientation of the instrument matters. Measurements should be taken at approximately a 45° angle relative to the top of the SmartPeg. - Ensure you have the correct SmartPeg Type for the specific implant
Use this link to find the correct SmartPeg Type: Find my SmartPeg - Soft tissue damping
Surrounding tissue can sometimes dampen the vibration more than expected. Holding the instrument a bit closer usually compensates for this. - The implant platform is not clean
Ensure the implant platform is clean and free of debris, so the SmartPeg seats properly and transmits its vibration. - The SmartPeg is worn or damaged
• If you are using a reusable SmartPeg, make sure it has been inspected before use and that it is within 20 reprocessing cycles. A reusable SmartPeg that is worn out, bent, or has damaged threads will not vibrate correctly — and the instrument may not be able to pick up a reading.
• A single‑use SmartPeg is intended for one treatment session only.
• Ensure the SmartPeg is properly seated on the implant and that it is not in contact with surrounding tissue, as this can prevent accurate signal detection and may result in no ISQ value or an incorrect one. - Electromagnetic interference
Strong electromagnetic noise sources nearby may disturb the measurement. (See the FAQ on “Electromagnetic noise” for details.)

No. The Osstell measurement does not affect the implant. The instrument only makes the SmartPeg vibrate. The SmartPeg’s magnet is activated by very low energy magnetic pulses generated by the instrument. The technique is objective, gentle, and highly repeatable
Yes, ISQ measurements can be performed on patients with a pacemaker.
As a precaution, the probe should be kept away from the chest area where the pacemaker is located, due to the magnetic pulses emitted during measurement.
There are published reports regarding pacemakers and magnetic fields for further reference.
Implant stability can be measured at different stages of treatment.
It is typically measured at implant placement to establish a baseline, and then during healing to monitor changes in stability and osseointegration. A final measurement is often taken before loading to support the decision.
Repeated measurements over time provide valuable information, as the trend in ISQ values helps guide clinical decisions.
Domande su OsstellConnect
Osstell Beacon
- Per trovare il codice di registrazione, assicurarsi di avere già installato Beacon Gateway. In caso contrario, accedere alla propria clinica nell’account, fare clic sulla scheda Instruments e scaricare il gateway. Installarlo.
- Prendere in mano lo strumento. Si sta connettendo a OsstellConnect e dovrebbe comparire un simbolo animato. Tenere presente che potrebbero essere necessari alcuni secondi.
- Una volta connesso, il simbolo smette di animarsi.
- Il codice di registrazione viene ora visualizzato sul display inferiore dello strumento.
Osstell IDx
- Alla prima accensione di Osstell IDx verrà chiesto di selezionare lingua, fuso orario, data e ora.
- Successivamente sarà necessario impostare un codice PIN di 4 cifre e una password di backup. La password di backup è necessaria per il ripristino da un backup: annotarla e conservarla in un luogo sicuro.
- Il codice di registrazione viene ora visualizzato su Osstell IDx.
Sì. Accedere alle cartelle dei pazienti, selezionare il paziente e quindi l’impianto da modificare. Selezionare la scheda “Implant & abutment”. Fare clic sull’icona della penna per modificare, aggiornare i dati dell’impianto e salvare.
Sì, è possibile esportare tutti i dati in un file Excel per ulteriori analisi. Accedere alle cartelle dei pazienti e fare clic su CSV export. Il file comparirà nella cartella dei download.
Assicurarsi che i dati esportati siano gestiti in conformità alle normative applicabili sulla protezione dei dati, come GDPR o HIPAA.
Sì. Accedere alle cartelle dei pazienti, selezionare il paziente da eliminare e fare clic su Delete nell’angolo in alto a destra. Confermare l’eliminazione del paziente e di tutti i dati. I dati verranno rimossi definitivamente dall’account.
Sì. Accedere alle cartelle dei pazienti, selezionare il paziente e l’impianto. Aprire la scheda Stability. Fare clic sull’icona di modifica accanto alla misurazione che si desidera eliminare, quindi su Delete. La misurazione verrà rimossa definitivamente dalla cartella del paziente.
Prima di iniziare, assicurarsi di avere già installato Beacon Gateway. In caso contrario, accedere alla propria clinica nella sezione account, fare clic sulla scheda Instruments e scaricare il gateway. Installarlo.
- Inserire Osstell Key in una porta USB del computer.
- Prendere in mano il dispositivo. Si sta ora connettendo a OsstellConnect e dovrebbe comparire il seguente simbolo animato. Tenere presente che potrebbero essere necessari alcuni secondi.
- Una volta connesso, il simbolo smette di animarsi.
- Accedere alle cartelle dei pazienti.
- Se è la prima misurazione, creare un paziente. Compilare e salvare i dati del paziente. Fare clic su New Treatment e compilare le informazioni sul trattamento. Fare clic su Add implant, compilare i dati dell’impianto e salvare. Fare clic su Measure stability.
- Se è una misurazione di controllo, selezionare il paziente e quindi il dente. Fare clic su Measure stability.
- Misurare in direzione bucco-linguale. Il valore ISQ viene ora visualizzato in OsstellConnect.
- Misurare in direzione mesio-distale. Il valore ISQ viene ora visualizzato in OsstellConnect.
- Compilare le informazioni sul trattamento e salvare.
I dati presenti in Osstell IDx vengono caricati automaticamente sull’account OsstellConnect se lo strumento è connesso a Internet. Per connettere il dispositivo a Internet, seguire le istruzioni qui.
Si noti che è possibile creare anche backup, ad esempio su una chiavetta USB. Seguire le istruzioni qui.
- Per documentare un fallimento implantare, accedere alle cartelle dei pazienti. Selezionare il paziente, quindi il dente. Fare clic su “Contrassegna come ‘Non riuscito’”. Scegliere il tipo di fallimento (precoce o tardivo), inserire la data del fallimento e scegliere il motivo. Fare clic su “Contrassegna come ‘Non riuscito’”.
- È possibile accedere alla cronologia del fallimento implantare nella cronologia. Fare clic sulla scheda “Failed” per visualizzare tutte le informazioni relative al trattamento e al fallimento.
- Sul dente con impianto fallito viene visualizzato un simbolo della cronologia.
You can record ISQ at abutment level in OsstellConnect, but it is important to follow the correct clinical measurement procedure to obtain accurate values.
How to measure ISQ at abutment level
- Perform an implant level measurement first, before placing the abutment.
- Measure again at abutment level during the same session, using a SmartPeg made for abutment level measuring.
- Determine the offset by noting the difference between implant level and abutment level ISQ. This offset remains stable throughout healing and should be used when interpreting follow-up measurements.
- For all subsequent visits, measure on the abutment and apply the same offset to understand the true implant ISQ.
How to record the measurement in OsstellConnect:
- Go to the patient’s register, select the patient and the implant in the tooth chart. Click ‘Add abutment’, choose the abutment, and save.
- Select ‘Measure stability’ and choose ‘Abutment’ under Measurement level. Measure on the abutment as you would at implant level and save.
- To review the stability trend, open the Stability tab and toggle ‘Show abutment’. You can also enable ‘Show details’ to view buccal–lingual and mesial–distal ISQ values.
For a more detailed explanation and clinical guidance, see our blog post here.
• To document an implant failure, go to your patients records. Select the patient, then select the tooth. Click ‘Mark as failed’. Choose the type of failure (early or late failure), fill in the failure date. Choose the reason for failure. Click ‘Mark as failed’.
• You can access the history of the implant failure by navigating to the history tab. Click the tab ‘Failed’ to see all information related to the treatment and the failure.
• A history symbol is displayed on the tooth with a failed implant.
The data in your Osstell IDx is automatically uploaded to your OsstellConnect account if it is connected to the internet. To connect your device to the internet, please follow the instructions here.
Please note that you can also create backups, for example on a USB stick. Please follow the instructions here.
Before starting, make sure that you have already installed the Beacon Gateway. If you have not installed it yet, please navigate to your clinic in your account, click the instruments tab and download the gateway. Install it.
- Plug in the Osstell Key to a USB port on your computer.
- Take your instrument in hand. It is now connecting to OsstellConnect and you should see the following symbol animating. Please note that it can take a few seconds.
- When connected, the symbol stops animating.
- Go to your patient records.
- If it is the first measurement, create a patient. Fill in patient data and save. Click New Treatment and fill in treatment information. Click Add implant, fill in implant data and save. Click measure stability.
- If it is a follow up measurement, select the patient and then the tooth on the teeth chart. Click measure stability.
- Measure in buccal lingual direction. The ISQ value is now showing in OsstellConnect.
- Measure in mesial distal direction. The ISQ value is now showing in OsstellConnect.
- Fill in the information about the treatment and save.
Yes, simply navigate to your patient records. Select the patient. Select the implant. Go to the stability tab. Click on the edit icon by the measurement you would like to delete. Click delete. Please note that the measurement will be permanently removed from the patient chart.
Yes, simply navigate to your patient records. Select the patient you would like to delete. Click delete in the upper right corner. Confirm that you want to delete the patient and all data. Please note that it will be permanently removed from your account.
Yes, you can export all your data to an Excel file for further analysis. Simply go to your patient records and click CSV export. The file will appear in your downloads.
Please ensure that any exported data is handled in compliance with applicable data protection regulations, such as GDPR or HIPAA.
Yes, simply navigate to your patient records. Select the patient. Select the implant you want to edit on the tooth chart. Select the tab ‘Implant & abutment’. Click on the pen icon to edit. Edit implant data. Save.
Simply navigate to your patient records. Select the patient. Click ‘edit’ on the top right corner. Edit the data and save.
You can find the serial number on the back of your instrument.
Osstell Beacon
• To find your registration code, please make sure that you have already installed the Beacon Gateway. If you have not installed it yet, please navigate to your clinic in your account, click the instruments tab and download the gateway. Install it.
• Take your instrument in hand. It is now connecting to OsstellConnect and you should see a symbol animating. Please note that it can take a few seconds.
• When connected, the symbol stops animating.
• The registration code is now displayed on the lower screen of your instrument.
Osstell IDx
• When turning on your Osstell IDx for the first time, you will be prompted to select language, time zone, date and time.
• After that, you will need to set up a 4-digit pin code and a backup password. The backup password is needed when restoring to a backup, so please note it down and save it in a safe place.
• Your registration code is now displayed on your Osstell IDx.
Domande su Osstell Classic
Prima dell’uso su un paziente, applicare una guaina protettiva sullo strumento. La guaina protettiva aiuta a prevenire la contaminazione crociata e impedisce l’adesione di materiale composito dentale alla superficie della punta e del corpo del dispositivo, nonché scolorimenti e degradazione dovuti alle soluzioni di pulizia.
Nota
- Le guaine protettive sono esclusivamente monouso per singolo paziente.
- Smaltire le guaine usate nei rifiuti ordinari dopo ogni paziente.
- Non lasciare le guaine protettive sullo strumento per periodi prolungati.
- Vedere di seguito le guaine protettive consigliate.
- TIDIShield, n. articolo: 20808, n. articolo: 20987. tidiproducts.com
- PremiumPlus: guaina per sensore radiografico 183-2, misura 2
- Lo strumento deve essere pulito con agenti appropriati dopo ogni paziente.
- Una prima misurazione deve essere effettuata al posizionamento dell’impianto per ottenere un valore base di riferimento per le misurazioni future durante la guarigione. Prima del restauro definitivo viene effettuata un’altra misurazione, che consente di osservare lo sviluppo della stabilità implantare.
- Si raccomanda di misurare sia in direzione bucco-linguale sia mesio-distale per individuare la stabilità più bassa. Lo strumento richiede pertanto di eseguire la misurazione in entrambe le direzioni.
- Fare clic qui per vedere un filmato su come eseguire la misurazione.
La stabilità implantare può essere misurata in diverse fasi del trattamento.
In genere viene misurata al momento del posizionamento dell’impianto per stabilire un valore base di riferimento e poi durante la guarigione per monitorare le variazioni di stabilità e l’osteointegrazione. Spesso viene effettuata una misurazione finale prima del carico, a supporto della decisione.
Misurazioni ripetute nel tempo forniscono informazioni preziose, poiché l’andamento dei valori ISQ aiuta a guidare le decisioni cliniche.
Sì, le misurazioni ISQ possono essere eseguite su pazienti portatori di pacemaker.
A scopo precauzionale, la sonda deve essere tenuta lontana dalla zona del torace in cui è posizionato il pacemaker, a causa degli impulsi magnetici emessi durante la misurazione.
Per ulteriori riferimenti, esistono pubblicazioni su pacemaker e campi magnetici.
Prima di ogni utilizzo, inumidire una garza o un panno morbido con un detergente per superfici consigliato (vedere l’elenco seguente) e pulire l’intero strumento.
Detergenti accettabili:
- Alcol isopropilico al 70%
- Detergenti enzimatici a pH neutro e a bassa schiumosità, quali:
- Salviette disinfettanti BePro Disinfectant Wipes, REF 19500102, www.wh.com (ordinabili presso W&H Sterilization)
- Medizime LF
- Enzol
Non utilizzare:
- Detergenti/disinfettanti acidi o a base fenolica
- Detergenti fortemente alcalini di qualsiasi tipo, inclusi saponi per le mani e detersivi per piatti
- Detergenti a base di candeggina
- Detergenti a base di perossido di idrogeno
- Detergenti abrasivi
- Detergenti a base di acetone o idrocarburi
- MEK (metiletilchetone)
- Birex
- Glutaraldeide
- Detergenti a base di sali di cloruro di ammonio quaternario
Lo strumento non richiede manutenzione regolare. In caso di malfunzionamento, contattare il rappresentante commerciale o il distributore locale per ulteriori istruzioni.
Osstell Beacon – 2 anni
W&H Osstell Classic – 1 anno
Prima dell’uso su un paziente, posizionare una guaina protettiva sullo strumento. La guaina protettiva impedisce la contaminazione crociata e aiuta ad evitare che il materiale dentale composito aderisca alla superficie della punta e del corpo dello strumento e che si verifichino scolorimento e degradazione a causa delle soluzioni di pulizia.
Nota
- Le guaine protettive sono esclusivamente monouso.
- Gettare le guaine protettive usate insieme ai rifiuti comuni dopo ogni paziente.
- Non lasciare inserita una guaina protettiva sullo strumento per lunghi periodi di tempo.
- Di seguito sono indicate le guaine protettive consigliate.
- TIDIShield, numero articolo: 20808, numero articolo: 20987. tidiproducts.com
- PremiumPlus: guaina copri sensore per raggi X 183-2, dimensione 2
Lo strumento deve essere pulito con detergenti appropriato dopo ogni paziente.
Una prima misurazione dovrebbe essere effettuata al momento del posizionamento dell’impianto per ottenere un valore di base per le misurazioni future durante il processo di osteointegrazione. Prima della protesi definitiva viene effettuata un’altra misurazione che consente di osservare lo sviluppo della stabilità dell’impianto.
Si raccomanda di eseguire la misurazione in direzione buccale-linguale e mesiale-distale per individuare la stabilità minore. Lo strumento indica infatti all’utente di eseguire la misurazione in entrambe le direzioni.
Fai clic qui per aprire un filmato che spiega come eseguire la misurazione.
Prima di ogni utilizzo, inumidire una garza o un panno morbido con un detergente per superfici raccomandato (vedere l’elenco sottostante) e strofinare l’intero strumento.
Detergenti accettabili:
- Alcol isopropilico al 70%
- Detergenti enzimatici a bassa formazione di schiuma, a pH neutro quali:
- BePro Disinfectant Wipes, REF 19500102, www.wh.com (possono essere ordinate da W&H Sterilization)
- Medizime LF
- Enzol
Non utilizzare:
- Detergenti/disinfettanti a base di acidi o fenoli
- Qualsiasi detergente alcalino forte, inclusi saponi per le mani e per i piatti
- Detergenti a base di candeggina
- Detergenti a base di perossido di idrogeno
- Detergenti abrasivi
- Detergenti a base di acetone o idrocarburi
- MEK (metiletilchetone)
- Birex
- Gluteraldeide
- Detergenti a base di cloruro d’ammonio quaternario
Lo strumento non necessita di manutenzione regolare. In caso di malfunzionamento dello strumento, contattare il proprio rappresentante commerciale o distributore locale per ricevere assistenza.
You can record ISQ at abutment level in OsstellConnect, but it is important to follow the correct clinical measurement procedure to obtain accurate values.
How to measure ISQ at abutment level
- Perform an implant level measurement first, before placing the abutment.
- Measure again at abutment level during the same session, using a SmartPeg made for abutment level measuring.
- Determine the offset by noting the difference between implant level and abutment level ISQ. This offset remains stable throughout healing and should be used when interpreting follow-up measurements.
- For all subsequent visits, measure on the abutment and apply the same offset to understand the true implant ISQ.
How to record the measurement in OsstellConnect:
- Go to the patient’s register, select the patient and the implant in the tooth chart. Click ‘Add abutment’, choose the abutment, and save.
- Select ‘Measure stability’ and choose ‘Abutment’ under Measurement level. Measure on the abutment as you would at implant level and save.
- To review the stability trend, open the Stability tab and toggle ‘Show abutment’. You can also enable ‘Show details’ to view buccal–lingual and mesial–distal ISQ values.
For a more detailed explanation and clinical guidance, see our blog post here.
You can find the serial number on the back of your instrument.
Alcune spiegazioni possibili includono:
Riutilizzo degli SmartPeg: Gli SmartPeg sono monouso e devono essere utilizzati per eseguire una o più misurazioni in una sessione di trattamento e su un solo paziente. Riutilizzarli in modo ripetuto può provocare letture errate a causa dell’usura delle filettature degli SmartPeg in alluminio morbido.
Tipo errato di SmartPeg selezionato per l’impianto: Consultare l’elenco di riferimento degli SmartPeg alla pagina osstell.com/smartpegguide
Presenza di tessuto osseo o tessuto molle tra SmartPeg e impianto: Assicurarsi di pulire l’innesto protesico dell’impianto prima di collegare lo SmartPeg.
Interferenze elettromagnetiche: Rimuovere la fonte di interferenze elettromagnetiche.
La sonda è tenuta troppo lontana dallo SmartPeg: Tenere la sonda a una distanza di 2-4 mm dallo SmartPeg.
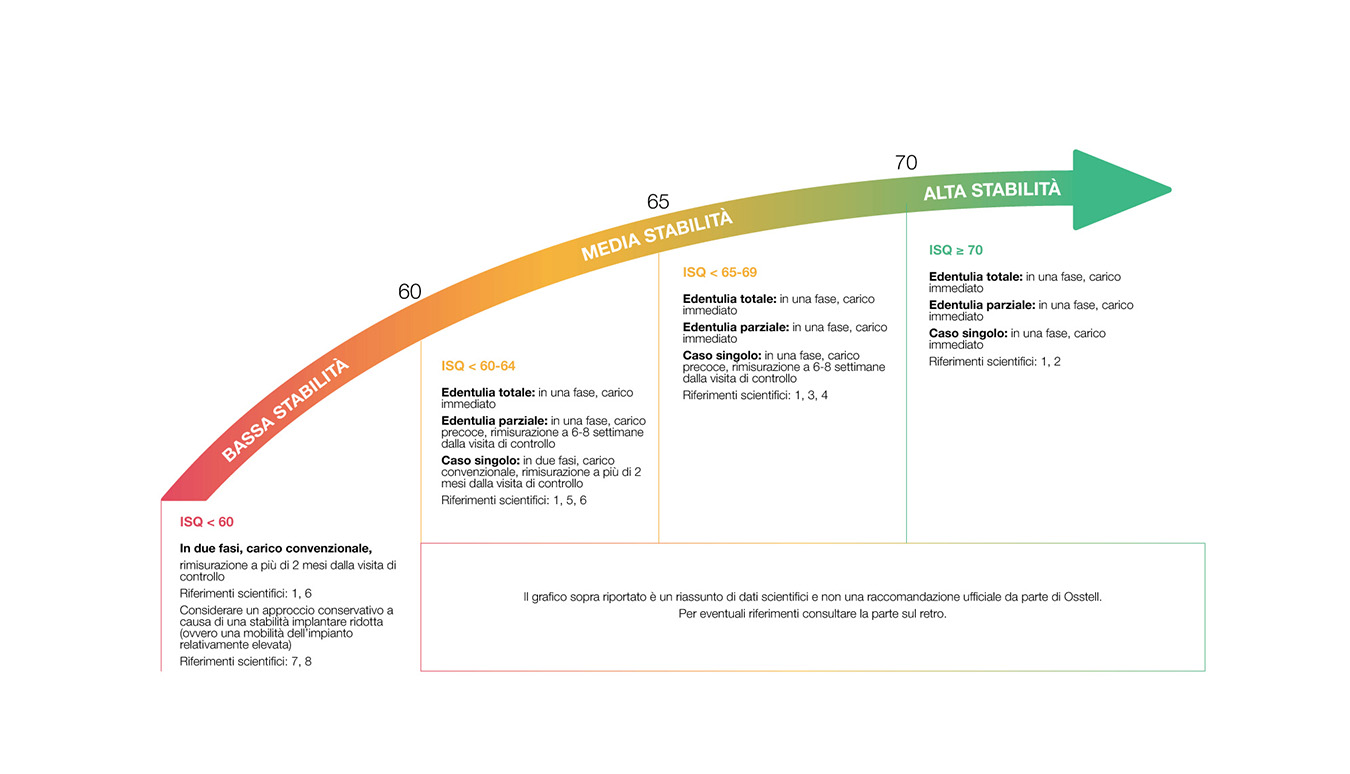
ISQ should always be measured in two directions, because implant stability can vary depending on the amount of surrounding bone in different directions. Measuring from two angles ensures that both the most and the least stable directions are captured.
To do this, take one measurement in the buccal-lingual direction and one in the mesial-distal direction. These two ISQ values represent the different stability directions. Sometimes the values are identical; sometimes they differ.
If the two measurements differ, always rely on the lowest ISQ value, as it reflects the weakest direction and therefore provides the most clinically relevant information about implant stability.
There are currently thousands of articles where Osstell devices were used in the study, published in scientific papers. These abstracts could be found in our searchable database under “Resources/Scientific database“.
The Osstell ISQ scale is based on outcomes from these studies, all performed using Osstell instruments and aluminium SmartPegs.
Osstell measures implant stability using Resonance Frequency Analysis (RFA). The small SmartPeg that you attach to the implant has a tiny magnet on top. When the probe sends magnetic pulses, the SmartPeg starts to vibrate – similar to a very small tuning fork.
How it works:
- The instrument tip sends magnetic pulses
These pulses make the SmartPeg vibrate without touching it. - The vibration changes depending on how stable the implant is
– A stable implant (good bone support) makes the SmartPeg vibrate faster.
– A less stable implant makes it vibrate slower. - The device converts this vibration into an ISQ value
– Higher stability → higher frequency → higher ISQ
– Lower stability → lower frequency → lower ISQ
It takes less than a second, and the ISQ value is shown immediately.
If no ISQ value appears, it usually means the SmartPeg’s vibration is not being detected clearly by the instrument. Several factors can cause this, and most are easy to resolve:
- Distance to instrument is too great
The instrument should normally be held 2–4 mm from the magnet on top of the SmartPeg. Do not touch the magnet. If no value appears, move the instrument closer until the signal is detected. - Angle needs adjustment
The magnetic field is directional, so the orientation of the instrument matters. Measurements should be taken at approximately a 45° angle relative to the top of the SmartPeg. - Ensure you have the correct SmartPeg Type for the specific implant
Use this link to find the correct SmartPeg Type: Find my SmartPeg - Soft tissue damping
Surrounding tissue can sometimes dampen the vibration more than expected. Holding the instrument a bit closer usually compensates for this. - The implant platform is not clean
Ensure the implant platform is clean and free of debris, so the SmartPeg seats properly and transmits its vibration. - The SmartPeg is worn or damaged
• If you are using a reusable SmartPeg, make sure it has been inspected before use and that it is within 20 reprocessing cycles. A reusable SmartPeg that is worn out, bent, or has damaged threads will not vibrate correctly — and the instrument may not be able to pick up a reading.
• A single‑use SmartPeg is intended for one treatment session only.
• Ensure the SmartPeg is properly seated on the implant and that it is not in contact with surrounding tissue, as this can prevent accurate signal detection and may result in no ISQ value or an incorrect one. - Electromagnetic interference
Strong electromagnetic noise sources nearby may disturb the measurement. (See the FAQ on “Electromagnetic noise” for details.)

No. The Osstell measurement does not affect the implant. The instrument only makes the SmartPeg vibrate. The SmartPeg’s magnet is activated by very low energy magnetic pulses generated by the instrument. The technique is objective, gentle, and highly repeatable
Yes, ISQ measurements can be performed on patients with a pacemaker.
As a precaution, the probe should be kept away from the chest area where the pacemaker is located, due to the magnetic pulses emitted during measurement.
There are published reports regarding pacemakers and magnetic fields for further reference.
Implant stability can be measured at different stages of treatment.
It is typically measured at implant placement to establish a baseline, and then during healing to monitor changes in stability and osseointegration. A final measurement is often taken before loading to support the decision.
Repeated measurements over time provide valuable information, as the trend in ISQ values helps guide clinical decisions.
Domande su Osstell e sulla scala ISQ
ISQ e BIC misurano aspetti diversi dell’integrazione implantare.
BIC (bone-to-implant contact, contatto osso-impianto) descrive la percentuale della superficie implantare a contatto con l’osso a livello microscopico, mentre ISQ riflette la stabilità implantare misurando la rigidità dell’interfaccia osso-impianto.
Di conseguenza, un BIC elevato non significa sempre stabilità elevata, poiché anche qualità e rigidità dell’osso svolgono un ruolo fondamentale.
Per una spiegazione più dettagliata, vedere: How ISQ correlates to torque
Il torque è una misurazione statica, effettuata una sola volta al momento del posizionamento dell’impianto, e non può essere ripetuta in seguito senza mettere a rischio l’osteointegrazione dell’impianto. Riflette l’attrito rotazionale tra la superficie dell’impianto e l’osso, anziché la stabilità laterale dell’impianto.
La misurazione della stabilità implantare con gli strumenti Osstell valuta la stabilità laterale dell’impianto. Le misurazioni sono senza contatto e possono essere ripetute nel tempo per monitorare lo sviluppo dell’osteointegrazione.
Non esiste un unico valore ISQ che determini l’idoneità al carico immediato. Oltre al valore ISQ, la decisione dipende dalla stabilità primaria, dal giudizio clinico e dai fattori di rischio specifici del paziente.
Come indicazione generale, valori ISQ più elevati indicano maggiore stabilità e valori pari o superiori a circa 70 possono supportare il carico immediato in casi appropriati.
Per indicazioni sull’interpretazione dei valori ISQ, consultare la scala ISQ Osstell.
Non esiste un unico valore ISQ che determini quando un impianto può essere caricato. La decisione dipende dalla stabilità nel tempo (l’andamento dell’ISQ), nonché dal giudizio clinico e dai fattori di rischio specifici del paziente.
Come indicazione generale, valori ISQ più elevati offrono maggiore affidabilità e valori pari o superiori a circa 70 sono spesso considerati adatti per il carico di impianti non solidarizzati. Per restauri solidarizzati possono essere accettabili valori inferiori.
Per indicazioni sull’interpretazione dei valori ISQ, consultare la scala ISQ Osstell.
ISQ (Implant Stability Quotient) è un valore numerico da 1 a 99 che descrive la stabilità implantare. Viene calcolato dalla frequenza di risonanza misurata quando lo strumento Osstell invia un impulso magnetico a uno SmartPeg collegato all’impianto, traducendola in un valore clinicamente intuitivo.
ISQ significa Implant Stability Quotient e deriva dagli Hertz, poiché la tecnica utilizzata è l’Analisi della Frequenza di Risonanza (RFA). La scala in Hertz non è intuitiva né facile da comunicare, perciò oltre 20 anni fa è stata tradotta in una scala ISQ da 1 a 99. Oggi sappiamo che la scala correla con la micromobilità: una stabilità elevata corrisponde a > 70 ISQ, tra 60 e 69 a stabilità media e < 60 ISQ è considerata bassa stabilità.
Comprendere l’osteointegrazione in ambito odontoiatrico
Implant stability can be measured at different stages of treatment.
It is typically measured at implant placement to establish a baseline, and then during healing to monitor changes in stability and osseointegration. A final measurement is often taken before loading to support the decision.
Repeated measurements over time provide valuable information, as the trend in ISQ values helps guide clinical decisions.
Domande su Osstell IDx
Scegliere il dente sul touch screen e iniziare a misurare.
Con un uso normale, le batterie durano almeno un giorno e nella maggior parte dei casi più a lungo. Per ricaricare IDx da completamente scarico occorrono circa 2 ore.
Sì, OsstellConnect è accessibile tramite iPhone, iPad, Mac o PC.
Hai registrato il dispositivo? Osstell IDx può essere utilizzato senza registrazione solo per un periodo limitato.
I dati del paziente possono essere salvati nel dispositivo oppure su OsstellConnect.
Un avviso di rumore elettromagnetico indica la presenza di un disturbo magnetico esterno o interno che può influire sulla misurazione.
Può verificarsi a causa di apparecchiature elettroniche vicine oppure se la sonda viene tenuta molto vicino al dispositivo stesso.
Per abilitare il backup automatico di Osstell IDx, verrà chiesto di creare un codice di backup di 8 caratteri. Il backup serve a ripristinare l’unità nel caso in cui si eliminino per errore dei pazienti o si perda lo strumento. Il codice viene creato durante la procedura di registrazione e deve essere inserito una sola volta. Per poter accedere al backup in futuro, è MOLTO importante annotare il codice e conservarlo in un luogo sicuro.
Il backup può essere eseguito anche via USB senza un codice.
Registrare IDx seguendo le istruzioni sul dispositivo oppure questo link.
IDx continua a consumare una piccola quantità di energia anche quando è spento. Se la batteria si scarica completamente (0%), le impostazioni memorizzate di data e ora vengono perse.
Quando ciò accade, all’avvio verrà richiesto di impostare nuovamente data e ora.
Se IDx è connesso a Internet, data e ora verranno impostate automaticamente.
Due anni.
Accedere alla propria clinica nella sezione account. Selezionare la scheda Instruments. Fare clic su Download firmware.
Istruzioni per il download:
- Attendere il completamento del download (potrebbe richiedere tempo a seconda della connessione)
- Copiare il file binario .m2f su una chiavetta USB
- Inserire la chiavetta USB in IDx mentre è acceso
- Seguire le istruzioni sul display di IDx
Nota: non è possibile aprire o visualizzare il file .m2f.
È inoltre possibile consultare questa guida.
Osstell Beacon
- Per trovare il codice di registrazione, assicurarsi di avere già installato Beacon Gateway. In caso contrario, accedere alla propria clinica nell’account, fare clic sulla scheda Instruments e scaricare il gateway. Installarlo.
- Prendere in mano lo strumento. Si sta connettendo a OsstellConnect e dovrebbe comparire un simbolo animato. Tenere presente che potrebbero essere necessari alcuni secondi.
- Una volta connesso, il simbolo smette di animarsi.
- Il codice di registrazione viene ora visualizzato sul display inferiore dello strumento.
Osstell IDx
- Alla prima accensione di Osstell IDx verrà chiesto di selezionare lingua, fuso orario, data e ora.
- Successivamente sarà necessario impostare un codice PIN di 4 cifre e una password di backup. La password di backup è necessaria per il ripristino da un backup: annotarla e conservarla in un luogo sicuro.
- Il codice di registrazione viene ora visualizzato su Osstell IDx.
You can record ISQ at abutment level in OsstellConnect, but it is important to follow the correct clinical measurement procedure to obtain accurate values.
How to measure ISQ at abutment level
- Perform an implant level measurement first, before placing the abutment.
- Measure again at abutment level during the same session, using a SmartPeg made for abutment level measuring.
- Determine the offset by noting the difference between implant level and abutment level ISQ. This offset remains stable throughout healing and should be used when interpreting follow-up measurements.
- For all subsequent visits, measure on the abutment and apply the same offset to understand the true implant ISQ.
How to record the measurement in OsstellConnect:
- Go to the patient’s register, select the patient and the implant in the tooth chart. Click ‘Add abutment’, choose the abutment, and save.
- Select ‘Measure stability’ and choose ‘Abutment’ under Measurement level. Measure on the abutment as you would at implant level and save.
- To review the stability trend, open the Stability tab and toggle ‘Show abutment’. You can also enable ‘Show details’ to view buccal–lingual and mesial–distal ISQ values.
For a more detailed explanation and clinical guidance, see our blog post here.
The data in your Osstell IDx is automatically uploaded to your OsstellConnect account if it is connected to the internet. To connect your device to the internet, please follow the instructions here.
Please note that you can also create backups, for example on a USB stick. Please follow the instructions here.
Navigate to your clinic in your account. Select the instrument tab. Click on Download firmware.
Download instructions:
• Wait for the download to complete (could take a while depending on your connection)
• Copy the .m2f binary file to a USB memory stick
• Insert the memory stick in your IDx while it is running
• Follow instructions on the IDx display
Note: you cannot open or view the .m2f file
You can also check this guide
Osstell Beacon
• To find your registration code, please make sure that you have already installed the Beacon Gateway. If you have not installed it yet, please navigate to your clinic in your account, click the instruments tab and download the gateway. Install it.
• Take your instrument in hand. It is now connecting to OsstellConnect and you should see a symbol animating. Please note that it can take a few seconds.
• When connected, the symbol stops animating.
• The registration code is now displayed on the lower screen of your instrument.
Osstell IDx
• When turning on your Osstell IDx for the first time, you will be prompted to select language, time zone, date and time.
• After that, you will need to set up a 4-digit pin code and a backup password. The backup password is needed when restoring to a backup, so please note it down and save it in a safe place.
• Your registration code is now displayed on your Osstell IDx.
Two years.
The IDx continues to consume a small amount of power even when switched off. If the battery becomes fully depleted (0%), the stored date and time settings will be lost.
When this happens, you will be prompted to set the date and time again at start-up.
If your IDx is connected to the internet, the date and time will be set automatically.
An electromagnetic noise warning indicates the presence of an external or internal magnetic disturbance that may affect the measurement.
This can occur due to nearby electronic equipment, or if the probe is held very close to the instrument itself.
ISQ should always be measured in two directions, because implant stability can vary depending on the amount of surrounding bone in different directions. Measuring from two angles ensures that both the most and the least stable directions are captured.
To do this, take one measurement in the buccal-lingual direction and one in the mesial-distal direction. These two ISQ values represent the different stability directions. Sometimes the values are identical; sometimes they differ.
If the two measurements differ, always rely on the lowest ISQ value, as it reflects the weakest direction and therefore provides the most clinically relevant information about implant stability.
Register your IDx by following the instructions in the device or by following this link.
Osstell measures implant stability using Resonance Frequency Analysis (RFA). The small SmartPeg that you attach to the implant has a tiny magnet on top. When the probe sends magnetic pulses, the SmartPeg starts to vibrate – similar to a very small tuning fork.
How it works:
- The instrument tip sends magnetic pulses
These pulses make the SmartPeg vibrate without touching it. - The vibration changes depending on how stable the implant is
– A stable implant (good bone support) makes the SmartPeg vibrate faster.
– A less stable implant makes it vibrate slower. - The device converts this vibration into an ISQ value
– Higher stability → higher frequency → higher ISQ
– Lower stability → lower frequency → lower ISQ
It takes less than a second, and the ISQ value is shown immediately.
For normal use, the batteries last for at least one day but in most cases longer. It takes about 2 hours to charge the IDx from a fully discharged state.
Choose a tooth position on the touch screen and start measuring.
No. The Osstell measurement does not affect the implant. The instrument only makes the SmartPeg vibrate. The SmartPeg’s magnet is activated by very low energy magnetic pulses generated by the instrument. The technique is objective, gentle, and highly repeatable
Perform measurements, press End patient, and then save as Add new patient.
Simply select the pen symbol in the patient list to edit.
The patient data can be saved either in the instrument or in OsstellConnect.
Values can only be removed before saving clicking on the trash bin symbol. After saving the data cannot be modified.
Yes, OsstellConnect is accessible via iPhone, iPad, Mac or PC.
Have you registered your device? You can only use the Osstell IDx for a limited time without registration.
The following products may be autoclaved (over-pressurized steam up to 135 deg Celsius):
- SmartPeg Mount
- Reusable SmartPeg
- Probe (IDx)
Please note that single-use SmartPegs are disposable and cannot be autoclaved!
Yes, ISQ measurements can be performed on patients with a pacemaker.
As a precaution, the probe should be kept away from the chest area where the pacemaker is located, due to the magnetic pulses emitted during measurement.
There are published reports regarding pacemakers and magnetic fields for further reference.
To enable automatic backup of your Osstell IDx, you will be asked to create a backup code made up of 8 characters. The purpose of the backup is to reset the unit if you for some reason remove patients by mistake or lose your instrument. The code is created during the registration process and you only have to enter it once. To make sure you can access your backup at a later date, it is VERY important that you write this code down and keep it in a safe place.
Backup can also be done via USB without a code.
Questions about Osstell and the ISQ scale
ISQ stands for Implant Stability Quotient and is a recalculated value derived from the resonance frequency (Hz) measured using Resonance Frequency Analysis (RFA). The scale in Hertz is non-intuitive and hard to communicate so it was translated to a scale of ISQ 1-99, more than 20 years ago. Today we know that the scale correlates to micro mobility and that high stability means > 70 ISQ, between 60-69 is medium stability and < 60 ISQ is considered as low stability.
ISQ (Implant Stability Quotient) is a numerical value from 1 to 99 that describes implant stability. It is calculated from the resonance frequency measured when the Osstell instrument sends a magnetic pulse to a SmartPeg attached to the implant, translating this into a clinically intuitive value.

There is no single ISQ value that determines when an implant can be loaded. The decision depends on the stability over time (the ISQ trend), as well as clinical judgement and patient-specific risk factors.
As a general guideline, higher ISQ values provide greater confidence, and values around 70 or above are often considered suitable for loading non-splinted implants. For splinted restorations, lower values may be acceptable.
For guidance on how to interpret ISQ values, see the Osstell ISQ Scale.
ISQ should always be measured in two directions, because implant stability can vary depending on the amount of surrounding bone in different directions. Measuring from two angles ensures that both the most and the least stable directions are captured.
To do this, take one measurement in the buccal-lingual direction and one in the mesial-distal direction. These two ISQ values represent the different stability directions. Sometimes the values are identical; sometimes they differ.
If the two measurements differ, always rely on the lowest ISQ value, as it reflects the weakest direction and therefore provides the most clinically relevant information about implant stability.
There is no single ISQ value that determines suitability for immediate loading. In addition to the ISQ value, the decision depends on primary stability, clinical judgement, and patient-specific risk factors.
As a general guide, higher ISQ values indicate greater stability, and values around 70 or above may support immediate loading in appropriate cases.
For guidance on interpreting ISQ values, see the Osstell ISQ Scale.
There are currently thousands of articles where Osstell devices were used in the study, published in scientific papers. These abstracts could be found in our searchable database under “Resources/Scientific database“.
The Osstell ISQ scale is based on outcomes from these studies, all performed using Osstell instruments and aluminium SmartPegs.
Osstell measures the lateral stability of the implant and thereby indirectly the degree of osseointegration. The results are presented as an ISQ, ranging from 1-99 ISQ, which correlates to micro mobility.
Osstell measures implant stability using Resonance Frequency Analysis (RFA). The small SmartPeg that you attach to the implant has a tiny magnet on top. When the probe sends magnetic pulses, the SmartPeg starts to vibrate – similar to a very small tuning fork.
How it works:
- The instrument tip sends magnetic pulses
These pulses make the SmartPeg vibrate without touching it. - The vibration changes depending on how stable the implant is
– A stable implant (good bone support) makes the SmartPeg vibrate faster.
– A less stable implant makes it vibrate slower. - The device converts this vibration into an ISQ value
– Higher stability → higher frequency → higher ISQ
– Lower stability → lower frequency → lower ISQ
It takes less than a second, and the ISQ value is shown immediately.
Periotest (DCA) measurements are designed for natural teeth, which are connected to the bone via the periodontal ligament. In contrast, dental implants are anchored directly to the bone without a periodontal ligament.
RFA measurements using Osstell instruments assess implant stability by measuring the stiffness of the bone–implant interface. They provide an objective and repeatable value on a more sensitive scale, supporting reliable assessment over time.
Torque is a one-time, static measurement taken at implant placement and cannot be repeated later without risking the implant’s osseointegration. It reflects the rotational friction between the implant surface and the bone, rather than the lateral stability of the implant.
Measuring implant stability with Osstell instruments assesses the lateral stability of the implant. These measurements are contact-free and can be repeated over time to monitor the development of osseointegration.
ISQ and BIC measure different aspects of implant integration.
BIC (bone-to-implant contact) describes the percentage of the implant surface in contact with bone at a microscopic level, while ISQ reflects implant stability by measuring the stiffness of the bone–implant interface.
As a result, high BIC does not always mean high stability, as bone quality and stiffness also play a key role.
For a more detailed explanation, see: How ISQ correlates to torque
Yes. The ISQ value can be affected if the SmartPeg is not mounted correctly.
For accurate measurements, the SmartPeg should be attached finger tight using the SmartPeg Mount, which corresponds to about 4–6 Ncm.
At this level, the SmartPeg has firm, stable contact with the implant, and the resulting ISQ value is consistent – typically within ±2 ISQ units.
- If the SmartPeg is not fully seated:
The contact becomes unstable, and the ISQ value can appear artificially low, or you don’t receive any value. - If too much force is applied:
Overtightening does not improve accuracy. It may damage the SmartPeg threads.
– A reusable SmartPeg may be damaged so it cannot be used again.
– A single use or reusable SmartPeg may have its threads deformed, which can lead to inaccurate measurements during that session or, in worst case a broken SmartPeg.
In short: finger tight (4–5 Ncm) is enough to ensure stable contact and reliable ISQ readings.
If no ISQ value appears, it usually means the SmartPeg’s vibration is not being detected clearly by the instrument. Several factors can cause this, and most are easy to resolve:
- Distance to instrument is too great
The instrument should normally be held 2–4 mm from the magnet on top of the SmartPeg. Do not touch the magnet. If no value appears, move the instrument closer until the signal is detected. - Angle needs adjustment
The magnetic field is directional, so the orientation of the instrument matters. Measurements should be taken at approximately a 45° angle relative to the top of the SmartPeg. - Ensure you have the correct SmartPeg Type for the specific implant
Use this link to find the correct SmartPeg Type: Find my SmartPeg - Soft tissue damping
Surrounding tissue can sometimes dampen the vibration more than expected. Holding the instrument a bit closer usually compensates for this. - The implant platform is not clean
Ensure the implant platform is clean and free of debris, so the SmartPeg seats properly and transmits its vibration. - The SmartPeg is worn or damaged
• If you are using a reusable SmartPeg, make sure it has been inspected before use and that it is within 20 reprocessing cycles. A reusable SmartPeg that is worn out, bent, or has damaged threads will not vibrate correctly — and the instrument may not be able to pick up a reading.
• A single‑use SmartPeg is intended for one treatment session only.
• Ensure the SmartPeg is properly seated on the implant and that it is not in contact with surrounding tissue, as this can prevent accurate signal detection and may result in no ISQ value or an incorrect one. - Electromagnetic interference
Strong electromagnetic noise sources nearby may disturb the measurement. (See the FAQ on “Electromagnetic noise” for details.)

Clinically, the lowest ISQ values typically seen are around 40.
If the stability is below 30, the implant is generally considered to have very low stability or to be loose. It may also indicate that the SmartPeg is not correctly mounted on the implant.
Very low values (below 20) are rarely seen in clinical situations and are more commonly observed in laboratory models with artificially low stability.
Implant stability can be measured at different stages of treatment.
It is typically measured at implant placement to establish a baseline, and then during healing to monitor changes in stability and osseointegration. A final measurement is often taken before loading to support the decision.
Repeated measurements over time provide valuable information, as the trend in ISQ values helps guide clinical decisions.