Support
Perguntas frequentes
Saiba mais sobre nossos produtos, a escala ISQ e como usá-la, o OsstellConnect,a tecnologia Osstell, e muito mais.
Perguntas sobre o OsstellConnect
You can record ISQ at abutment level in OsstellConnect, but it is important to follow the correct clinical measurement procedure to obtain accurate values.
How to measure ISQ at abutment level
- Perform an implant level measurement first, before placing the abutment.
- Measure again at abutment level during the same session, using a SmartPeg made for abutment level measuring.
- Determine the offset by noting the difference between implant level and abutment level ISQ. This offset remains stable throughout healing and should be used when interpreting follow-up measurements.
- For all subsequent visits, measure on the abutment and apply the same offset to understand the true implant ISQ.
How to record the measurement in OsstellConnect:
- Go to the patient’s register, select the patient and the implant in the tooth chart. Click ‘Add abutment’, choose the abutment, and save.
- Select ‘Measure stability’ and choose ‘Abutment’ under Measurement level. Measure on the abutment as you would at implant level and save.
- To review the stability trend, open the Stability tab and toggle ‘Show abutment’. You can also enable ‘Show details’ to view buccal–lingual and mesial–distal ISQ values.
For a more detailed explanation and clinical guidance, see our blog post here.
• To document an implant failure, go to your patients records. Select the patient, then select the tooth. Click ‘Mark as failed’. Choose the type of failure (early or late failure), fill in the failure date. Choose the reason for failure. Click ‘Mark as failed’.
• You can access the history of the implant failure by navigating to the history tab. Click the tab ‘Failed’ to see all information related to the treatment and the failure.
• A history symbol is displayed on the tooth with a failed implant.
Os dados do seu Osstell IDx são enviados automaticamente para sua conta do OsstellConnect, desde que o equipamento esteja conectado à internet. Para conectar seu dispositivo à Internet, siga as instruções aqui.
Observe que você também pode criar backups, por exemplo, em um pendrive. Siga as instruções aqui.
Antes de começar, certifique-se de que já instalou o Beacon Gateway. Se você ainda não o instalou, navegue até sua clínica em sua conta, clique na guia instrumentos e baixe o gateway. Instale-o.
- Conecte a Osstell Key a uma porta USB do seu computador.
- Pegue seu instrumento na mão. Ele agora está se conectando ao OsstellConnect e você deverá ver o seguinte símbolo animado. Observe que pode levar alguns segundos.
- Quando a conexão for estabelecida, o símbolo deixará de ser animado.
- Acesse seus registros de pacientes.
- Se for a primeira medição, crie um paciente. Preencha os dados do paciente e salve. Clique em Novo tratamento e preencha as informações do tratamento. Clique em Adicionar implante, preencha os dados do implante e salve. Clique em Meça a estabilidade.
- Se for uma medição de acompanhamento, selecione o paciente e, em seguida, o dente na tabela de dentes. Clique em Meça a estabilidade.
- Meça na direção bucal-lingual. O valor ISQ está aparecendo agora no OsstellConnect.
- Meça na direção mesial-distal. O valor ISQ está aparecendo agora no OsstellConnect.
- Preencha as informações sobre o tratamento e salve.
Yes, simply navigate to your patient records. Select the patient. Select the implant. Go to the stability tab. Click on the edit icon by the measurement you would like to delete. Click delete. Please note that the measurement will be permanently removed from the patient chart.
Yes, simply navigate to your patient records. Select the patient you would like to delete. Click delete in the upper right corner. Confirm that you want to delete the patient and all data. Please note that it will be permanently removed from your account.
Sim, você pode exportar todos os seus dados para um arquivo Excel para análise posterior. Basta acessar os seus registros de pacientes e clicar em exportar CSV. O arquivo aparecerá em seus downloads.
Certifique-se de que todos os dados exportados sejam tratados em conformidade com os regulamentos de proteção de dados aplicáveis, como o GDPR ou a HIPAA.
Yes, simply navigate to your patient records. Select the patient. Select the implant you want to edit on the tooth chart. Select the tab ‘Implant & abutment’. Click on the pen icon to edit. Edit implant data. Save.
Simply navigate to your patient records. Select the patient. Click ‘edit’ on the top right corner. Edit the data and save.
You can find the serial number on the back of your instrument.
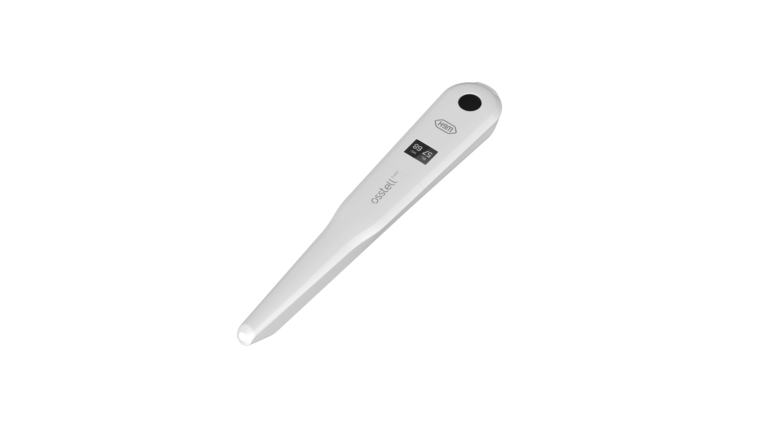
Osstell Beacon
• To find your registration code, please make sure that you have already installed the Beacon Gateway. If you have not installed it yet, please navigate to your clinic in your account, click the instruments tab and download the gateway. Install it.
• Take your instrument in hand. It is now connecting to OsstellConnect and you should see a symbol animating. Please note that it can take a few seconds.
• When connected, the symbol stops animating.
• The registration code is now displayed on the lower screen of your instrument.
Osstell IDx
• When turning on your Osstell IDx for the first time, you will be prompted to select language, time zone, date and time.
• After that, you will need to set up a 4-digit pin code and a backup password. The backup password is needed when restoring to a backup, so please note it down and save it in a safe place.
• Your registration code is now displayed on your Osstell IDx.
Questions about Smartpegs
Yes, it can be sterilised with a Prion cycle at 134 °C for 18 minutes.
Whether you are using a single-use or a reusable SmartPeg, it should always be installed using the SmartPeg Mount and tightened to approximately 4–6 Ncm – typically described as finger tight. This ensures proper seating and accurate ISQ measurements without risking damage to the implant or the SmartPeg.
Yes. You can mix single-use and reusable SmartPegs during the same treatment session. The only requirement is that you use the correct SmartPeg Type number for the specific implant or abutment you are measuring.
Whether the SmartPeg is single-use or reusable does not affect the measurement.
Yes, as long as its integrity and performance are maintained.
Osstell is also the only company offering both a sterile single-use and a reusable SmartPeg made of aluminium, supported by more than 1,500 published studies on the ISQ method.
With the Osstell original ISQ scale and SmartPegs, no conversion tables or correction factors are needed. The measured ISQ value is the true value, regardless of whether you use a single use or a reusable SmartPeg.
SmartPegs are supplied in different packaging formats depending on whether they are single-use or reusable:
Single-use SmartPegs
- Delivered sterile.
- Supplied in boxes of 5 pieces, in a single sterile barrier system with protective outer packaging.
- Intended for one treatment session only and must not be reused.
Reusable SmartPegs
- Delivered nonsterile in individual packaging.
- Must be cleaned, disinfected and sterilized before the first clinical use and after every subsequent use. (See quickguide at osstell/ifu).
SmartPeg Mount
- Delivered nonsterile with the instrument.
- Can be purchased separately, in package of 5.
- Must also be cleaned, disinfected and sterilized before use and between patients. (See quickguide at osstell/ifu).
Yes. The reusable and single use SmartPegs are designed so they can be easily distinguished visually:
- The single-use SmartPeg is supplied sterile, has an aluminium coloured (non coloured) magnet, and does not include any laser marked identifiers on the body.
- The reusable SmartPeg has a black magnet on top and carries laser marked Type and LOT numbers on the body for identification and traceability.

The reusable SmartPeg can be used for up to 20 reprocessing cycles, as long as its integrity and performance are maintained.
If inspection reveals wear, deformation, corrosion, damaged threads, or any loss of functional compatibility, the SmartPeg must be discarded, even if it has been processed fewer than 20 times.
The single-use SmartPeg is intended for one treatment session only and must not be reprocessed.
The reusable SmartPeg is engineered with special protective surface coating – one on the SmartPeg body and another black protective coating on the magnet. These coatings provide resistance to moisture, cleaning chemicals, wear, and corrosion, ensuring that the SmartPeg maintains its performance throughout the validated number of reprocessing cycles.
The reusable SmartPeg can easily be distinguished from the single use version: it has a black magnet, and its LOT and Type number are laser marked on the body for clear identification.
Prior to the first clinical use, and after each use the reusable products must be cleaned, disinfected and sterilized according to the instructions in the quickguide that is found here: Osstell/ifu
You can record ISQ at abutment level in OsstellConnect, but it is important to follow the correct clinical measurement procedure to obtain accurate values.
How to measure ISQ at abutment level
- Perform an implant level measurement first, before placing the abutment.
- Measure again at abutment level during the same session, using a SmartPeg made for abutment level measuring.
- Determine the offset by noting the difference between implant level and abutment level ISQ. This offset remains stable throughout healing and should be used when interpreting follow-up measurements.
- For all subsequent visits, measure on the abutment and apply the same offset to understand the true implant ISQ.
How to record the measurement in OsstellConnect:
- Go to the patient’s register, select the patient and the implant in the tooth chart. Click ‘Add abutment’, choose the abutment, and save.
- Select ‘Measure stability’ and choose ‘Abutment’ under Measurement level. Measure on the abutment as you would at implant level and save.
- To review the stability trend, open the Stability tab and toggle ‘Show abutment’. You can also enable ‘Show details’ to view buccal–lingual and mesial–distal ISQ values.
For a more detailed explanation and clinical guidance, see our blog post here.
ISQ should always be measured in two directions, because implant stability can vary depending on the amount of surrounding bone in different directions. Measuring from two angles ensures that both the most and the least stable directions are captured.
To do this, take one measurement in the buccal-lingual direction and one in the mesial-distal direction. These two ISQ values represent the different stability directions. Sometimes the values are identical; sometimes they differ.
If the two measurements differ, always rely on the lowest ISQ value, as it reflects the weakest direction and therefore provides the most clinically relevant information about implant stability.
No. A torque device should not be used to tighten the SmartPeg.
SmartPegs should always be mounted using the SmartPeg Mount and tightened to approximately 4–6 Ncm, which is typically described as finger tight.
This ensures the SmartPeg is seated correctly without risking damage to the implant connection.
Osstell measures implant stability using Resonance Frequency Analysis (RFA). The small SmartPeg that you attach to the implant has a tiny magnet on top. When the probe sends magnetic pulses, the SmartPeg starts to vibrate – similar to a very small tuning fork.
How it works:
- The instrument tip sends magnetic pulses
These pulses make the SmartPeg vibrate without touching it. - The vibration changes depending on how stable the implant is
– A stable implant (good bone support) makes the SmartPeg vibrate faster.
– A less stable implant makes it vibrate slower. - The device converts this vibration into an ISQ value
– Higher stability → higher frequency → higher ISQ
– Lower stability → lower frequency → lower ISQ
It takes less than a second, and the ISQ value is shown immediately.
Yes. The ISQ value can be affected if the SmartPeg is not mounted correctly.
For accurate measurements, the SmartPeg should be attached finger tight using the SmartPeg Mount, which corresponds to about 4–6 Ncm.
At this level, the SmartPeg has firm, stable contact with the implant, and the resulting ISQ value is consistent – typically within ±2 ISQ units.
- If the SmartPeg is not fully seated:
The contact becomes unstable, and the ISQ value can appear artificially low, or you don’t receive any value. - If too much force is applied:
Overtightening does not improve accuracy. It may damage the SmartPeg threads.
– A reusable SmartPeg may be damaged so it cannot be used again.
– A single use or reusable SmartPeg may have its threads deformed, which can lead to inaccurate measurements during that session or, in worst case a broken SmartPeg.
In short: finger tight (4–5 Ncm) is enough to ensure stable contact and reliable ISQ readings.
The following products may be autoclaved (over-pressurized steam up to 135 deg Celsius):
- SmartPeg Mount
- Reusable SmartPeg
- Probe (IDx)
Please note that single-use SmartPegs are disposable and cannot be autoclaved!
Different implants require specific SmartPegs to ensure accurate measurement. Each SmartPeg is matched to a particular implant system and connection type.
You can find the correct SmartPeg for your implant in the SmartPeg Reference Guide – click here to access it.
Perguntas sobre o Osstell Beacon
Osstell Beacon – 2 anos
W&H Osstell Classic – 1 ano
Antes de cada uso, umedeça uma gaze ou pano macio com um produto de limpeza de superfícies recomendado (veja a lista abaixo) e limpe todo o instrumento.
Produtos de limpeza aceitáveis:
- Álcool isopropílico 70%
- Detergentes enzimáticos com baixo poder de espuma e pH neutro, tais como:
- BePro Disinfectant Wipes, REF 19500102, www.wh.com (pode ser encomendado à W&H Sterilization)
- Medizime LF
- Enzol
Não use:
- Produtos de limpeza/desinfetantes à base de ácidos ou fenólicos
- Detergentes alcalinos fortes de qualquer tipo, incluindo sabonetes para as mãos e detergentes para louça
- Produtos de limpeza à base de lixívia
- Produtos de limpeza à base de peróxido de hidrogênio
- Produtos de limpeza abrasivos
- Produtos de limpeza à base de acetona ou hidrocarbonetos
- MEK (Metil Etil Cetona)
- Birex
- Glutaraldeído
- Produtos de limpeza à base de sal de cloreto de amônio quaternário
O instrumento não requer manutenção regular. Em caso de mau funcionamento do instrumento, entre em contato com o representante de vendas ou distribuidor local para obter mais instruções.
You can record ISQ at abutment level in OsstellConnect, but it is important to follow the correct clinical measurement procedure to obtain accurate values.
How to measure ISQ at abutment level
- Perform an implant level measurement first, before placing the abutment.
- Measure again at abutment level during the same session, using a SmartPeg made for abutment level measuring.
- Determine the offset by noting the difference between implant level and abutment level ISQ. This offset remains stable throughout healing and should be used when interpreting follow-up measurements.
- For all subsequent visits, measure on the abutment and apply the same offset to understand the true implant ISQ.
How to record the measurement in OsstellConnect:
- Go to the patient’s register, select the patient and the implant in the tooth chart. Click ‘Add abutment’, choose the abutment, and save.
- Select ‘Measure stability’ and choose ‘Abutment’ under Measurement level. Measure on the abutment as you would at implant level and save.
- To review the stability trend, open the Stability tab and toggle ‘Show abutment’. You can also enable ‘Show details’ to view buccal–lingual and mesial–distal ISQ values.
For a more detailed explanation and clinical guidance, see our blog post here.
You can find the serial number on the back of your instrument.
Osstell Beacon
• To find your registration code, please make sure that you have already installed the Beacon Gateway. If you have not installed it yet, please navigate to your clinic in your account, click the instruments tab and download the gateway. Install it.
• Take your instrument in hand. It is now connecting to OsstellConnect and you should see a symbol animating. Please note that it can take a few seconds.
• When connected, the symbol stops animating.
• The registration code is now displayed on the lower screen of your instrument.
Osstell IDx
• When turning on your Osstell IDx for the first time, you will be prompted to select language, time zone, date and time.
• After that, you will need to set up a 4-digit pin code and a backup password. The backup password is needed when restoring to a backup, so please note it down and save it in a safe place.
• Your registration code is now displayed on your Osstell IDx.
Comece carregando o instrumento durante aproximadamente 3 horas para garantir um desempenho ideal.
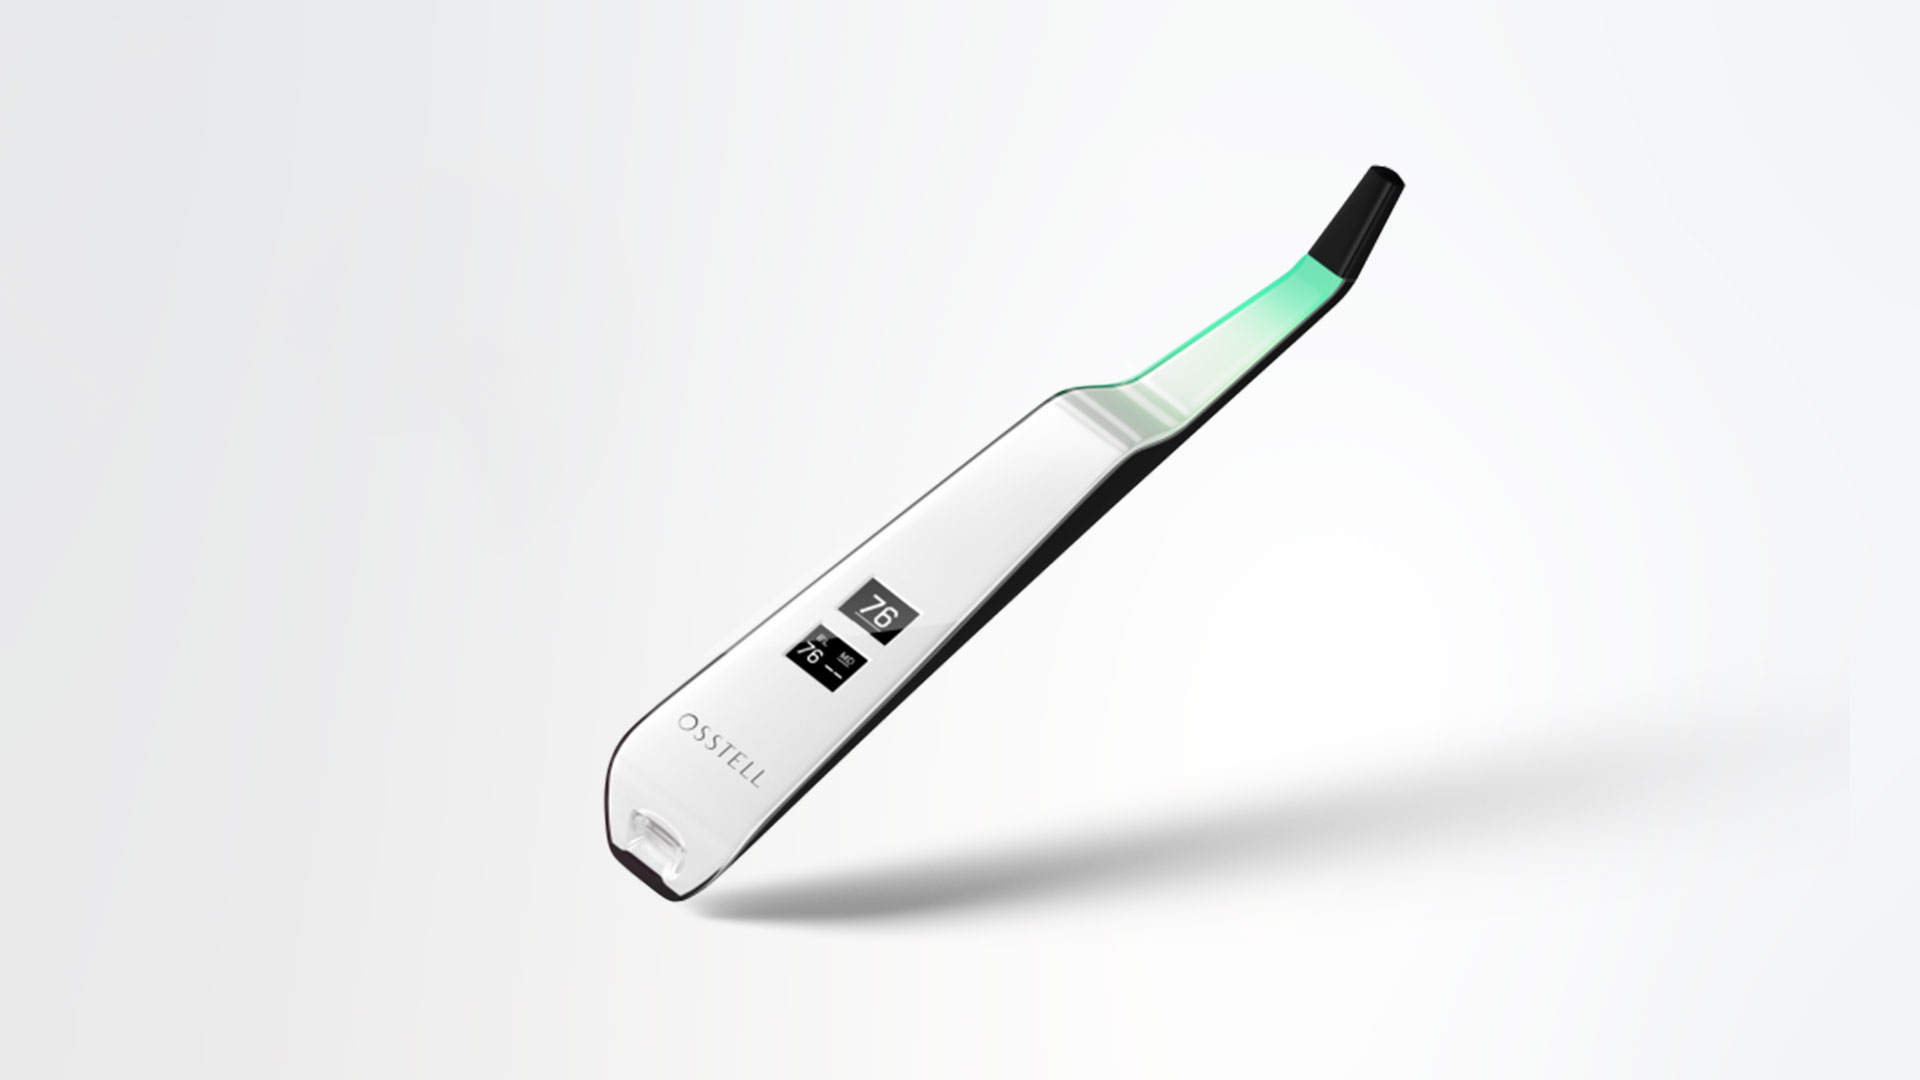
O Osstell Beacon liga-se automaticamente ao ser movimentado, exibe o estado da bateria e fica então pronto para realizar medições na direção BL (bucal-lingual).
Aproxime o instrumento de um SmartPeg ou TestPeg para iniciar a medição. Um sinal sonoro confirma a medição, e o valor de ISQ é exibido juntamente com uma indicação colorida da estabilidade (vermelho, amarelo, verde).
Na inicialização, é exibido um código do OsstellConnect até que o instrumento seja registrado. Você pode cadastrar seu instrumento aqui: Cadastre-se no OsstellConnect.
O instrumento desliga-se automaticamente após 60 segundos sem movimento.
Video on how to measure: Measure with Osstell Beacon
1. Activate the Osstell Beacon by picking it up. The instrument will start-up and after showing the battery status, the instrument will be ready for measurement in the BL (Buccal – Lingual) direction, which is prompted in the upper display as well as optimal angle towards the Smartpeg.
2. Place a barrier sleeve over the Osstell beacon instrument.
3. Place the SmartPeg into the SmartPeg Mount. The SmartPeg is magnetic, and the SmartPeg Mount will hold the SmartPeg. See fig 2. Attach the SmartPeg to the implant or abutment by screwing the SmartPeg Mount using finger force of approximately 4-6 Ncm. Do not over-tighten, to avoid damaging the SmartPeg threads.
4. Hold the instrument tip close (2-4mm) to the top of the SmartPeg without touching it. Sometimes, you will need to go as close as 1 mm. An audible sound indicates when measurement has started, and measured data will be shown in the upper display combined with a colored light indication below the tip.
5. Bring the instrument out of the mouth to clearly read the ISQ value and the colored indication. The measured ISQ values will be displayed in the upper display for a couple of seconds and then switch to be ready for measurement in mesial-distal direction.
6. Repeat step 4 and the sequence starts over and the Osstell Beacon is ready for measurement in the BL (Buccal- Lingual) direction again.
7. When all measurements are performed, remove the SmartPeg by using the SmartPeg Mount. The instrument is automatically turned off after 60 seconds of inactivity.
As explicações possíveis incluem:
SmartPeg reutilizado: Os SmartPegs são descartáveis e devem ser usados somente para uma ou várias medições em uma única sessão de tratamento, apenas para um único paciente. A reutilização repetida pode resultar em leituras falsas devido ao desgaste das roscas de alumínio macio do SmartPeg.
Tipo de SmartPeg selecionado incorreto para o implante: Veja a lista de referências do SmartPeg, osstell.com/smartpegguide
Osso ou tecido mole entre o SmartPeg e o implante: Certifique-se de limpar a conexão protética do implante antes de fixar o SmartPeg.
Interferência eletromagnética: Remova a fonte de interferência eletromagnética.
A sonda está muito afastada do SmartPeg: Mantenha a sonda a uma distância de 2 a 4 mm do SmartPeg.
Although it is possible to use the Osstell Beacon directly, depending on the status of the built-in rechargeable battery, it is recommended to charge the battery for at least 3 hours before using the Osstell Beacon instrument.
The Osstell Beacon is activated by a built-in motion sensor. As soon as the motion sensor detects movement, the Osstell Beacon will start-up and shortly show battery status and then be ready for measurement in the BL (Buccal – Lingual) direction, which is indicated in the upper display.
The Osstell Beacon will start to measure, indicated by an audible sound, when near an Osstell SmartPeg or Test peg due to a built-in magnetic detector that senses the magnet on the top of the Osstell SmartPeg/TestPeg. Measured data will be shown in the upper display combined with a colored light indication below the tip.
The red, yellow and green color indicates if the measured ISQ value corresponds to a low, medium or high implant stability according to the ISQ scale guidance, click here for more information.
After 60 seconds of no motion, the Osstell Beacon will turn off automatically.
Vídeo mostrando como realizar a medição: Medição com o Osstell Beacon
- Ative o Osstell Beacon levantando o instrumento. O instrumento será ligado e, após exibir o estado da bateria, estará pronto para realizar medições na direção BL (bucal-lingual), indicada na parte superior do visor, bem como o ângulo ideal em relação ao SmartPeg.
- Coloque uma capa de proteção sobre o instrumento Osstell Beacon.
- Coloque o SmartPeg no SmartPeg Mount. O SmartPeg é magnético, e o SmartPeg Mount o manterá na posição. Consulte a Figura 2. Fixe o SmartPeg ao implante ou ao pilar, rosqueando o SmartPeg Mount com força manual de aproximadamente 4-6 Ncm. Não aperte excessivamente, para evitar danos à rosca do SmartPeg.
- Mantenha a ponta do instrumento próxima (2-4 mm) da parte superior do SmartPeg, sem tocá-lo. Em alguns casos, será necessário aproximá-la até cerca de 1 mm. Um sinal sonoro indica o início da medição, e os dados medidos serão exibidos na parte superior do visor, juntamente com uma indicação luminosa colorida abaixo da ponta do instrumento.
- Retire o instrumento da boca para visualizar claramente o valor de ISQ e a indicação colorida. Os valores de ISQ medidos serão exibidos na parte superior do visor por alguns segundos e, em seguida, o instrumento passará automaticamente para o modo de medição na direção mesial-distal.
- Repita a etapa 4, e a sequência será reiniciada. O Osstell Beacon estará novamente pronto para realizar medições na direção BL (bucal-lingual).
- Quando todas as medições tiverem sido realizadas, remova o SmartPeg utilizando o SmartPeg Mount. O instrumento desliga-se automaticamente após 60 segundos de inatividade.
Possible explanations include:
Re-Used SmartPeg: The SmartPegs are disposable and should only be used for one or multiple measurement at one treatment session, for a single patient only. Repeated re-use may result in false readings due to wear and tear of the soft aluminum SmartPeg threads.
Wrong SmartPeg type selected for the implant: See SmartPeg reference list, osstell.com/smartpegguide
Bone or soft tissue in between SmartPeg and Implant: Make sure to clean the Implant prosthetic connection before attaching the SmartPeg.
Electromagnetic interference: Remove the source of electromagnetic interference.
Probe is held too far away from the SmartPeg: Hold the probe 2-4 mm away from the SmartPeg.
You can have your Osstell Beacon online connected to OsstellConnect for data collection, but it is not a requirement. OsstellConnect is an online tool for statistical analysis and valuable insights based on your data. Before you can start using data connection to OsstellConnect you have to register your Osstell Beacon. The serial number can be found on the back of the instrument. For registration assistance and features of data connection to OsstellConnect, please visit osstellconnect.com/beacon
2 years
Before each use, moisten a gauze or soft cloth with an acceptable (see list below) surface disinfectant and wipe the whole Osstell Beacon instrument. Note! Do not autoclave the Osstell Beacon instrument. Routinely check the surface of the instrument tip and overall surface for possible cracks and resins.
Acceptable Cleaners:
o Isopropyl alcohol
o Ethyl alcohol-based cleaners
Do not use:
o Strong alkali detergent of any type, including hand soaps and dish soaps Bleach based cleaners
o Hydrogen Peroxide based cleaners Abrasive Cleansers
o Acetone or hydrocarbon based cleaners MEK (Methyl Ethyl Ketone)
o Birex Gluteraldehyde
o Quaternary Ammonium Chloride salt-based cleaners
The Osstell Beacon is delivered from factory in a “transport” mode, where the built-in motion sensor is deactivated. To deactivate the transport mode and start charging, connect the small USB connector of the Osstell USB cable to wide end of the instrument. Connect the large USB connector to a standard USB outlet of a PC, laptop or charger.
Charge the Beacon for at least 30 min in room temperature, then try again. If the error remains, try resetting the device by:
1. Identify the Beacon reset pin on the picture below.
![]()
2. With a paper clip, do a gentle press for 1 second on the reset button (Note! You may have to tilt the pin a little downwards).
If you see a “PadLock” symbol in the upper display, press one more time on the reset button.
If the Beacon still doesn’t start or the display is showing a wrench and a manual, then please contact your local sales representative or distributor or support@osstell.com.
No, a Wi‑Fi connection is not required to use your Osstell Beacon. You can measure implant stability and document ISQ values manually in your patient journal or in OsstellConnect at a later stage.
If connected, the Osstell Beacon can communicate wirelessly with OsstellConnect, allowing measurements to be transferred and recorded automatically.
OsstellConnect is an online tool used for data collection, statistical analysis and clinical insights based on your measurements.
To use the data connection, your Osstell Beacon must first be registered. The serial number can be found on the back of the instrument. For registration guidance and more information, please visit https://osstellconnect.com/register
The Osstell Beacon is delivered in transportation mode with the motion sensor deactivated. To switch modes, briefly connect the USB cable to the instrument and a USB port on a computer for a few seconds, then disconnect.
Charge the Beacon for at least 30 min in room temperature, then try again. If the error remains, try resetting the device by:
1. Identify the Beacon reset pin on the picture below.
![]()
2. With a paper clip, do a gentle press for 1 second on the reset button (Note! You may have to tilt the pin a little downwards).
If you see a “PadLock” symbol in the upper display, press one more time on the reset button.
If the Beacon still doesn’t start or the display is showing a wrench and a manual, then please contact your local sales representative or distributor or support@osstell.com.
ISQ should always be measured in two directions, because implant stability can vary depending on the amount of surrounding bone in different directions. Measuring from two angles ensures that both the most and the least stable directions are captured.
To do this, take one measurement in the buccal-lingual direction and one in the mesial-distal direction. These two ISQ values represent the different stability directions. Sometimes the values are identical; sometimes they differ.
If the two measurements differ, always rely on the lowest ISQ value, as it reflects the weakest direction and therefore provides the most clinically relevant information about implant stability.
Atualmente, existem milhares de artigos científicos publicados que relatam estudos nos quais foram utilizados dispositivos Osstell. Os resumos desses estudos podem ser consultados em nosso banco de dados pesquisável, na seção “Resources/Scientific Database“.
A escala ISQ da Osstell baseia-se nos resultados desses estudos, todos realizados com instrumentos Osstell e SmartPegs de alumínio.
Osstell measures implant stability using Resonance Frequency Analysis (RFA). The small SmartPeg that you attach to the implant has a tiny magnet on top. When the probe sends magnetic pulses, the SmartPeg starts to vibrate – similar to a very small tuning fork.
How it works:
- The instrument tip sends magnetic pulses
These pulses make the SmartPeg vibrate without touching it. - The vibration changes depending on how stable the implant is
– A stable implant (good bone support) makes the SmartPeg vibrate faster.
– A less stable implant makes it vibrate slower. - The device converts this vibration into an ISQ value
– Higher stability → higher frequency → higher ISQ
– Lower stability → lower frequency → lower ISQ
It takes less than a second, and the ISQ value is shown immediately.
Se nenhum valor de ISQ for exibido, isso normalmente significa que a vibração do SmartPeg não está sendo detectada com clareza pelo instrumento. Vários fatores podem causar isso, e a maioria deles pode ser resolvida facilmente:
- A distância entre o instrumento e o SmartPeg é muito grande
O instrumento deve normalmente ser mantido a 2–4 mm do ímã localizado na parte superior do SmartPeg. Não toque no ímã. Se nenhum valor for exibido, aproxime o instrumento até que o sinal seja detectado. - É necessário ajustar o ângulo
O campo magnético é direcional, portanto, a orientação do instrumento é importante. As medições devem ser realizadas com o instrumento posicionado em um ângulo de aproximadamente 45° em relação à parte superior do SmartPeg. - Certifique-se de que está utilizando o tipo de SmartPeg correto para o implante específico
Use este link para identificar o tipo de SmartPeg correto: Encontre o meu SmartPeg - Amortecimento pelos tecidos moles
Os tecidos ao redor do implante podem, em alguns casos, amortecer a vibração mais do que o esperado. Manter o instrumento um pouco mais próximo geralmente compensa esse efeito. - A plataforma do implante não está limpa
Certifique-se de que a plataforma do implante esteja limpa e livre de resíduos, para que o SmartPeg fique corretamente assentado e transmita adequadamente sua vibração. - O SmartPeg está desgastado ou danificado
- Se você estiver utilizando um SmartPeg reutilizável, certifique-se de que ele tenha sido inspecionado antes do uso e de que não tenha ultrapassado 20 ciclos de reprocessamento. Um SmartPeg reutilizável desgastado, deformado ou com a rosca danificada não vibrará corretamente, e o instrumento poderá não conseguir obter uma leitura.
- O SmartPeg de uso único destina-se a ser utilizado em apenas uma sessão de tratamento.
- Certifique-se de que o SmartPeg esteja corretamente assentado no implante e de que não esteja em contato com os tecidos ao redor, pois isso pode impedir a detecção precisa do sinal e resultar na ausência de um valor de ISQ ou na exibição de um valor incorreto.
- Interferência eletromagnética
Fontes intensas de interferência eletromagnética nas proximidades podem interferir na medição. (Consulte as Perguntas Frequentes sobre “Interferência eletromagnética” para mais detalhes.)
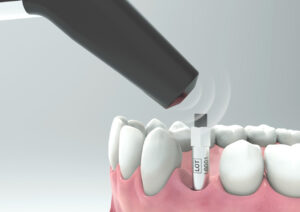
Não. A medição realizada com o Osstell não afeta o implante. O instrumento apenas faz o SmartPeg vibrar. O ímã do SmartPeg é ativado por pulsos magnéticos de energia muito baixa gerados pelo instrumento. A técnica é objetiva, delicada e altamente reprodutível
Sim, as medições de ISQ podem ser realizadas em pacientes com marca-passo.
Como medida de precaução, a sonda deve ser mantida afastada da região do tórax onde o marca-passo está implantado, devido aos pulsos magnéticos emitidos durante a medição.
Existem publicações sobre marca-passos e campos magnéticos disponíveis para consulta.
A estabilidade do implante pode ser medida em diferentes etapas do tratamento.
Normalmente, ela é medida no momento da instalação do implante para estabelecer um valor de referência e, posteriormente, durante o período de cicatrização, para monitorar as alterações na estabilidade e na osseointegração. Uma medição final costuma ser realizada antes da carga, para auxiliar na tomada de decisão clínica.
Medições repetidas ao longo do tempo fornecem informações valiosas, pois a evolução dos valores de ISQ auxilia na tomada de decisões clínicas.
Perguntas sobre o Osstell Classic
Osstell Beacon – 2 anos
W&H Osstell Classic – 1 ano
Antes de usar em um paciente, coloque uma luva de barreira sobre o instrumento. A luva de barreira ajuda a prevenir a contaminação cruzada e ajuda a evitar que o material composto dentário adira à superfície da ponta e do corpo do instrumento, e também a descoloração e degradação das soluções de limpeza.
Nota
- As luvas de barreira são para uso em um único paciente.
- Descarte as luvas de barreira usadas no lixo comum após cada paciente.
- Não deixe as luvas de barreira no instrumento por períodos prolongados.
- Veja abaixo as luvas de barreira recomendadas.
- TIDIShield, Nº de art.: 20808, Nº de art.: 20987. tidiproducts.com
- PremiumPlus: Luva para sensor de raios X 183-2, tamanho 2
- O instrumento deve ser limpo com agentes adequados após cada paciente.
- Deve ser feita uma primeira medição na colocação do implante para obter uma base para medições futuras ao longo do processo de cicatrização. Antes da restauração final, é realizada outra medição que permite observar a evolução da estabilidade do implante.
- Recomenda-se medir nos sentidos bucal-lingual e mesial-distal para encontrar a menor estabilidade. Portanto, o instrumento solicita ao usuário que faça a medição em ambos os sentidos.
- Clique aqui para ver um vídeo sobre como fazer a medição.
Antes de cada uso, umedeça uma gaze ou pano macio com um produto de limpeza de superfícies recomendado (veja a lista abaixo) e limpe todo o instrumento.
Produtos de limpeza aceitáveis:
- Álcool isopropílico 70%
- Detergentes enzimáticos com baixo poder de espuma e pH neutro, tais como:
- BePro Disinfectant Wipes, REF 19500102, www.wh.com (pode ser encomendado à W&H Sterilization)
- Medizime LF
- Enzol
Não use:
- Produtos de limpeza/desinfetantes à base de ácidos ou fenólicos
- Detergentes alcalinos fortes de qualquer tipo, incluindo sabonetes para as mãos e detergentes para louça
- Produtos de limpeza à base de lixívia
- Produtos de limpeza à base de peróxido de hidrogênio
- Produtos de limpeza abrasivos
- Produtos de limpeza à base de acetona ou hidrocarbonetos
- MEK (Metil Etil Cetona)
- Birex
- Glutaraldeído
- Produtos de limpeza à base de sal de cloreto de amônio quaternário
O instrumento não requer manutenção regular. Em caso de mau funcionamento do instrumento, entre em contato com o representante de vendas ou distribuidor local para obter mais instruções.
You can record ISQ at abutment level in OsstellConnect, but it is important to follow the correct clinical measurement procedure to obtain accurate values.
How to measure ISQ at abutment level
- Perform an implant level measurement first, before placing the abutment.
- Measure again at abutment level during the same session, using a SmartPeg made for abutment level measuring.
- Determine the offset by noting the difference between implant level and abutment level ISQ. This offset remains stable throughout healing and should be used when interpreting follow-up measurements.
- For all subsequent visits, measure on the abutment and apply the same offset to understand the true implant ISQ.
How to record the measurement in OsstellConnect:
- Go to the patient’s register, select the patient and the implant in the tooth chart. Click ‘Add abutment’, choose the abutment, and save.
- Select ‘Measure stability’ and choose ‘Abutment’ under Measurement level. Measure on the abutment as you would at implant level and save.
- To review the stability trend, open the Stability tab and toggle ‘Show abutment’. You can also enable ‘Show details’ to view buccal–lingual and mesial–distal ISQ values.
For a more detailed explanation and clinical guidance, see our blog post here.
You can find the serial number on the back of your instrument.
As explicações possíveis incluem:
SmartPeg reutilizado: Os SmartPegs são descartáveis e devem ser usados somente para uma ou várias medições em uma única sessão de tratamento, apenas para um único paciente. A reutilização repetida pode resultar em leituras falsas devido ao desgaste das roscas de alumínio macio do SmartPeg.
Tipo de SmartPeg selecionado incorreto para o implante: Veja a lista de referências do SmartPeg, osstell.com/smartpegguide
Osso ou tecido mole entre o SmartPeg e o implante: Certifique-se de limpar a conexão protética do implante antes de fixar o SmartPeg.
Interferência eletromagnética: Remova a fonte de interferência eletromagnética.
A sonda está muito afastada do SmartPeg: Mantenha a sonda a uma distância de 2 a 4 mm do SmartPeg.
ISQ should always be measured in two directions, because implant stability can vary depending on the amount of surrounding bone in different directions. Measuring from two angles ensures that both the most and the least stable directions are captured.
To do this, take one measurement in the buccal-lingual direction and one in the mesial-distal direction. These two ISQ values represent the different stability directions. Sometimes the values are identical; sometimes they differ.
If the two measurements differ, always rely on the lowest ISQ value, as it reflects the weakest direction and therefore provides the most clinically relevant information about implant stability.
Atualmente, existem milhares de artigos científicos publicados que relatam estudos nos quais foram utilizados dispositivos Osstell. Os resumos desses estudos podem ser consultados em nosso banco de dados pesquisável, na seção “Resources/Scientific Database“.
A escala ISQ da Osstell baseia-se nos resultados desses estudos, todos realizados com instrumentos Osstell e SmartPegs de alumínio.
Osstell measures implant stability using Resonance Frequency Analysis (RFA). The small SmartPeg that you attach to the implant has a tiny magnet on top. When the probe sends magnetic pulses, the SmartPeg starts to vibrate – similar to a very small tuning fork.
How it works:
- The instrument tip sends magnetic pulses
These pulses make the SmartPeg vibrate without touching it. - The vibration changes depending on how stable the implant is
– A stable implant (good bone support) makes the SmartPeg vibrate faster.
– A less stable implant makes it vibrate slower. - The device converts this vibration into an ISQ value
– Higher stability → higher frequency → higher ISQ
– Lower stability → lower frequency → lower ISQ
It takes less than a second, and the ISQ value is shown immediately.
Se nenhum valor de ISQ for exibido, isso normalmente significa que a vibração do SmartPeg não está sendo detectada com clareza pelo instrumento. Vários fatores podem causar isso, e a maioria deles pode ser resolvida facilmente:
- A distância entre o instrumento e o SmartPeg é muito grande
O instrumento deve normalmente ser mantido a 2–4 mm do ímã localizado na parte superior do SmartPeg. Não toque no ímã. Se nenhum valor for exibido, aproxime o instrumento até que o sinal seja detectado. - É necessário ajustar o ângulo
O campo magnético é direcional, portanto, a orientação do instrumento é importante. As medições devem ser realizadas com o instrumento posicionado em um ângulo de aproximadamente 45° em relação à parte superior do SmartPeg. - Certifique-se de que está utilizando o tipo de SmartPeg correto para o implante específico
Use este link para identificar o tipo de SmartPeg correto: Encontre o meu SmartPeg - Amortecimento pelos tecidos moles
Os tecidos ao redor do implante podem, em alguns casos, amortecer a vibração mais do que o esperado. Manter o instrumento um pouco mais próximo geralmente compensa esse efeito. - A plataforma do implante não está limpa
Certifique-se de que a plataforma do implante esteja limpa e livre de resíduos, para que o SmartPeg fique corretamente assentado e transmita adequadamente sua vibração. - O SmartPeg está desgastado ou danificado
- Se você estiver utilizando um SmartPeg reutilizável, certifique-se de que ele tenha sido inspecionado antes do uso e de que não tenha ultrapassado 20 ciclos de reprocessamento. Um SmartPeg reutilizável desgastado, deformado ou com a rosca danificada não vibrará corretamente, e o instrumento poderá não conseguir obter uma leitura.
- O SmartPeg de uso único destina-se a ser utilizado em apenas uma sessão de tratamento.
- Certifique-se de que o SmartPeg esteja corretamente assentado no implante e de que não esteja em contato com os tecidos ao redor, pois isso pode impedir a detecção precisa do sinal e resultar na ausência de um valor de ISQ ou na exibição de um valor incorreto.
- Interferência eletromagnética
Fontes intensas de interferência eletromagnética nas proximidades podem interferir na medição. (Consulte as Perguntas Frequentes sobre “Interferência eletromagnética” para mais detalhes.)
Não. A medição realizada com o Osstell não afeta o implante. O instrumento apenas faz o SmartPeg vibrar. O ímã do SmartPeg é ativado por pulsos magnéticos de energia muito baixa gerados pelo instrumento. A técnica é objetiva, delicada e altamente reprodutível
Sim, as medições de ISQ podem ser realizadas em pacientes com marca-passo.
Como medida de precaução, a sonda deve ser mantida afastada da região do tórax onde o marca-passo está implantado, devido aos pulsos magnéticos emitidos durante a medição.
Existem publicações sobre marca-passos e campos magnéticos disponíveis para consulta.
A estabilidade do implante pode ser medida em diferentes etapas do tratamento.
Normalmente, ela é medida no momento da instalação do implante para estabelecer um valor de referência e, posteriormente, durante o período de cicatrização, para monitorar as alterações na estabilidade e na osseointegração. Uma medição final costuma ser realizada antes da carga, para auxiliar na tomada de decisão clínica.
Medições repetidas ao longo do tempo fornecem informações valiosas, pois a evolução dos valores de ISQ auxilia na tomada de decisões clínicas.
Compreendendo a osseointegração em odontologia
A estabilidade do implante pode ser medida em diferentes etapas do tratamento.
Normalmente, ela é medida no momento da instalação do implante para estabelecer um valor de referência e, posteriormente, durante o período de cicatrização, para monitorar as alterações na estabilidade e na osseointegração. Uma medição final costuma ser realizada antes da carga, para auxiliar na tomada de decisão clínica.
Medições repetidas ao longo do tempo fornecem informações valiosas, pois a evolução dos valores de ISQ auxilia na tomada de decisões clínicas.
Questions about the Osstell IDx
You can record ISQ at abutment level in OsstellConnect, but it is important to follow the correct clinical measurement procedure to obtain accurate values.
How to measure ISQ at abutment level
- Perform an implant level measurement first, before placing the abutment.
- Measure again at abutment level during the same session, using a SmartPeg made for abutment level measuring.
- Determine the offset by noting the difference between implant level and abutment level ISQ. This offset remains stable throughout healing and should be used when interpreting follow-up measurements.
- For all subsequent visits, measure on the abutment and apply the same offset to understand the true implant ISQ.
How to record the measurement in OsstellConnect:
- Go to the patient’s register, select the patient and the implant in the tooth chart. Click ‘Add abutment’, choose the abutment, and save.
- Select ‘Measure stability’ and choose ‘Abutment’ under Measurement level. Measure on the abutment as you would at implant level and save.
- To review the stability trend, open the Stability tab and toggle ‘Show abutment’. You can also enable ‘Show details’ to view buccal–lingual and mesial–distal ISQ values.
For a more detailed explanation and clinical guidance, see our blog post here.
Navigate to your clinic in your account. Select the instrument tab. Click on Download firmware.
Download instructions:
• Wait for the download to complete (could take a while depending on your connection)
• Copy the .m2f binary file to a USB memory stick
• Insert the memory stick in your IDx while it is running
• Follow instructions on the IDx display
Note: you cannot open or view the .m2f file
You can also check this guide
Osstell Beacon
• To find your registration code, please make sure that you have already installed the Beacon Gateway. If you have not installed it yet, please navigate to your clinic in your account, click the instruments tab and download the gateway. Install it.
• Take your instrument in hand. It is now connecting to OsstellConnect and you should see a symbol animating. Please note that it can take a few seconds.
• When connected, the symbol stops animating.
• The registration code is now displayed on the lower screen of your instrument.
Osstell IDx
• When turning on your Osstell IDx for the first time, you will be prompted to select language, time zone, date and time.
• After that, you will need to set up a 4-digit pin code and a backup password. The backup password is needed when restoring to a backup, so please note it down and save it in a safe place.
• Your registration code is now displayed on your Osstell IDx.
Two years.
The IDx continues to consume a small amount of power even when switched off. If the battery becomes fully depleted (0%), the stored date and time settings will be lost.
When this happens, you will be prompted to set the date and time again at start-up.
If your IDx is connected to the internet, the date and time will be set automatically.
An electromagnetic noise warning indicates the presence of an external or internal magnetic disturbance that may affect the measurement.
This can occur due to nearby electronic equipment, or if the probe is held very close to the instrument itself.
ISQ should always be measured in two directions, because implant stability can vary depending on the amount of surrounding bone in different directions. Measuring from two angles ensures that both the most and the least stable directions are captured.
To do this, take one measurement in the buccal-lingual direction and one in the mesial-distal direction. These two ISQ values represent the different stability directions. Sometimes the values are identical; sometimes they differ.
If the two measurements differ, always rely on the lowest ISQ value, as it reflects the weakest direction and therefore provides the most clinically relevant information about implant stability.
Register your IDx by following the instructions in the device or by following this link.
Osstell measures implant stability using Resonance Frequency Analysis (RFA). The small SmartPeg that you attach to the implant has a tiny magnet on top. When the probe sends magnetic pulses, the SmartPeg starts to vibrate – similar to a very small tuning fork.
How it works:
- The instrument tip sends magnetic pulses
These pulses make the SmartPeg vibrate without touching it. - The vibration changes depending on how stable the implant is
– A stable implant (good bone support) makes the SmartPeg vibrate faster.
– A less stable implant makes it vibrate slower. - The device converts this vibration into an ISQ value
– Higher stability → higher frequency → higher ISQ
– Lower stability → lower frequency → lower ISQ
It takes less than a second, and the ISQ value is shown immediately.
For normal use, the batteries last for at least one day but in most cases longer. It takes about 2 hours to charge the IDx from a fully discharged state.
Choose a tooth position on the touch screen and start measuring.
Perform measurements, press End patient, and then save as Add new patient.
Simply select the pen symbol in the patient list to edit.
The patient data can be saved either in the instrument or in OsstellConnect.
Values can only be removed before saving clicking on the trash bin symbol. After saving the data cannot be modified.
Yes, OsstellConnect is accessible via iPhone, iPad, Mac or PC.
Have you registered your device? You can only use the Osstell IDx for a limited time without registration.
The following products may be autoclaved (over-pressurized steam up to 135 deg Celsius):
- SmartPeg Mount
- Reusable SmartPeg
- Probe (IDx)
Please note that single-use SmartPegs are disposable and cannot be autoclaved!
To enable automatic backup of your Osstell IDx, you will be asked to create a backup code made up of 8 characters. The purpose of the backup is to reset the unit if you for some reason remove patients by mistake or lose your instrument. The code is created during the registration process and you only have to enter it once. To make sure you can access your backup at a later date, it is VERY important that you write this code down and keep it in a safe place.
Backup can also be done via USB without a code.
Questions about Osstell and the ISQ scale
ISQ (Implant Stability Quotient) is a numerical value from 1 to 99 that describes implant stability. It is calculated from the resonance frequency measured when the Osstell instrument sends a magnetic pulse to a SmartPeg attached to the implant, translating this into a clinically intuitive value.

There is no single ISQ value that determines when an implant can be loaded. The decision depends on the stability over time (the ISQ trend), as well as clinical judgement and patient-specific risk factors.
As a general guideline, higher ISQ values provide greater confidence, and values around 70 or above are often considered suitable for loading non-splinted implants. For splinted restorations, lower values may be acceptable.
For guidance on how to interpret ISQ values, see the Osstell ISQ Scale.
ISQ should always be measured in two directions, because implant stability can vary depending on the amount of surrounding bone in different directions. Measuring from two angles ensures that both the most and the least stable directions are captured.
To do this, take one measurement in the buccal-lingual direction and one in the mesial-distal direction. These two ISQ values represent the different stability directions. Sometimes the values are identical; sometimes they differ.
If the two measurements differ, always rely on the lowest ISQ value, as it reflects the weakest direction and therefore provides the most clinically relevant information about implant stability.
There is no single ISQ value that determines suitability for immediate loading. In addition to the ISQ value, the decision depends on primary stability, clinical judgement, and patient-specific risk factors.
As a general guide, higher ISQ values indicate greater stability, and values around 70 or above may support immediate loading in appropriate cases.
For guidance on interpreting ISQ values, see the Osstell ISQ Scale.
Osstell measures the lateral stability of the implant and thereby indirectly the degree of osseointegration. The results are presented as an ISQ, ranging from 1-99 ISQ, which correlates to micro mobility.
Osstell measures implant stability using Resonance Frequency Analysis (RFA). The small SmartPeg that you attach to the implant has a tiny magnet on top. When the probe sends magnetic pulses, the SmartPeg starts to vibrate – similar to a very small tuning fork.
How it works:
- The instrument tip sends magnetic pulses
These pulses make the SmartPeg vibrate without touching it. - The vibration changes depending on how stable the implant is
– A stable implant (good bone support) makes the SmartPeg vibrate faster.
– A less stable implant makes it vibrate slower. - The device converts this vibration into an ISQ value
– Higher stability → higher frequency → higher ISQ
– Lower stability → lower frequency → lower ISQ
It takes less than a second, and the ISQ value is shown immediately.
Periotest (DCA) measurements are designed for natural teeth, which are connected to the bone via the periodontal ligament. In contrast, dental implants are anchored directly to the bone without a periodontal ligament.
RFA measurements using Osstell instruments assess implant stability by measuring the stiffness of the bone–implant interface. They provide an objective and repeatable value on a more sensitive scale, supporting reliable assessment over time.
ISQ and BIC measure different aspects of implant integration.
BIC (bone-to-implant contact) describes the percentage of the implant surface in contact with bone at a microscopic level, while ISQ reflects implant stability by measuring the stiffness of the bone–implant interface.
As a result, high BIC does not always mean high stability, as bone quality and stiffness also play a key role.
For a more detailed explanation, see: How ISQ correlates to torque
Yes. The ISQ value can be affected if the SmartPeg is not mounted correctly.
For accurate measurements, the SmartPeg should be attached finger tight using the SmartPeg Mount, which corresponds to about 4–6 Ncm.
At this level, the SmartPeg has firm, stable contact with the implant, and the resulting ISQ value is consistent – typically within ±2 ISQ units.
- If the SmartPeg is not fully seated:
The contact becomes unstable, and the ISQ value can appear artificially low, or you don’t receive any value. - If too much force is applied:
Overtightening does not improve accuracy. It may damage the SmartPeg threads.
– A reusable SmartPeg may be damaged so it cannot be used again.
– A single use or reusable SmartPeg may have its threads deformed, which can lead to inaccurate measurements during that session or, in worst case a broken SmartPeg.
In short: finger tight (4–5 Ncm) is enough to ensure stable contact and reliable ISQ readings.
Clinically, the lowest ISQ values typically seen are around 40.
If the stability is below 30, the implant is generally considered to have very low stability or to be loose. It may also indicate that the SmartPeg is not correctly mounted on the implant.
Very low values (below 20) are rarely seen in clinical situations and are more commonly observed in laboratory models with artificially low stability.