FAQ

Support

よくある質問

弊社の製品、ISQスケールとその使用方法 OsstellConnect [オステルコネクト]、Osstell [オステル] テクノロジーなどについての詳細をご覧下さい。
OsstellConnectに関する質問

How do I measure and record ISQ on an abutment?

You can record ISQ at abutment level in OsstellConnect, but it is important to follow the correct clinical measurement procedure to obtain accurate values.

How to measure ISQ at abutment level

  1. Perform an implant level measurement first, before placing the abutment.
  2. Measure again at abutment level during the same session, using a SmartPeg made for abutment level measuring.
  3. Determine the offset by noting the difference between implant level and abutment level ISQ. This offset remains stable throughout healing and should be used when interpreting follow-up measurements.
  4. For all subsequent visits, measure on the abutment and apply the same offset to understand the true implant ISQ.

How to record the measurement in OsstellConnect:

  1. Go to the patient’s register, select the patient and the implant in the tooth chart. Click ‘Add abutment’, choose the abutment, and save.
  2. Select ‘Measure stability’ and choose ‘Abutment’ under Measurement level. Measure on the abutment as you would at implant level and save.
  3. To review the stability trend, open the Stability tab and toggle ‘Show abutment’. You can also enable ‘Show details’ to view buccal–lingual and mesial–distal ISQ values.

For a more detailed explanation and clinical guidance, see our blog post here.

How should I document an implant failure?

• To document an implant failure, go to your patients records. Select the patient, then select the tooth. Click ‘Mark as failed’. Choose the type of failure (early or late failure), fill in the failure date. Choose the reason for failure. Click ‘Mark as failed’.

• You can access the history of the implant failure by navigating to the history tab. Click the tab ‘Failed’ to see all information related to the treatment and the failure.

• A history symbol is displayed on the tooth with a failed implant.

Osstell IDxからOsstellConnectにデータをアップロードするにはどうすればいいですか?

Osstell IDxがインターネットに接続されていれば、保存されているデータはOsstellConnectアカウントに自動的にアップロードされます。機器をインターネットに接続する方法については、こちらをご覧下さい。

例えば、USBメモリなどにバックアップを作成することも可能です。詳しくは、こちらをご覧下さい。


https://osstell.com/app/uploads/How-to-connect-to-the-Internet-6.0.pdf

https://osstell.com/app/uploads/Backup-Osstell-IDx-6.0.pdf

Osstell BeaconをOsstellConnectに接続し、データを直接記録するにはどうすればいいですか?

まず初めに、Beacon Gatewayがインストールされていることを確認します。まだインストールされていない場合は、アカウントでクリニックに進み、[器具] タブをクリックして、Gatewayをダウンロードして下さい。Gatewayをインストールします。

  • Osstell KeyをコンピュータのUSBポートに接続します。
  • インスツルメントを手に持ちます。OsstellConnectとの接続が開始され、次のマークのアニメーションが表示されるはずです。これには数秒かかることがあります。
  • 接続が完了すると、マークのアニメーションが止まります。
  • 患者記録に進みます。
    • 初回の測定の場合は、患者を作成します。患者データを入力し、保存します。[新規治療] をクリックし、治療情報を入力します。[インプラントを追加] をクリックし、インプラントデータを入力して保存します。[安定性を測定] をクリックします。
    • フォローアップ測定の場合は、患者を選択してから、歯式チャートで歯を選択します。[安定性を測定] をクリックします。
  • 頬舌方向(頬側-舌側)で測定します。ISQ値がOsstellConnectに表示されます。
  • 近遠心方向で測定します。ISQ値がOsstellConnectに表示されます。
  • 治療に関する情報を入力し、保存します。
Can I delete a measurement?

Yes, simply navigate to your patient records. Select the patient. Select the implant. Go to the stability tab. Click on the edit icon by the measurement you would like to delete. Click delete. Please note that the measurement will be permanently removed from the patient chart.

Can I delete a patient?

Yes, simply navigate to your patient records. Select the patient you would like to delete. Click delete in the upper right corner. Confirm that you want to delete the patient and all data. Please note that it will be permanently removed from your account.

私のデータをすべてエクスポートすることができますか?

はい。詳細な分析のためにすべてのデータをExcelファイルにエクスポートできます。患者記録に進み、[CSVエクスポート] をクリックして下さい。ファイルがダウンロード項目に表示されます。

エクスポートしたデータは、GDPRやHIPAAなどの適用されるデータ保護規制を遵守して取り扱って下さい。

Can I manually edit implant data?

Yes, simply navigate to your patient records. Select the patient. Select the implant you want to edit on the tooth chart. Select the tab ‘Implant & abutment’. Click on the pen icon to edit. Edit implant data. Save.

How can I edit patient data?

Simply navigate to your patient records. Select the patient. Click ‘edit’ on the top right corner. Edit the data and save.

How can I find the serial number (SN)?

You can find the serial number on the back of your instrument.

How can I find my registration code?

Osstell Beacon
• To find your registration code, please make sure that you have already installed the Beacon Gateway. If you have not installed it yet, please navigate to your clinic in your account, click the instruments tab and download the gateway. Install it.
• Take your instrument in hand. It is now connecting to OsstellConnect and you should see a symbol animating. Please note that it can take a few seconds.
• When connected, the symbol stops animating.
• The registration code is now displayed on the lower screen of your instrument.

Osstell IDx
• When turning on your Osstell IDx for the first time, you will be prompted to select language, time zone, date and time.
• After that, you will need to set up a 4-digit pin code and a backup password. The backup password is needed when restoring to a backup, so please note it down and save it in a safe place.
• Your registration code is now displayed on your Osstell IDx.

Questions about Smartpegs

Questions about Smartpegs

Can the reusable SmartPeg be sterilised according to the Prion cycle?

Yes, it can be sterilised with a Prion cycle at 134 °C for 18 minutes.

How should I mount the SmartPeg on the implant?

Whether you are using a single-use or a reusable SmartPeg, it should always be installed using the SmartPeg Mount and tightened to approximately 4–6 Ncm – typically described as finger tight. This ensures proper seating and accurate ISQ measurements without risking damage to the implant or the SmartPeg.

Can I mix single-use and reusable SmartPegs in the same treatment session?

Yes. You can mix single-use and reusable SmartPegs during the same treatment session. The only requirement is that you use the correct SmartPeg Type number for the specific implant or abutment you are measuring.

Whether the SmartPeg is single-use or reusable does not affect the measurement.

Does a reusable SmartPeg provide the same ISQ values as a single use SmartPeg?

Yes, as long as its integrity and performance are maintained.

Osstell is also the only company offering both a sterile single-use and a reusable SmartPeg made of aluminium, supported by more than 1,500 published studies on the ISQ method.

With the Osstell original ISQ scale and SmartPegs, no conversion tables or correction factors are needed. The measured ISQ value is the true value, regardless of whether you use a single use or a reusable SmartPeg.

How are the different SmartPegs packed?

SmartPegs are supplied in different packaging formats depending on whether they are single-use or reusable:

Single-use SmartPegs

  • Delivered sterile.
  • Supplied in boxes of 5 pieces, in a single sterile barrier system with protective outer packaging.
  • Intended for one treatment session only and must not be reused.

Reusable SmartPegs

  • Delivered nonsterile in individual packaging.
  • Must be cleaned, disinfected and sterilized before the first clinical use and after every subsequent use. (See quickguide at osstell/ifu).

SmartPeg Mount

  • Delivered nonsterile with the instrument.
  • Can be purchased separately, in package of 5.
  • Must also be cleaned, disinfected and sterilized before use and between patients. (See quickguide at osstell/ifu).
Is there a visual difference between the single-use and reusable SmartPeg?

Yes. The reusable and single use SmartPegs are designed so they can be easily distinguished visually:

  • The single-use SmartPeg is supplied sterile, has an aluminium coloured (non coloured) magnet, and does not include any laser marked identifiers on the body.
  • The reusable SmartPeg has a black magnet on top and carries laser marked Type and LOT numbers on the body for identification and traceability.

How many times can the SmartPeg be used?

The reusable SmartPeg can be used for up to 20 reprocessing cycles, as long as its integrity and performance are maintained.

If inspection reveals wear, deformation, corrosion, damaged threads, or any loss of functional compatibility, the SmartPeg must be discarded, even if it has been processed fewer than 20 times.

The single-use SmartPeg is intended for one treatment session only and must not be reprocessed.

Why can the reusable SmartPeg be cleaned and sterilised when the single-use SmartPeg cannot, even though both are made of aluminium?

The reusable SmartPeg is engineered with special protective surface coating – one on the SmartPeg body and another black protective coating on the magnet. These coatings provide resistance to moisture, cleaning chemicals, wear, and corrosion, ensuring that the SmartPeg maintains its performance throughout the validated number of reprocessing cycles.

The reusable SmartPeg can easily be distinguished from the single use version: it has a black magnet, and its LOT and Type number are laser marked on the body for clear identification.

How should the reusable SmartPeg and the SmartPeg Mount be cleaned and sterilized?

Prior to the first clinical use, and after each use the reusable products must be cleaned, disinfected and sterilized according to the instructions in the quickguide that is found here: Osstell/ifu

How do I measure and record ISQ on an abutment?

You can record ISQ at abutment level in OsstellConnect, but it is important to follow the correct clinical measurement procedure to obtain accurate values.

How to measure ISQ at abutment level

  1. Perform an implant level measurement first, before placing the abutment.
  2. Measure again at abutment level during the same session, using a SmartPeg made for abutment level measuring.
  3. Determine the offset by noting the difference between implant level and abutment level ISQ. This offset remains stable throughout healing and should be used when interpreting follow-up measurements.
  4. For all subsequent visits, measure on the abutment and apply the same offset to understand the true implant ISQ.

How to record the measurement in OsstellConnect:

  1. Go to the patient’s register, select the patient and the implant in the tooth chart. Click ‘Add abutment’, choose the abutment, and save.
  2. Select ‘Measure stability’ and choose ‘Abutment’ under Measurement level. Measure on the abutment as you would at implant level and save.
  3. To review the stability trend, open the Stability tab and toggle ‘Show abutment’. You can also enable ‘Show details’ to view buccal–lingual and mesial–distal ISQ values.

For a more detailed explanation and clinical guidance, see our blog post here.

Why do I need to take two measurements at the same occasion?

ISQ should always be measured in two directions, because implant stability can vary depending on the amount of surrounding bone in different directions. Measuring from two angles ensures that both the most and the least stable directions are captured.
To do this, take one measurement in the buccal-lingual direction and one in the mesial-distal direction. These two ISQ values represent the different stability directions. Sometimes the values are identical; sometimes they differ.
If the two measurements differ, always rely on the lowest ISQ value, as it reflects the weakest direction and therefore provides the most clinically relevant information about implant stability.

Do I need a torque device to tighten the SmartPeg correctly?

No. A torque device should not be used to tighten the SmartPeg.

SmartPegs should always be mounted using the SmartPeg Mount and tightened to approximately 4–6 Ncm, which is typically described as finger tight.

This ensures the SmartPeg is seated correctly without risking damage to the implant connection.

How does the Osstell technology work?

Osstell measures implant stability using Resonance Frequency Analysis (RFA). The small SmartPeg that you attach to the implant has a tiny magnet on top. When the probe sends magnetic pulses, the SmartPeg starts to vibrate – similar to a very small tuning fork.
How it works:

  1. The instrument tip sends magnetic pulses
    These pulses make the SmartPeg vibrate without touching it.
  2. The vibration changes depending on how stable the implant is
    – A stable implant (good bone support) makes the SmartPeg vibrate faster.
    – A less stable implant makes it vibrate slower.
  3. The device converts this vibration into an ISQ value
    – Higher stability → higher frequency → higher ISQ
    – Lower stability → lower frequency → lower ISQ

It takes less than a second, and the ISQ value is shown immediately.

Does the way the SmartPeg is tightened affect the ISQ value?

Yes. The ISQ value can be affected if the SmartPeg is not mounted correctly.

For accurate measurements, the SmartPeg should be attached finger tight using the SmartPeg Mount, which corresponds to about 4–6 Ncm.

At this level, the SmartPeg has firm, stable contact with the implant, and the resulting ISQ value is consistent – typically within ±2 ISQ units.

  • If the SmartPeg is not fully seated:
    The contact becomes unstable, and the ISQ value can appear artificially low, or you don’t receive any value.
  • If too much force is applied:
    Overtightening does not improve accuracy. It may damage the SmartPeg threads.
    – A reusable SmartPeg may be damaged so it cannot be used again.
    – A single use or reusable SmartPeg may have its threads deformed, which can lead to inaccurate measurements during that session or, in worst case a broken SmartPeg.

In short: finger tight (4–5 Ncm) is enough to ensure stable contact and reliable ISQ readings.

Which Osstell products can be autoclaved?

The following products may be autoclaved (over-pressurized steam up to 135 deg Celsius):

  • SmartPeg Mount
  • Reusable SmartPeg
  • Probe (IDx)

Please note that single-use SmartPegs are disposable and cannot be autoclaved!

How do I select the correct SmartPeg for my implant?

Different implants require specific SmartPegs to ensure accurate measurement. Each SmartPeg is matched to a particular implant system and connection type.

You can find the correct SmartPeg for your implant in the SmartPeg Reference Guide – click here to access it.

Osstell Beaconに関する質問

Osstell Beaconに関する質問

Osstellインスツルメントの保証期間はどのくらいですか?

Osstell Beacon – 2年間
W&H Osstell Classic – 1年間

インスツルメントのお手入れ方法を教えて下さい。

使用前に毎回、推奨される表面洗浄剤(下記リスト参照)を含ませたガーゼまたは柔らかい布で、機器全体を拭いて下さい。

使用可能な洗浄剤

  • イソプロピルアルコール(70%)
  • 低発泡性で、pHが中性の酵素系洗浄剤。例:
    • BePro Disinfectant Wipes、REF 19500102、www.wh.com(W&H Sterilizationから注文可能)
    • Medizime LF
    • Enzol

以下は使用しないで下さい。

  • 酸性またはフェノール系の洗浄剤/消毒剤
  • 手洗い用石けんや食器用洗剤を含む、あらゆる種類の強アルカリ性洗剤
  • 塩素系洗浄剤
  • 過酸化水素系洗浄剤
  • 研磨剤入り洗浄剤
  • アセトン系または炭化水素系洗浄剤
  • MEK(メチルエチルケトン)
  • Birex
  • グルタルアルデヒド
  • 第四級アンモニウム塩系洗浄剤

本機器は定期的なメンテナンスを必要としません。本機器に不具合が生じた場合は、最寄りの販売代理店または販売業者にご連絡の上、対応方法について指示を受けて下さい。

How do I measure and record ISQ on an abutment?

You can record ISQ at abutment level in OsstellConnect, but it is important to follow the correct clinical measurement procedure to obtain accurate values.

How to measure ISQ at abutment level

  1. Perform an implant level measurement first, before placing the abutment.
  2. Measure again at abutment level during the same session, using a SmartPeg made for abutment level measuring.
  3. Determine the offset by noting the difference between implant level and abutment level ISQ. This offset remains stable throughout healing and should be used when interpreting follow-up measurements.
  4. For all subsequent visits, measure on the abutment and apply the same offset to understand the true implant ISQ.

How to record the measurement in OsstellConnect:

  1. Go to the patient’s register, select the patient and the implant in the tooth chart. Click ‘Add abutment’, choose the abutment, and save.
  2. Select ‘Measure stability’ and choose ‘Abutment’ under Measurement level. Measure on the abutment as you would at implant level and save.
  3. To review the stability trend, open the Stability tab and toggle ‘Show abutment’. You can also enable ‘Show details’ to view buccal–lingual and mesial–distal ISQ values.

For a more detailed explanation and clinical guidance, see our blog post here.

How can I find the serial number (SN)?

You can find the serial number on the back of your instrument.

How can I find my registration code?

Osstell Beacon
• To find your registration code, please make sure that you have already installed the Beacon Gateway. If you have not installed it yet, please navigate to your clinic in your account, click the instruments tab and download the gateway. Install it.
• Take your instrument in hand. It is now connecting to OsstellConnect and you should see a symbol animating. Please note that it can take a few seconds.
• When connected, the symbol stops animating.
• The registration code is now displayed on the lower screen of your instrument.

Osstell IDx
• When turning on your Osstell IDx for the first time, you will be prompted to select language, time zone, date and time.
• After that, you will need to set up a 4-digit pin code and a backup password. The backup password is needed when restoring to a backup, so please note it down and save it in a safe place.
• Your registration code is now displayed on your Osstell IDx.

どのように開始しますか?

最適な性能を得るために、ご使用前にインスツルメントを約3時間充電して下さい。

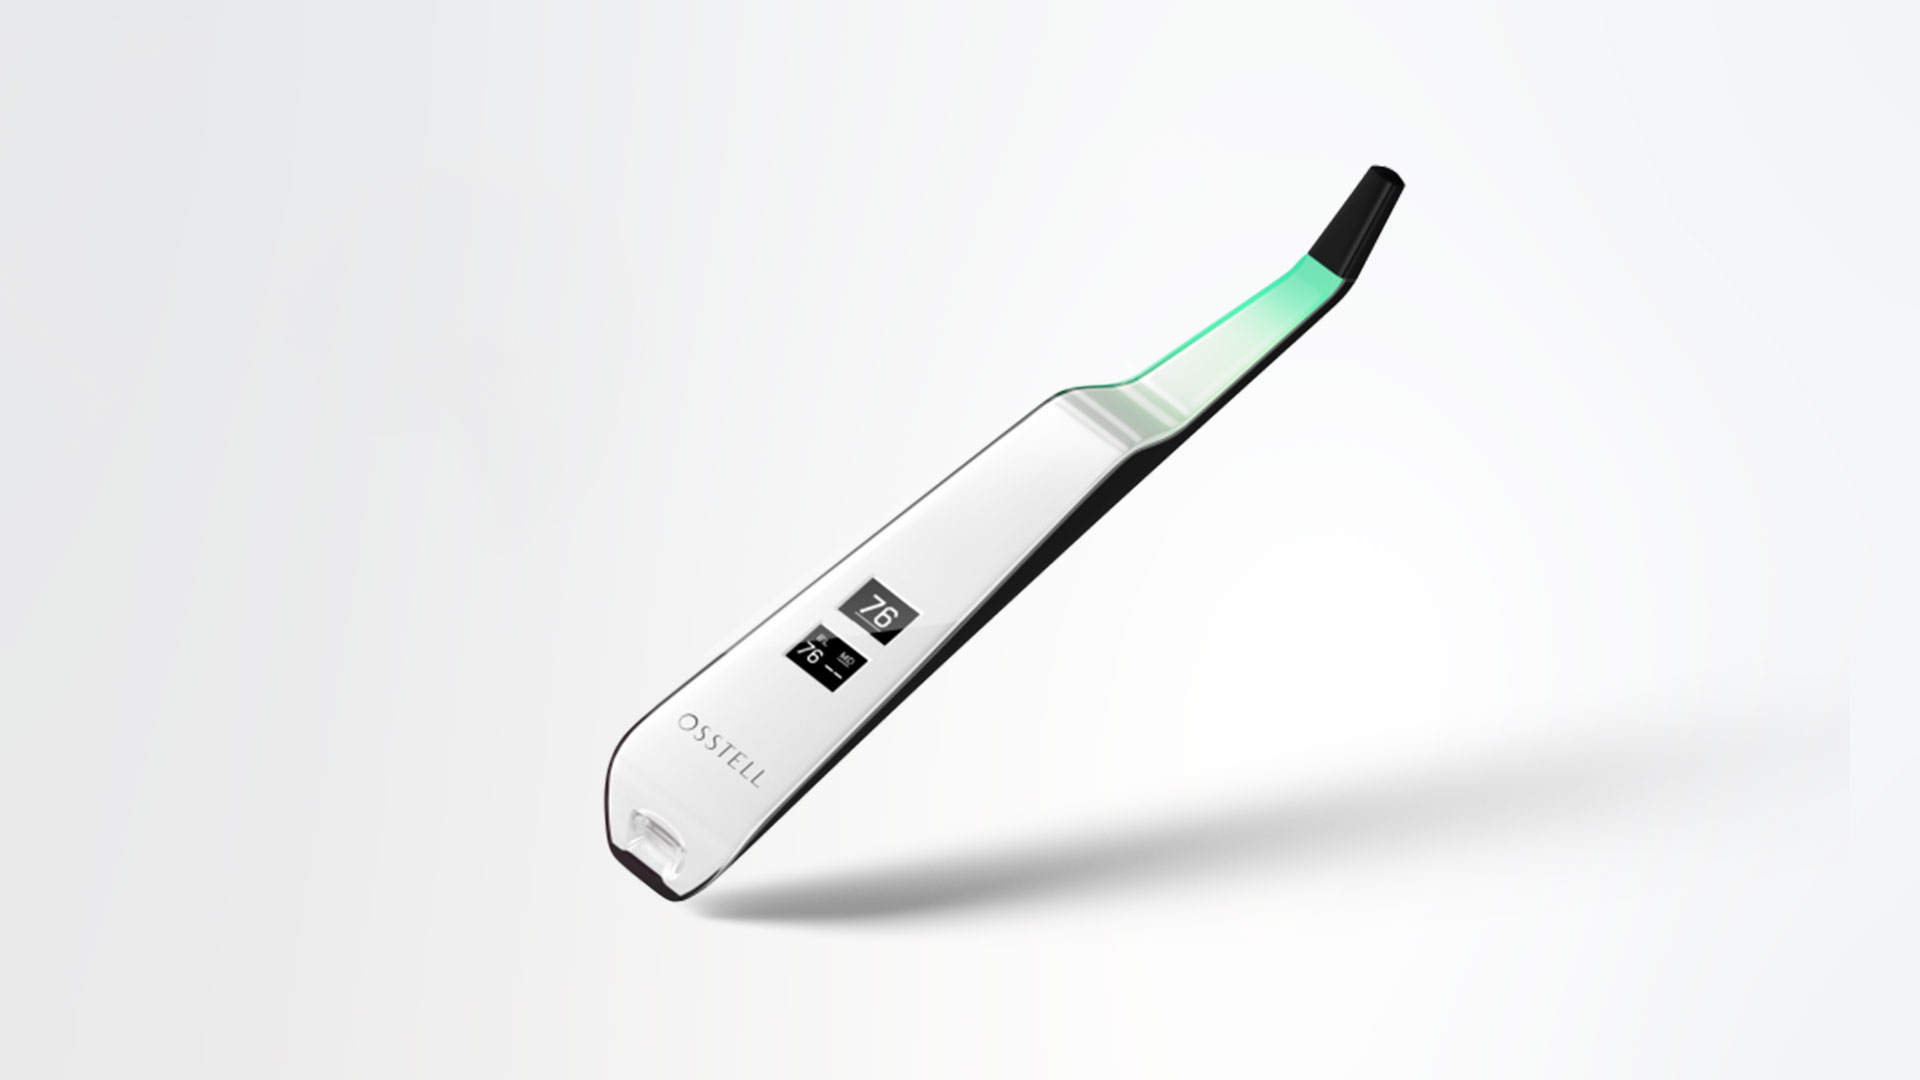
Osstell Beaconは動かすと自動的に起動し、バッテリー残量が表示された後、BL(頬舌側)方向の測定が可能な状態になります。

測定を開始するには、インスツルメントをSmartPegまたはTestPegに近づけて下さい。測定が完了すると信号音が鳴り、ISQ値とともに、安定性の度合いが赤・黄・緑の色で表示されます。

インスツルメントの登録が完了するまでは、起動時にOsstellConnect登録コードが表示されます。インスツルメントは、以下のページで登録できます:OsstellConnectに登録

インスツルメントを60秒間動かさないと、自動的に電源が切れます。

How do I measure with the Osstell Beacon?

Video on how to measure: Measure with Osstell Beacon

1. Activate the Osstell Beacon by picking it up. The instrument will start-up and after showing the battery status, the instrument will be ready for measurement in the BL (Buccal – Lingual) direction, which is prompted in the upper display as well as optimal angle towards the Smartpeg.

2. Place a barrier sleeve over the Osstell beacon instrument.

3. Place the SmartPeg into the SmartPeg Mount. The SmartPeg is magnetic, and the SmartPeg Mount will hold the SmartPeg. See fig 2. Attach the SmartPeg to the implant or abutment by screwing the SmartPeg Mount using finger force of approximately 4-6 Ncm. Do not over-tighten, to avoid damaging the SmartPeg threads.

4. Hold the instrument tip close (2-4mm) to the top of the SmartPeg without touching it. Sometimes, you will need to go as close as 1 mm. An audible sound indicates when measurement has started, and measured data will be shown in the upper display combined with a colored light indication below the tip.

5. Bring the instrument out of the mouth to clearly read the ISQ value and the colored indication. The measured ISQ values will be displayed in the upper display for a couple of seconds and then switch to be ready for measurement in mesial-distal direction.

6. Repeat step 4 and the sequence starts over and the Osstell Beacon is ready for measurement in the BL (Buccal- Lingual) direction again.

7. When all measurements are performed, remove the SmartPeg by using the SmartPeg Mount. The instrument is automatically turned off after 60 seconds of inactivity.

測定時に予期しない値が出たり、測定値が表示されなかったりするのはなぜですか?

考えられる原因を以下に挙げます。


SmartPegが再使用されている: SmartPegは使い捨てであり、1回の治療セッションで1人の患者に対して、1回または複数回の測定にのみ使用して下さい。繰り返し再使用すると、軟らかいアルミニウム製SmartPegのねじ部の摩耗により、誤った測定値が出る可能性があります。

インプラントに対して誤った種類のSmartPegが選択されている: SmartPegの参照リスト(osstell.com/smartpegguide)をご覧下さい。

SmartPegとインプラントの間に骨または軟組織が介在している: SmartPegを装着する前に、必ずインプラントの補綴接続部を清掃して下さい。

電磁干渉: 電磁干渉の原因を取り除いて下さい。

プローブがSmartPegから離れすぎている: プローブをSmartPegから2~4mm離して保持して下さい。

How do I get started?

Although it is possible to use the Osstell Beacon directly, depending on the status of the built-in rechargeable battery, it is recommended to charge the battery for at least 3 hours before using the Osstell Beacon instrument.

The Osstell Beacon is activated by a built-in motion sensor. As soon as the motion sensor detects movement, the Osstell Beacon will start-up and shortly show battery status and then be ready for measurement in the BL (Buccal – Lingual) direction, which is indicated in the upper display.

The Osstell Beacon will start to measure, indicated by an audible sound, when near an Osstell SmartPeg or Test peg due to a built-in magnetic detector that senses the magnet on the top of the Osstell SmartPeg/TestPeg. Measured data will be shown in the upper display combined with a colored light indication below the tip.

The red, yellow and green color indicates if the measured ISQ value corresponds to a low, medium or high implant stability according to the ISQ scale guidance, click here for more information.

After 60 seconds of no motion, the Osstell Beacon will turn off automatically.

How do I measure with the Osstell Beacon?

1. Activate the Osstell Beacon by picking it up. The instrument will start-up and after showing the battery status, the instrument will be ready for measurement in the BL (Buccal – Lingual) direction, which is prompted in the upper display as well as optimal angle towards the Smartpeg.

2. Place a barrier sleeve over the Osstell beacon instrument.

3. Place the SmartPeg into the SmartPeg Mount. The SmartPeg is magnetic, and the SmartPeg Mount will hold the SmartPeg. See fig 2. Attach the SmartPeg to the implant or abutment by screwing the SmartPeg Mount using finger force of approximately 4-6 Ncm. Do not over-tighten, to avoid damaging the SmartPeg threads.

4. Hold the instrument tip close (2-4mm) to the top of the SmartPeg without touching it. Sometimes, you will need to go as close as 1 mm. An audible sound indicates when measurement has started, and measured data will be shown in the upper display combined with a colored light indication below the tip.

5. Bring the instrument out of the mouth to clearly read the ISQ value and the colored indication. The measured ISQ values will be displayed in the upper display for a couple of seconds and then switch to be ready for measurement in mesial-distal direction.

6. Repeat step 4 and the sequence starts over and the Osstell Beacon is ready for measurement in the BL (Buccal- Lingual) direction again.

7. When all measurements are performed, remove the SmartPeg by using the SmartPeg Mount. The instrument is automatically turned off after 60 seconds of inactivity.

Why is it that I get unexpected values or no readings when measuring?

Possible explanations include:

Re-Used SmartPeg: The SmartPegs are disposable and should only be used for one or multiple measurement at one treatment session, for a single patient only. Repeated re-use may result in false readings due to wear and tear of the soft aluminum SmartPeg threads.

Wrong SmartPeg type selected for the implant: See SmartPeg reference list, osstell.com/smartpegguide

Bone or soft tissue in between SmartPeg and Implant: Make sure to clean the Implant prosthetic connection before attaching the SmartPeg.

Electromagnetic interference: Remove the source of electromagnetic interference.

Probe is held too far away from the SmartPeg: Hold the probe 2-4 mm away from the SmartPeg.

Do I need to be connected to WiFi?

You can have your Osstell Beacon online connected to OsstellConnect for data collection, but it is not a requirement. OsstellConnect is an online tool for statistical analysis and valuable insights based on your data. Before you can start using data connection to OsstellConnect you have to register your Osstell Beacon. The serial number can be found on the back of the instrument. For registration assistance and features of data connection to OsstellConnect, please visit osstellconnect.com/beacon

What is the warranty on the Osstell Beacon?

2 years

How do I clean the Osstell Beacon?

Before each use, moisten a gauze or soft cloth with an acceptable (see list below) surface disinfectant and wipe the whole Osstell Beacon instrument. Note! Do not autoclave the Osstell Beacon instrument. Routinely check the surface of the instrument tip and overall surface for possible cracks and resins.

Acceptable Cleaners:
o Isopropyl alcohol
o Ethyl alcohol-based cleaners

Do not use:
o Strong alkali detergent of any type, including hand soaps and dish soaps Bleach based cleaners
o Hydrogen Peroxide based cleaners Abrasive Cleansers
o Acetone or hydrocarbon based cleaners MEK (Methyl Ethyl Ketone)
o Birex Gluteraldehyde
o Quaternary Ammonium Chloride salt-based cleaners

How do I engage / disengage transportation mode?

The Osstell Beacon is delivered from factory in a “transport” mode, where the built-in motion sensor is deactivated. To deactivate the transport mode and start charging, connect the small USB connector of the Osstell USB cable to wide end of the instrument. Connect the large USB connector to a standard USB outlet of a PC, laptop or charger.

Osstell Beaconでの測定方法は?

測定方法の動画はこちら:Osstell Beaconによる測定方法

  1. Osstell Beaconを手に取ると、自動的に起動します。インスツルメントの起動プロセスが完了してバッテリー残量が表示された後、BL(頬舌側)方向の測定が可能な状態になり、上段ディスプレイに、測定方向およびSmartPegに対する最適な角度が表示されます。
  2. Osstell Beaconインスツルメントにバリアスリーブを装着します。
  3. SmartPeg MountにSmartPegを取り付けます。SmartPegは磁気を帯びており、SmartPeg Mountによって保持されます。図2を参照して下さい。約4~6Ncmの力でSmartPeg Mountを指で回し、インプラントまたはアバットメントにSmartPegを装着します。SmartPegのねじ部を損傷しないよう、締めすぎないで下さい。
  4. インスツルメント先端部をSmartPeg上端から約2~4mm離した位置で、接触しないように保持します。場合によっては、約1 mmまで近づける必要があります。測定が開始されると信号音が鳴り、測定データが上段ディスプレイに表示されるとともに、先端下部のカラーインジケーターが点灯します。
  5. インスツルメントを口腔内から取り出して、ISQ値とカラーインジケーターを確認します。測定したISQ値は上段ディスプレイに数秒間表示されます。その後、近遠心(MD)方向の測定待機状態に切り替わります。
  6. 手順4を繰り返します。測定シーケンスが再び開始され、完了後、Osstell BeaconはBL(頬舌側)方向の測定待機状態に戻ります。
  7. すべての測定が終了したら、SmartPeg Mountを使用してSmartPegを取り外します。インスツルメントを60秒間動かさないと、自動的に電源が切れます。
Do I need to be connected to Wi‑Fi?

No, a Wi‑Fi connection is not required to use your Osstell Beacon. You can measure implant stability and document ISQ values manually in your patient journal or in OsstellConnect at a later stage.
If connected, the Osstell Beacon can communicate wirelessly with OsstellConnect, allowing measurements to be transferred and recorded automatically.
OsstellConnect is an online tool used for data collection, statistical analysis and clinical insights based on your measurements.
To use the data connection, your Osstell Beacon must first be registered. The serial number can be found on the back of the instrument. For registration guidance and more information, please visit https://osstellconnect.com/register

How do I switch the Osstell Beacon from transport mode to use mode?

The Osstell Beacon is delivered in transportation mode with the motion sensor deactivated. To switch modes, briefly connect the USB cable to the instrument and a USB port on a computer for a few seconds, then disconnect.

What should I do if the Osstell Beacon doesn’t start or when the display is showing a wrench and a manual?

Charge the Beacon for at least 30 min in room temperature, then try again. If the error remains, try resetting the device by:

1. Identify the Beacon reset pin on the picture below.

2. With a paper clip, do a gentle press for 1 second on the reset button (Note! You may have to tilt the pin a little downwards).
If you see a “PadLock” symbol in the upper display, press one more time on the reset button.


If the Beacon still doesn’t start or the display is showing a wrench and a manual, then please contact your local sales representative or distributor or support@osstell.com.

Why do I need to take two measurements at the same occasion?

ISQ should always be measured in two directions, because implant stability can vary depending on the amount of surrounding bone in different directions. Measuring from two angles ensures that both the most and the least stable directions are captured.
To do this, take one measurement in the buccal-lingual direction and one in the mesial-distal direction. These two ISQ values represent the different stability directions. Sometimes the values are identical; sometimes they differ.
If the two measurements differ, always rely on the lowest ISQ value, as it reflects the weakest direction and therefore provides the most clinically relevant information about implant stability.

Osstellの測定法を裏付ける研究はありますか?

現在、Osstell機器を用いた研究が数千件あり、科学論文として発表されています。これらの論文の要旨は、「リソース / 科学的データベース」にある検索可能なデータベースでご覧いただけます。

OsstellのISQスケールは、Osstellインスツルメントとアルミニウム製SmartPegを用いて実施されたこれらの研究成果に基づいています。


科学データベース – ISQ インプラント安定性のエビデンス – Osstell®

How does the Osstell technology work?

Osstell measures implant stability using Resonance Frequency Analysis (RFA). The small SmartPeg that you attach to the implant has a tiny magnet on top. When the probe sends magnetic pulses, the SmartPeg starts to vibrate – similar to a very small tuning fork.
How it works:

  1. The instrument tip sends magnetic pulses
    These pulses make the SmartPeg vibrate without touching it.
  2. The vibration changes depending on how stable the implant is
    – A stable implant (good bone support) makes the SmartPeg vibrate faster.
    – A less stable implant makes it vibrate slower.
  3. The device converts this vibration into an ISQ value
    – Higher stability → higher frequency → higher ISQ
    – Lower stability → lower frequency → lower ISQ

It takes less than a second, and the ISQ value is shown immediately.

ISQ値が表示されない場合はどうすればよいですか?

ISQ値が表示されない場合、多くは、インスツルメントがSmartPegの振動を正しく検出できていません。その原因はいくつか考えられますが、ほとんどは簡単に対処できます。

  1. インスツルメントがSmartPegから離れすぎている
    インスツルメントは通常、SmartPeg上部の磁石から2~4 mmの位置に保持する必要があります。磁石には接触しないようにして下さい。ISQ値が表示されない場合は、信号が検出されるまでインスツルメントを少しずつ近づけて下さい。
  2. インスツルメントの角度を調整する必要がある
    磁場には方向性があるため、インスツルメントの向きが測定に影響します。SmartPegの上部に対して約45°の角度で測定して下さい。
  3. 使用しているSmartPegのタイプがインプラントに適合していることを確認する
    以下のリンクを使用して、適切なSmartPegのタイプを確認して下さい:適切なSmartPegを選択
  4. 軟組織による振動の減衰
    周囲の軟組織によって、SmartPegの振動が想定以上に減衰することがあります。この状態は通常、インスツルメントを少し近づけることで改善します。
  5. インプラントプラットフォームが清潔ではない
    SmartPegが正しく装着され、振動が適切に伝達されるよう、インプラントプラットフォームが清潔で、異物がないことを確認して下さい。
  6. SmartPegが摩耗または損傷している
    • 再使用可能SmartPegをご使用の場合は、使用前に点検を行い、前処理サイクルが20回以内であることを確認して下さい。再使用可能SmartPegが摩耗、変形している場合、またはそのねじ部が損傷している場合は正常に振動せず、インスツルメントがISQ値を測定できないことがあります。
    • 単回使用SmartPegは、1回の治療でのみ使用して下さい。
    • SmartPegがインプラントに正しく装着され、周囲の軟組織に接触していないことを確認して下さい。軟組織に接触していると、信号を正しく検出できず、ISQ値が表示されない、または正確な値が得られないことがあります。
  7. 電磁干渉
    近くに強い電磁ノイズ源があると、測定に影響を及ぼすことがあります。(詳しくは「電磁ノイズ」のFAQをご覧下さい。)
Osstellインスツルメントを使用した場合、インプラントに影響はありますか?

いいえ。Osstellによる測定がインプラントに影響を与えることはありません。インスツルメントはSmartPegを振動させるだけです。SmartPegの磁石は、インスツルメントが発生させる微弱な磁気パルスによって作動します。この測定方法は客観的で、インプラントへの負荷が少なく、再現性に優れています。

患者がペースメーカーを装着していても、ISQを測定できますか?

はい。患者がペースメーカーを装着していても、ISQ測定を行うことができます。
ただし、測定中はインスツルメントから磁気パルスが発生するため、念のために、プローブはペースメーカーが埋め込まれている胸部付近に近づけないで下さい。
ペースメーカーと磁場との関係については、公表されている文献もありますので、必要に応じてご参照下さい。

インプラントの安定性はいつ測定すればよいですか?

インプラントの安定性は、治療のさまざまな段階で測定できます。
通常は、ベースラインを取得するためにインプラント埋入時に測定し、その後は治癒期間中に安定性やオッセオインテグレーションの変化をモニタリングするために測定します。また、一般的には、荷重開始前に最後の測定を行い、荷重開始の判断に活用します。
経時的に繰り返し測定することで、ISQ値の推移を把握でき、臨床判断に役立つ有用な情報が得られます。

Osstell Classic

Osstell Classicに関する質問

Osstellインスツルメントの保証期間はどのくらいですか?

Osstell Beacon – 2年間
W&H Osstell Classic – 1年間

Osstell Classicでの測定方法は?

患者に使用する前に、インスツルメントにバリアスリーブを取り付けて下さい。バリアスリーブは、交差汚染の防止に役立つほか、歯科用コンポジット材料が機器の先端や本体表面に付着したり、洗浄液による変色や劣化が起きたりするのを防ぐ効果があります。

注意

  • バリアスリーブは1人の患者専用の使い切りです。
  • 使用済みのバリアスリーブは、患者ごとに標準廃棄物として処分して下さい。
  • バリアスリーブを機器に長時間装着したままにしないで下さい。
  • 推奨されるバリアスリーブについては下記を参照して下さい。
    • TIDIShield、品番:20808、品番:20987。 tidiproducts.com
    • PremiumPlus:183-2 X線センサースリーブ、サイズ2
  • 本インスツルメントは、患者ごとに適切な薬剤で洗浄する必要があります。
  • 治癒過程を通じた今後の測定の基準値を得るために、インプラント埋入時に最初の測定を行って下さい。最終補綴の前に再度測定を行うことで、インプラント安定性の推移を確認することができます。
  • 最も低い安定性を確認するために、頬舌方向と近遠心方向の両方向で測定することが推奨されます。そのため、本機器はこれら両方向での測定をユーザーに促します。
  • こちらをクリックして、測定方法の動画をご覧下さい。
インスツルメントのお手入れ方法を教えて下さい。

使用前に毎回、推奨される表面洗浄剤(下記リスト参照)を含ませたガーゼまたは柔らかい布で、機器全体を拭いて下さい。

使用可能な洗浄剤

  • イソプロピルアルコール(70%)
  • 低発泡性で、pHが中性の酵素系洗浄剤。例:
    • BePro Disinfectant Wipes、REF 19500102、www.wh.com(W&H Sterilizationから注文可能)
    • Medizime LF
    • Enzol

以下は使用しないで下さい。

  • 酸性またはフェノール系の洗浄剤/消毒剤
  • 手洗い用石けんや食器用洗剤を含む、あらゆる種類の強アルカリ性洗剤
  • 塩素系洗浄剤
  • 過酸化水素系洗浄剤
  • 研磨剤入り洗浄剤
  • アセトン系または炭化水素系洗浄剤
  • MEK(メチルエチルケトン)
  • Birex
  • グルタルアルデヒド
  • 第四級アンモニウム塩系洗浄剤

本機器は定期的なメンテナンスを必要としません。本機器に不具合が生じた場合は、最寄りの販売代理店または販売業者にご連絡の上、対応方法について指示を受けて下さい。

How do I measure and record ISQ on an abutment?

You can record ISQ at abutment level in OsstellConnect, but it is important to follow the correct clinical measurement procedure to obtain accurate values.

How to measure ISQ at abutment level

  1. Perform an implant level measurement first, before placing the abutment.
  2. Measure again at abutment level during the same session, using a SmartPeg made for abutment level measuring.
  3. Determine the offset by noting the difference between implant level and abutment level ISQ. This offset remains stable throughout healing and should be used when interpreting follow-up measurements.
  4. For all subsequent visits, measure on the abutment and apply the same offset to understand the true implant ISQ.

How to record the measurement in OsstellConnect:

  1. Go to the patient’s register, select the patient and the implant in the tooth chart. Click ‘Add abutment’, choose the abutment, and save.
  2. Select ‘Measure stability’ and choose ‘Abutment’ under Measurement level. Measure on the abutment as you would at implant level and save.
  3. To review the stability trend, open the Stability tab and toggle ‘Show abutment’. You can also enable ‘Show details’ to view buccal–lingual and mesial–distal ISQ values.

For a more detailed explanation and clinical guidance, see our blog post here.

How can I find the serial number (SN)?

You can find the serial number on the back of your instrument.

測定時に予期しない値が出たり、測定値が表示されなかったりするのはなぜですか?

考えられる原因を以下に挙げます。


SmartPegが再使用されている: SmartPegは使い捨てであり、1回の治療セッションで1人の患者に対して、1回または複数回の測定にのみ使用して下さい。繰り返し再使用すると、軟らかいアルミニウム製SmartPegのねじ部の摩耗により、誤った測定値が出る可能性があります。

インプラントに対して誤った種類のSmartPegが選択されている: SmartPegの参照リスト(osstell.com/smartpegguide)をご覧下さい。

SmartPegとインプラントの間に骨または軟組織が介在している: SmartPegを装着する前に、必ずインプラントの補綴接続部を清掃して下さい。

電磁干渉: 電磁干渉の原因を取り除いて下さい。

プローブがSmartPegから離れすぎている: プローブをSmartPegから2~4mm離して保持して下さい。

Why do I need to take two measurements at the same occasion?

ISQ should always be measured in two directions, because implant stability can vary depending on the amount of surrounding bone in different directions. Measuring from two angles ensures that both the most and the least stable directions are captured.
To do this, take one measurement in the buccal-lingual direction and one in the mesial-distal direction. These two ISQ values represent the different stability directions. Sometimes the values are identical; sometimes they differ.
If the two measurements differ, always rely on the lowest ISQ value, as it reflects the weakest direction and therefore provides the most clinically relevant information about implant stability.

Osstellの測定法を裏付ける研究はありますか?

現在、Osstell機器を用いた研究が数千件あり、科学論文として発表されています。これらの論文の要旨は、「リソース / 科学的データベース」にある検索可能なデータベースでご覧いただけます。

OsstellのISQスケールは、Osstellインスツルメントとアルミニウム製SmartPegを用いて実施されたこれらの研究成果に基づいています。


科学データベース – ISQ インプラント安定性のエビデンス – Osstell®

How does the Osstell technology work?

Osstell measures implant stability using Resonance Frequency Analysis (RFA). The small SmartPeg that you attach to the implant has a tiny magnet on top. When the probe sends magnetic pulses, the SmartPeg starts to vibrate – similar to a very small tuning fork.
How it works:

  1. The instrument tip sends magnetic pulses
    These pulses make the SmartPeg vibrate without touching it.
  2. The vibration changes depending on how stable the implant is
    – A stable implant (good bone support) makes the SmartPeg vibrate faster.
    – A less stable implant makes it vibrate slower.
  3. The device converts this vibration into an ISQ value
    – Higher stability → higher frequency → higher ISQ
    – Lower stability → lower frequency → lower ISQ

It takes less than a second, and the ISQ value is shown immediately.

ISQ値が表示されない場合はどうすればよいですか?

ISQ値が表示されない場合、多くは、インスツルメントがSmartPegの振動を正しく検出できていません。その原因はいくつか考えられますが、ほとんどは簡単に対処できます。

  1. インスツルメントがSmartPegから離れすぎている
    インスツルメントは通常、SmartPeg上部の磁石から2~4 mmの位置に保持する必要があります。磁石には接触しないようにして下さい。ISQ値が表示されない場合は、信号が検出されるまでインスツルメントを少しずつ近づけて下さい。
  2. インスツルメントの角度を調整する必要がある
    磁場には方向性があるため、インスツルメントの向きが測定に影響します。SmartPegの上部に対して約45°の角度で測定して下さい。
  3. 使用しているSmartPegのタイプがインプラントに適合していることを確認する
    以下のリンクを使用して、適切なSmartPegのタイプを確認して下さい:適切なSmartPegを選択
  4. 軟組織による振動の減衰
    周囲の軟組織によって、SmartPegの振動が想定以上に減衰することがあります。この状態は通常、インスツルメントを少し近づけることで改善します。
  5. インプラントプラットフォームが清潔ではない
    SmartPegが正しく装着され、振動が適切に伝達されるよう、インプラントプラットフォームが清潔で、異物がないことを確認して下さい。
  6. SmartPegが摩耗または損傷している
    • 再使用可能SmartPegをご使用の場合は、使用前に点検を行い、前処理サイクルが20回以内であることを確認して下さい。再使用可能SmartPegが摩耗、変形している場合、またはそのねじ部が損傷している場合は正常に振動せず、インスツルメントがISQ値を測定できないことがあります。
    • 単回使用SmartPegは、1回の治療でのみ使用して下さい。
    • SmartPegがインプラントに正しく装着され、周囲の軟組織に接触していないことを確認して下さい。軟組織に接触していると、信号を正しく検出できず、ISQ値が表示されない、または正確な値が得られないことがあります。
  7. 電磁干渉
    近くに強い電磁ノイズ源があると、測定に影響を及ぼすことがあります。(詳しくは「電磁ノイズ」のFAQをご覧下さい。)

Osstellインスツルメントを使用した場合、インプラントに影響はありますか?

いいえ。Osstellによる測定がインプラントに影響を与えることはありません。インスツルメントはSmartPegを振動させるだけです。SmartPegの磁石は、インスツルメントが発生させる微弱な磁気パルスによって作動します。この測定方法は客観的で、インプラントへの負荷が少なく、再現性に優れています。

患者がペースメーカーを装着していても、ISQを測定できますか?

はい。患者がペースメーカーを装着していても、ISQ測定を行うことができます。
ただし、測定中はインスツルメントから磁気パルスが発生するため、念のために、プローブはペースメーカーが埋め込まれている胸部付近に近づけないで下さい。
ペースメーカーと磁場との関係については、公表されている文献もありますので、必要に応じてご参照下さい。

インプラントの安定性はいつ測定すればよいですか?

インプラントの安定性は、治療のさまざまな段階で測定できます。
通常は、ベースラインを取得するためにインプラント埋入時に測定し、その後は治癒期間中に安定性やオッセオインテグレーションの変化をモニタリングするために測定します。また、一般的には、荷重開始前に最後の測定を行い、荷重開始の判断に活用します。
経時的に繰り返し測定することで、ISQ値の推移を把握でき、臨床判断に役立つ有用な情報が得られます。

歯科におけるオッセオインテグレーションの理解

歯科におけるオッセオインテグレーションの理解

骨結合インプラントとは何ですか?

骨結合インプラントとは、周囲の骨と結合しており、時間が経っても安定した土台を義歯に提供するインプラントのことを指します。1 2

歯科におけるオッセオインテグレーションはどのように起こるのですか?

オッセオインテグレーションの過程では、骨細胞がインプラントの表面を取り囲んで結合し、時間の経過とともに機械的安定性から生物学的安定性へと移行していきます。 1 3

歯科インプラントにおけるオッセオインテグレーションの定義とは何ですか?

オッセオインテグレーション(骨結合)とは、生きている骨とインプラントの表面との直接的かつ機能的な結合のことです。これは、歯科インプラントの安定性と成功を確保するための重要な要素です。1 2

インプラントの安定性はいつ測定すればよいですか?

インプラントの安定性は、治療のさまざまな段階で測定できます。
通常は、ベースラインを取得するためにインプラント埋入時に測定し、その後は治癒期間中に安定性やオッセオインテグレーションの変化をモニタリングするために測定します。また、一般的には、荷重開始前に最後の測定を行い、荷重開始の判断に活用します。
経時的に繰り返し測定することで、ISQ値の推移を把握でき、臨床判断に役立つ有用な情報が得られます。

Questions about the Osstell IDx

Questions about the Osstell IDx

How do I measure and record ISQ on an abutment?

You can record ISQ at abutment level in OsstellConnect, but it is important to follow the correct clinical measurement procedure to obtain accurate values.

How to measure ISQ at abutment level

  1. Perform an implant level measurement first, before placing the abutment.
  2. Measure again at abutment level during the same session, using a SmartPeg made for abutment level measuring.
  3. Determine the offset by noting the difference between implant level and abutment level ISQ. This offset remains stable throughout healing and should be used when interpreting follow-up measurements.
  4. For all subsequent visits, measure on the abutment and apply the same offset to understand the true implant ISQ.

How to record the measurement in OsstellConnect:

  1. Go to the patient’s register, select the patient and the implant in the tooth chart. Click ‘Add abutment’, choose the abutment, and save.
  2. Select ‘Measure stability’ and choose ‘Abutment’ under Measurement level. Measure on the abutment as you would at implant level and save.
  3. To review the stability trend, open the Stability tab and toggle ‘Show abutment’. You can also enable ‘Show details’ to view buccal–lingual and mesial–distal ISQ values.

For a more detailed explanation and clinical guidance, see our blog post here.

How can I update the software of my Osstell IDx?

Navigate to your clinic in your account. Select the instrument tab. Click on Download firmware.
Download instructions:

• Wait for the download to complete (could take a while depending on your connection)

• Copy the .m2f binary file to a USB memory stick

• Insert the memory stick in your IDx while it is running

• Follow instructions on the IDx display

Note: you cannot open or view the .m2f file
You can also check this guide

How can I find my registration code?

Osstell Beacon
• To find your registration code, please make sure that you have already installed the Beacon Gateway. If you have not installed it yet, please navigate to your clinic in your account, click the instruments tab and download the gateway. Install it.
• Take your instrument in hand. It is now connecting to OsstellConnect and you should see a symbol animating. Please note that it can take a few seconds.
• When connected, the symbol stops animating.
• The registration code is now displayed on the lower screen of your instrument.

Osstell IDx
• When turning on your Osstell IDx for the first time, you will be prompted to select language, time zone, date and time.
• After that, you will need to set up a 4-digit pin code and a backup password. The backup password is needed when restoring to a backup, so please note it down and save it in a safe place.
• Your registration code is now displayed on your Osstell IDx.

What is the warranty on IDx?

Two years.

Why do I need to set the date and time again?

The IDx continues to consume a small amount of power even when switched off. If the battery becomes fully depleted (0%), the stored date and time settings will be lost.
When this happens, you will be prompted to set the date and time again at start-up.

If your IDx is connected to the internet, the date and time will be set automatically.

Why do I sometimes get an electromagnetic noise warning when I approach the SmartPeg with the probe?

An electromagnetic noise warning indicates the presence of an external or internal magnetic disturbance that may affect the measurement.
This can occur due to nearby electronic equipment, or if the probe is held very close to the instrument itself.

Why do I need to take two measurements at the same occasion?

ISQ should always be measured in two directions, because implant stability can vary depending on the amount of surrounding bone in different directions. Measuring from two angles ensures that both the most and the least stable directions are captured.
To do this, take one measurement in the buccal-lingual direction and one in the mesial-distal direction. These two ISQ values represent the different stability directions. Sometimes the values are identical; sometimes they differ.
If the two measurements differ, always rely on the lowest ISQ value, as it reflects the weakest direction and therefore provides the most clinically relevant information about implant stability.

How do I get started?

Register your IDx by following the instructions in the device or by following this link.

How does the Osstell technology work?

Osstell measures implant stability using Resonance Frequency Analysis (RFA). The small SmartPeg that you attach to the implant has a tiny magnet on top. When the probe sends magnetic pulses, the SmartPeg starts to vibrate – similar to a very small tuning fork.
How it works:

  1. The instrument tip sends magnetic pulses
    These pulses make the SmartPeg vibrate without touching it.
  2. The vibration changes depending on how stable the implant is
    – A stable implant (good bone support) makes the SmartPeg vibrate faster.
    – A less stable implant makes it vibrate slower.
  3. The device converts this vibration into an ISQ value
    – Higher stability → higher frequency → higher ISQ
    – Lower stability → lower frequency → lower ISQ

It takes less than a second, and the ISQ value is shown immediately.

How long is the battery life of the Osstell IDx?

For normal use, the batteries last for at least one day but in most cases longer. It takes about 2 hours to charge the IDx from a fully discharged state.

How do I perform a measurement?

Choose a tooth position on the touch screen and start measuring.

How do I add patient information?

Perform measurements, press End patient, and then save as Add new patient.

How do I edit patient information?

Simply select the pen symbol in the patient list to edit.

How can I save patient data?

The patient data can be saved either in the instrument or in OsstellConnect.

How can I delete ISQ values (e.g. in case I have accidentally measured twice from the same direction)?

Values can only be removed before saving clicking on the trash bin symbol. After saving the data cannot be modified.

Is the IDx Portal both Windows and Mac compatible?

Yes, OsstellConnect is accessible via iPhone, iPad, Mac or PC.

Why is the instrument locked?

Have you registered your device? You can only use the Osstell IDx for a limited time without registration.

Which Osstell products can be autoclaved?

The following products may be autoclaved (over-pressurized steam up to 135 deg Celsius):

  • SmartPeg Mount
  • Reusable SmartPeg
  • Probe (IDx)

Please note that single-use SmartPegs are disposable and cannot be autoclaved!

Why do I need a backup code?

To enable automatic backup of your Osstell IDx, you will be asked to create a backup code made up of 8 characters. The purpose of the backup is to reset the unit if you for some reason remove patients by mistake or lose your instrument. The code is created during the registration process and you only have to enter it once. To make sure you can access your backup at a later date, it is VERY important that you write this code down and keep it in a safe place.

Backup can also be done via USB without a code.

Questions about Osstell and the ISQ scale

Questions about Osstell and the ISQ scale

What is an ISQ value?

ISQ (Implant Stability Quotient) is a numerical value from 1 to 99 that describes implant stability. It is calculated from the resonance frequency measured when the Osstell instrument sends a magnetic pulse to a SmartPeg attached to the implant, translating this into a clinically intuitive value.


What ISQ value should I have before loading?

There is no single ISQ value that determines when an implant can be loaded. The decision depends on the stability over time (the ISQ trend), as well as clinical judgement and patient-specific risk factors.
As a general guideline, higher ISQ values provide greater confidence, and values around 70 or above are often considered suitable for loading non-splinted implants. For splinted restorations, lower values may be acceptable.
For guidance on how to interpret ISQ values, see the Osstell ISQ Scale.

Why do I need to take two measurements at the same occasion?

ISQ should always be measured in two directions, because implant stability can vary depending on the amount of surrounding bone in different directions. Measuring from two angles ensures that both the most and the least stable directions are captured.
To do this, take one measurement in the buccal-lingual direction and one in the mesial-distal direction. These two ISQ values represent the different stability directions. Sometimes the values are identical; sometimes they differ.
If the two measurements differ, always rely on the lowest ISQ value, as it reflects the weakest direction and therefore provides the most clinically relevant information about implant stability.

There is no single ISQ value that determines suitability for immediate loading. In addition to the ISQ value, the decision depends on primary stability, clinical judgement, and patient-specific risk factors.
As a general guide, higher ISQ values indicate greater stability, and values around 70 or above may support immediate loading in appropriate cases.
For guidance on interpreting ISQ values, see the Osstell ISQ Scale.

What does Osstell measure?

Osstell measures the lateral stability of the implant and thereby indirectly the degree of osseointegration. The results are presented as an ISQ, ranging from 1-99 ISQ, which correlates to micro mobility.

How does the Osstell technology work?

Osstell measures implant stability using Resonance Frequency Analysis (RFA). The small SmartPeg that you attach to the implant has a tiny magnet on top. When the probe sends magnetic pulses, the SmartPeg starts to vibrate – similar to a very small tuning fork.
How it works:

  1. The instrument tip sends magnetic pulses
    These pulses make the SmartPeg vibrate without touching it.
  2. The vibration changes depending on how stable the implant is
    – A stable implant (good bone support) makes the SmartPeg vibrate faster.
    – A less stable implant makes it vibrate slower.
  3. The device converts this vibration into an ISQ value
    – Higher stability → higher frequency → higher ISQ
    – Lower stability → lower frequency → lower ISQ

It takes less than a second, and the ISQ value is shown immediately.

What is the difference between RFA and DCA (Periotest) measurements?

Periotest (DCA) measurements are designed for natural teeth, which are connected to the bone via the periodontal ligament. In contrast, dental implants are anchored directly to the bone without a periodontal ligament.
RFA measurements using Osstell instruments assess implant stability by measuring the stiffness of the bone–implant interface. They provide an objective and repeatable value on a more sensitive scale, supporting reliable assessment over time.

What is the difference between ISQ and BIC?

ISQ and BIC measure different aspects of implant integration.
BIC (bone-to-implant contact) describes the percentage of the implant surface in contact with bone at a microscopic level, while ISQ reflects implant stability by measuring the stiffness of the bone–implant interface.

As a result, high BIC does not always mean high stability, as bone quality and stiffness also play a key role.

For a more detailed explanation, see: How ISQ correlates to torque

Does the way the SmartPeg is tightened affect the ISQ value?

Yes. The ISQ value can be affected if the SmartPeg is not mounted correctly.

For accurate measurements, the SmartPeg should be attached finger tight using the SmartPeg Mount, which corresponds to about 4–6 Ncm.

At this level, the SmartPeg has firm, stable contact with the implant, and the resulting ISQ value is consistent – typically within ±2 ISQ units.

  • If the SmartPeg is not fully seated:
    The contact becomes unstable, and the ISQ value can appear artificially low, or you don’t receive any value.
  • If too much force is applied:
    Overtightening does not improve accuracy. It may damage the SmartPeg threads.
    – A reusable SmartPeg may be damaged so it cannot be used again.
    – A single use or reusable SmartPeg may have its threads deformed, which can lead to inaccurate measurements during that session or, in worst case a broken SmartPeg.

In short: finger tight (4–5 Ncm) is enough to ensure stable contact and reliable ISQ readings.

What is the lowest ISQ value typically observed?

Clinically, the lowest ISQ values typically seen are around 40.

If the stability is below 30, the implant is generally considered to have very low stability or to be loose. It may also indicate that the SmartPeg is not correctly mounted on the implant.

Very low values (below 20) are rarely seen in clinical situations and are more commonly observed in laboratory models with artificially low stability.